background image

Chapter 2

7

Z97M-PK USER MANUAL

Chapter 2

Installing the Motherboard

2-1. Safety Precautions

2-2. Installing the motherboard in a Chassis

This motherboard carries a Micro ATX form factor of 244 x 220 mm. Choose a chassis
that accommodates this from factor. Make sure that the I/O template in the chassis
matches the I/O ports installed on the rear edge of the motherboard. Most system
chassis have mounting brackets installed in the chassis, which corresponds to the
holes in the motherboard. Place the motherboard over the mounting brackets and
secure the motherboard onto the mounting brackets with screws.

Follow these safety precautions when installing the motherboard:

Wear a grounding strap attached to a grounded device to avoid damage

from static electricity.

Discharge static electricity by touching the metal case of a safely grounded

object before working on the motherboard.

Leave components in the static-proof bags.

Always remove the AC power by unplugging the power cord from the power

outlet before installing or removing the motherboard or other hardware
components.

Do not over-tighten the screws as this can stress the motherboard.

Содержание Z97M-PK

Страница 1: ...Z97M PK USER GUIDE Version 1 0 40 012 EU4105 ...

Страница 2: ...s been tested and found to comply with the limits for a Class B digital device pursuant to Part 15 of the FCC Rules These limits are designed to provide reasonable protection against harmful interference in a residential instal lation This equipment generates uses and can radiate radio frequency energy and if not installed and used in accordance with the instructions may cause harmful interference...

Страница 3: ...the BIOS Setup Utility Chapter 5 Describes the motherboard software page 69 Limits and methods of mesurement of radio disturbance char acteristics of information technology equipment EN 55022 EN 61000 3 2 Disturbances in supply systems caused EN 61000 3 3 Disturbances in supply systems caused by household appli ances and similar electrical equipment Voltage fluctuations EN 55024 Information techno...

Страница 4: ...ng a SATA Hard Drive 24 ConnectingCaseComponents 25 Front Panel Header 27 TABLE OF CONTENTS Preface i Chapter 1 1 Introducing the Motherboard 1 Introduction 1 PackageContents 1 Specifications 2 MotherboardComponents 4 I OPorts 6 Chapter 3 29 UsingBIOS 29 AbouttheSetupUtility 29 TheStandardConfiguration 29 EnteringtheSetupUtility 29 Resetting the Default CMOS Values 30 UsingBIOS 30 BIOSNavigationKe...

Страница 5: ...lingCrossFireXTM graphicscards 75 TheCatalystTM ControlCenterDialogBox 76 Chapter 5 69 Intel Rapid Storage Technology RAID Configuration 69 BeforecreatingaRAIDset 69 Entering Intel Rapid Storage Technology RAID BIOS utility 70 CreatingaRAIDset 71 DeletingaRAIDset 73 ResettingdiskstoNon RAID 74 ExitingSetup 74 Chapter 4 65 Using the Motherboard Software 65 Auto installingunderWindows7 8 8 1 65 Runn...

Страница 6: ...en USB 2 0 ports four USB 2 0 ports at rear panel and three USB 2 0 headers support additional six USB 2 0 ports and four USB 3 0 ports two USB 3 0 ports at the rear panel and one USB 3 0 header supports additional two USB 3 0 ports The gray USB 2 0 header provides EZ charger technology please refer to Front Panel USB 2 0 headers of chapter 2 for more details The motherboard is equipped with advan...

Страница 7: ... Express x16 slots one PCI Express Gen3 x16 slot one PCI Express Gen2 x4 mode slot 1 x PCI Express x1 Gen2 slot 1 x PCI slot IC ITE IT8893E SSDS multiple HDDs required Supported by Intel Z97 Express Chipset 6 x Serial ATA 6Gb s devices RAID 0 RAID 1 RAID 5 RAID 10 configuration Storage 1 x PS 2 mouse keyboard Combo connector 1 x D sub VGA port 1 x DVI port 1 x HDMI port 4 x USB 2 0 ports 1 x RJ45 ...

Страница 8: ...uto detect default System BIOS Micro ATX Size 244mm x 220mm Form Factor Supports eBLU 1 eDLU eSF 1 Cyberlink AP Support Note 1 Microsoft NET Framework 3 5 is required 3 x USB 2 0 headers support additional six USB 2 0 ports Gray header supports EZ charger 6 x SATA 6Gb s connectors 1 x SPDIF out header 1 x Front Panel audio header 1 x Front Panel switch LED header 1 x CIR header 1 x COM header 1 x ...

Страница 9: ...Chapter 1 4 Z97M PK USER MANUAL Motherboard Components ...

Страница 10: ...use only 9 SATA1 6 Serial ATA 6Gb s connectors 10 F_PANEL Front panel switch LED header 11 F_USB1 Front panel USB 2 0 header Gray header supports EZ Charger 12 F_USB2 3 Front panel USB 2 0 headers 13 TPM Trusted platform module header 14 LPT Parallel port header 15 SPDIFO1 SPDIF out header 16 SPK Speaker header 17 CIR1 Consumer Infrared 18 COM Onboard serial port header 19 CLR_CMOS Clear CMOS jump...

Страница 11: ... the audio jacks to connect audio devices The D port is for stereo line in signal while the F port is for microphone in signal This motherboard supports 8 channel audio devices that correspond to the A B C and E port respectively In addition all of the 3 ports B C and E provide users with both right left channels individually Users please refer to the following note for specific port function defi...

Страница 12: ...in the motherboard Place the motherboard over the mounting brackets and secure the motherboard onto the mounting brackets with screws Follow these safety precautions when installing the motherboard Wear a grounding strap attached to a grounded device to avoid damage from static electricity Discharge static electricity by touching the metal case of a safely grounded object before working on the mot...

Страница 13: ...ion shows the location of the motherboard jumpers Pin 1 is labeled To avoid the system instability after clearing CMOS we recommend users to enter the main BIOS setting page to Load Default Settings and then Save and Exit Setup 2 3 Checking Jumper Settings ...

Страница 14: ...nge the settings in the system Setup Utility We strongly recommend you do not over clock processor or other compo nents to run faster than their rated speed The following illustration shows CPU installation components A Press the hook of lever down with your thumb and pull it to the right side to release it from retention tab B Lift the tail of the load lever and rotate the load plate to fully ope...

Страница 15: ... IHS Intergraded Heat Spreader Engage the load lever while pressing down lightly onto the load plate Secure the load lever with the hook under retention tab Then the cover will flick automatically Please save and replace the cover onto the CPU socket if processor is removed ...

Страница 16: ...board and processor socket Avoid using cooling fans with sharp edges in case the fan casing and the clips cause serious damage to the motherboard or its components To achieve better airflow rates and heat dissipation we suggest that you use a high quality fan with 3800 rpm at least CPU fan and heat sink instal lation procedures may vary with the type of CPU fan heatsink supplied The form and size ...

Страница 17: ... at least one module in any of the four slots Total memory capacity is 32 GB Refer to the following to install the memory modules C The slot latches are levered upwards and latch on to the edges of the DIMM A Push the latches on each side of the DIMM slot down B Install the DIMM module into the slot and press it firmly down until it seats correctly Check that the cutouts on the DIMM module edge co...

Страница 18: ...ed Populated Populated 4 DIMMs Populated Populated Populated Populated Due to Intel CPU spec definition please follow the table above for recommended memory configuration 1 For best performance and compatibility we recommend that users give priority to the white DIMMs DDR3_2 DDR3_4 when installing DIMMs 2 We suggest users not to mix memory type It is recommended to use the same brand and type memo...

Страница 19: ...the PCI Express Base Specification revision 2 0 PCIE1 Slot Recommend add_on card configuration PCIEX16 Slot The PCI Express x16 slot is used to install an external PCI Ex press graphics card that is fully compliant to the PCI Express Base Specification revision 3 0 PCIEX16_S Slot This slot is fully compliant to the PCI Express Base Specification revision 2 0 which runs at x4 mode This motherboard is e...

Страница 20: ...Secure the metal bracket of the card to the system case with a screw For some add on cards for example graphics adapters and network adapters you have to install drivers and software before you can begin using the add on card Follow these instructions to install an add on card Please refer the following illustrations to install the add on card Install the LAN Card in the PCIE X1 slot Install the V...

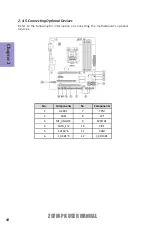
Страница 21: ...cting Optional Devices Refer to the following for information on connecting the motherboard s optional devices No Components No Components 1 USB3F 7 TPM 2 CASE 8 LPT 3 ME_UNLOCK 9 SPDIFO1 4 SATA_1 2 10 CIR1 5 SATA3 6 11 COM 6 F_USB1 3 12 F_AUDIO1 ...

Страница 22: ... system hang up This Motherboard implements one USB 3 0 header supporting 2 extra front USB 3 0 ports which delivers 5Gb s transfer rate 1 USB3F Front Panel USB 3 0 header 2 CASE Chassis Intrusion Detect Header This detects if the chassis cover has been removed This function needs a chassis equipped with instrusion detection switch and needs to be enabled in BIOS ...

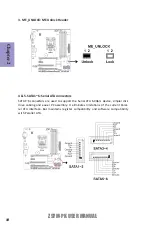
Страница 23: ... are used to support the Serial ATA 6 0Gb s device simpler disk drive cabling and easier PC assembly It eliminates limitations of the current Paral lel ATA interface But maintains register compatibility and software compatibility with Parallel ATA 4 5 SATA1 6 Serial ATA connectors ...

Страница 24: ...SB 2 0 ports Addition ally some computer cases have USB ports at the front of the case If you have this kind of case use auxiliary USB connector to connect the front mounted ports to the motherboard 6 F_USB1 3 Front Panel USB 2 0 headers Please make sure that the USB cable has the same pin assignment as indi cated above A different pin assignment may cause damage or system hang up 7 TPM Trusted Pl...

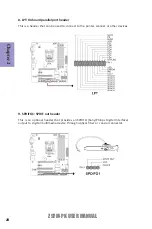
Страница 25: ...ides an SPDIFO Sony Philips Digital Interface output to digital multimedia device through optical fiber or coaxial connector 9 SPDIFO1 SPDIF out header This is a header that can be used to connect to the printer scanner or other devices 8 LPT Onboard parallel port header ...

Страница 26: ...Chapter 2 21 Z97M PK USER MANUAL 11 COM Onboard serial port header Connect a serial port extension bracket to this header to add a serial port to your system 10 CIR1 Consumer Infrared Header ...

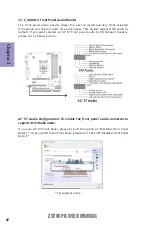
Страница 27: ...erence only AC 97 Audio Configuration To enable the front panel audio connector to support AC97 Audio mode The front panel audio header allows the user to install auxiliary front oriented microphone and line out ports for easier access This header supports HD audio by default If you want connect an AC 97 front panel audio to HD onboard headers please set as below picture 12 F_AUDIO1 Front Panel Au...

Страница 28: ...er 2 23 Z97M PK USER MANUAL If you use AC 97 Front Panel please don t tick off Using Front Jack Detect If you use HD Audio Front Panel please tick off the option of Using Front Jack Detect For reference only ...

Страница 29: ...low to install the SATA hard drives To install the Serial ATA SATA hard drives use the SATA cable that supports the Serial ATA protocol This SATA cable comes with a SATA power cable You can connect either end of the SATA cable to the SATA hard drive or the connector on the motherboard Refer to the illustration below for proper installation 1 Attach either cable end to the connector on the motherbo...

Страница 30: ...ponents No Components 1 SYS_FAN 4 F_PANEL 2 CPU_FAN 5 SPK 3 ATX_POWER 6 ATX_12V1 After you have installed the motherboard into a case you can begin connecting the motherboard components Refer to the following 2 4 7 Connecting Case Components ...

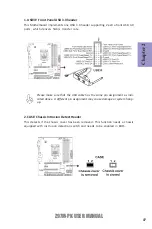
Страница 31: ...U_FAN Users please note that the fan connector supports the CPU cooling fan of 1 1A 2 2A 26 4W max at 12V Connect the system cooling fan connector to SYS_FAN 3 ATX_POWER ATX 24 pin Power Connector 6 ATX12V1 ATX 12V Power Connector Connect the standard power supply connector to ATX_POWER Connect the auxiliary case power supply connector to ATX12V1 ...

Страница 32: ...or allows you to connect to ATX v2 x power supply With ATX v2 x power supply users please note that when installing 24 pin power cable the latches of power cable and the ATX match perfectly Connecting 24 pin power cable 24 pin power cable The ATX12V1 4 Pin power connector is used to provide power to the CPU When installing 4 pin power cable the latches of power cable and the ATX12V1 match perfectl...

Страница 33: ...nel mounted LED provides power on off sleep and message waiting indication Reset Switch Supporting the reset function requires connecting pin 5 and 7 to a momentary con tact switch that is normally open When the switch is closed the board resets and runs POST Power Switch Supporting the power on off function requires connecting pins 6 and 8 to a momen tary contact switch that is normally open The ...

Страница 34: ...This chapter provides explanations for Setup Utility options The Standard Configuration A standard configuration has already been set in the Setup Utility However we rec ommend that you read this chapter in case you need to make any changes in the future This Setup Utility should be used when changing the system configuration when a configuration error is detected and you are prompted to make chan...

Страница 35: ...or the first time the POST screen may show a CMOS Settings Wrong message This standard message will appear following a clear CMOS data at factory by the manufacturer You simply need to Load Default Settings to reset the default CMOS values Note Changes to system hardware such as different CPU memories etc may also trigger this message ...

Страница 36: ... this motherboard apply for most conditions with optimum performance We do not suggest users change the default values in the BIOS setup and take no responsibility to any damage caused by changing the BIOS settings BIOS Navigation Keys The BIOS navigation keys are listed below KEY FUNCTION Scrolls through the items on a menu Change Opt F2 Previous Value F3 Optimized Defaults F1 General Help ESC Ex...

Страница 37: ...m Language English This item is used to set system language This menu shows the information of BIOS and enables you to set the system language date and time Choosethesystemdefault language Main Advanced Chipset M I B III Security Boot Exit Change Opt Enter Dbl Click Select Select Screen Click Select Item F1 General Help F2 Previous Values F3 OptimizedDefaults F4 Save Exit ESC Right Click Exit BIOS...

Страница 38: ... SATAConfiguration USB Configuration Trusted Computing Intel R Rapid Start Technology Intel R Smart Connect Technology LAN Configuration The item in the menu shows the LAN related information that the BIOS automatically detects Onboard LAN Controller Enabled Use this item to enable or disable Onboard LAN controller Press Esc to return to the Advanced Menu page Main Advanced Chipset M I B III Secur...

Страница 39: ... Main Advanced Chipset M I B III Security Boot Exit Change Opt Enter Dbl Click Select Select Screen Click Select Item F1 General Help F2 Previous Values F3 OptimizedDefaults F4 Save Exit ESC Right Click Exit CPU Temperature DTS 46 SystemTemperature 31O C CPU Fan Speed 3426 RPM SystemFan Speed 4787 RPM Core Voltage 1 728V DIMM Voltage 1 488V 12V 12 096V 5V 5 124V 3 3V 1 056V TCCActivation Temperatu...

Страница 40: ...Slope PWM value 10 This item is used to set the Slope Select PWM of the smart fan This item is used to set the CPU fan System fan full speed offset value CPU Fan System Fan Full Speed Offset DTS 52 Press Esc to return to the PC Health Status page CPU Temperature DTS System Temperature CPU Fan Speed System Fan Speed Core Voltage DIMM Voltage 12V 5V 3 3V System Component Characteristics These items ...

Страница 41: ...l Click Select Select Screen Click Select Item F1 General Help F2 Previous Values F3 OptimizedDefaults F4 Save Exit ESC Right Click Exit About Resume By Ring Resume By RTC Alarm Disabled The system can be turned off with a software command If you enable this item the system can automatically resume at a fixed time based on the system s RTC realtime clock Use the items below this one to set the dat...

Страница 42: ...end to RAM Sleep State default Press Esc to return to the Advanced Menu page Main Advanced Chipset M I B III Security Boot Exit Change Opt Enter Dbl Click Select Select Screen Click Select Item F1 General Help F2 Previous Values F3 OptimizedDefaults F4 Save Exit ESC Right Click Exit SelectthehighestACPIsleep state the system will enter whentheSUSPENDbuttonis pressed ACPI Settings ACPI Sleep State ...

Страница 43: ... F2 Previous Values F3 OptimizedDefaults F4 Save Exit ESC Right Click Exit Number of cores to enable in each processor package CPU Configuration Intel R Core TM i7 4765T CPU 2 00GHz EM64T Supported Processor Speed 2000 MHz Processor Stepping 306c3 Microcode Revision 19 Processor Cores 2 Intel HTTechnology Not Supported Intel VT x Technology Supported Active Processor Cores All Limit CPUID Maximum ...

Страница 44: ...alt worm attacks reducing the need for virus related repair Intel Virtualization Technology Enabled When disabled a VMM cannot utilize the additional hardware capabilities provided by Vandor Pool Technology LakeTiny Feature Enabled Use this item to enable or disable the LakeTiny for C state configuration CPU C6 Report Disabled Use this item to enable or disable CPU C6 ACPI C3 report to OS CPU C3 R...

Страница 45: ... channel allows one SATA device to be installed Use these items to configure each device on the SATA channel Spin up Device Disabled On an edge detect from 0 to 1 the PCH starts a COMRESET initialization sequence to the device External SATA Disabled Use this item to enable disable External SATA Support SATAConfiguration SATAMode AHCI Mode SATAPort1 Not Present Spin Up Device Disabled ExternalSATA ...

Страница 46: ...d Use this item to enable or disable support for legacy USB devices Main Advanced Chipset M I B III Security Boot Exit Change Opt Enter Dbl Click Select Select Screen Click Select Item F1 General Help F2 Previous Values F3 OptimizedDefaults F4 Save Exit ESC Right Click Exit USB Support Parameters USB Configuration All USB Devices Enabled Legacy USB Support Enabled Press Esc to return to the Advanc...

Страница 47: ...not show TPM Reset of platform is required Pending operation None Schedule an Operation for the Security Device NOTE Your Computer will reboot during restart in order to change State of Security Device TPM State Disabled Use this item to enable or disable the security device Press Esc to return to the Advanced Menu page TPM Active Status Deactivated This item displays the TPM status to be activate...

Страница 48: ... Help F2 Previous Values F3 OptimizedDefaults F4 Save Exit ESC Right Click Exit Intel R Rapid Start Technology Disabled Press Esc to return to the Advanced Menu page Use this item to show the information of Intel R Smart Connect Technology Intel R Smart Connect Technology ISCT Configuration Disabled Use this item to enable or disable ISCT configuration Enable Disable ISCT Configuration Main Advanc...

Страница 49: ...chipset and other system Chipset Menu System Agent SA Parameters Main Advanced Chipset M I B III Security Boot Exit Change Opt Enter Dbl Click Select Select Screen Click Select Item F1 General Help F2 Previous Values F3 OptimizedDefaults F4 Save Exit ESC Right Click Exit System Agent Configuration PCH Configuration ME Configuration ...

Страница 50: ...owing screen Main Advanced Chipset M I B III Security Boot Exit Change Opt Enter Dbl Click Select Select Screen Click Select Item F1 General Help F2 Previous Values F3 OptimizedDefaults F4 Save Exit ESC Right Click Exit Select which of IGFX PEG PCI Graphics device should be Primary Display or select SG for SwitchableGfx System Agent Configuration Initiate Graphic Adapter Auto IGD Memory 64M DVMT M...

Страница 51: ...an help you to increase the area available for programs running on a single computer system through using multiple display devices It is not only to increase larger screen viewing but aslo to improving personal productivity Step 1 Insert ECS drives DVD to run Auto setup or browse the DVD to install Intel chipset drivers VGA and sound drivers If you want know the detail information please refer to ...

Страница 52: ...orce 8400 GS Microsoft Corporation WDDM v1 1 and double click it Main Advanced Chipset M I B III Security Boot Exit Change Opt Enter Dbl Click Select Select Screen Click Select Item F1 General Help F2 Previous Values F3 OptimizedDefaults F4 Save Exit ESC Right Click Exit Select which of IGFX PEG PCI Graphics device should be Primary Display or Select SG for SwitchableGfx System Agent Configuration...

Страница 53: ...ional changes Extenddesktoptothisdisplay Disconnect this display Step 4 Change the appearance of your displays under Windows 7 8 Change the appearance of your displays Control Panel All Control Panel Items Display Screen Resolution Search Control Panel 1 2 3 4 Detect Identify 1 DELL U2410 Display Resolution 1920x1200 recommended Orientation Landscape Extenddesktoptothisdisplay Multiple displays Th...

Страница 54: ... What display settings should I choose OK Cancel Apply 2 You must selectApply before making additional changes 3 4 3 Change the appearance of your displays Control Panel All Control Panel Items Display Screen Resolution Search Control Panel 1 Detect Identify 4 AL1717 Display Resolution 1920x1200 recommended Orientation Landscape Extenddesktoptothisdisplay Multiple displays Make this my main displa...

Страница 55: ...ned up and the item below indicates the current status of the case Chassis Opened No This item indicates whether the case has been opened Press Esc to return to the Chipset Menu page Main Advanced Chipset M I B III Security Boot Exit Change Opt Enter Dbl Click Select Select Screen Click Select Item F1 General Help F2 Previous Values F3 OptimizedDefaults F4 Save Exit ESC Right Click Exit Select AC ...

Страница 56: ...set M I B III Security Boot Exit Change Opt Enter Dbl Click Select Select Screen Click Select Item F1 General Help F2 Previous Values F3 OptimizedDefaults F4 Save Exit ESC Right Click Exit Enable Disable ME Firmware Management EngineTechnology Configuration ME Control Enabled ME FW Version 9 1 2 1010 ME FW Version 9 1 2 1010 This item shows the ME FW version Press Esc to return to the Chipset Menu...

Страница 57: ...e TM i7 4765T CPU 2 00GHz Processor Speed 2000 MHz Memory Frequency 1333 MHz Total Memory 4096MB DDR3 Main Advanced Chipset M I B III Security Boot Exit NonTurboRatioOverride Change Opt Enter Dbl Click Select Select Screen Click Select Item F1 General Help F2 Previous Values F3 OptimizedDefaults F4 Save Exit ESC Right Click Exit CPU Ratio 32 This item allows users to control non turbo CPU ratio Pa...

Страница 58: ...r limit time window Power Limit 1 Time Second 8 This item allows you to set the power limit 1 time Power Limit 2 Switch Enabled This item allows you to enable or disable the power limit 2 switch Disable OverClocking Lock Enabled This item allows you to control the OverClocking lock Press Esc to return to the M I B III Menu page Short Duration Power Limit Override Maximum Intel R Turbo Boost Techno...

Страница 59: ...us Values F3 OptimizedDefaults F4 Save Exit ESC Right Click Exit MemoryInformation Memory RC Version 1 8 0 0 Memory Frequency 1333 Mhz Total Memory 4096 MB DDR3 Memory Profiles Automatic Memory Frequency 1333 Timing Default Current Target tCL 9 9 9 tRCD 9 9 9 tRP 9 9 9 tRAS 24 24 24 NMode 1 1 Auto tWR 10 10 10 tRFC 107 107 107 tWTR 5 5 5 tRRD 4 4 4 tRTP 5 5 5 tCWL 7 7 7 tREFI 5200 5200 5200 tFAW 2...

Страница 60: ...ral Help F2 Previous Values F3 OptimizedDefaults F4 Save Exit ESC Right Click Exit tRDRD Auto tRDRD_dr Auto tRDRD_dd Auto tRDPDEN Auto CMD_3st Auto tWRRD Auto tWRRD_dr Auto tWRRD_dd Auto tWRWR Auto tWRWR_dr Auto tWRWR_dd Auto tWRPDEN Auto Dec_WRD Auto EnhInterleaveSupport Enabled RI Support Enabled OLLWeakLockSupport Enabled Mc Lock Enabled CMD Tri State Enabled Memory Scrambler Enabled MRC Fast B...

Страница 61: ... allows you to enable or disable the memory remap above 4G Memory Thermal Management Enabled This item allows you to enable or disable the memory thermal management DDR PowerDown and Idle counter BIOS This item allows you to BIOS or PCODE the DDR Power Down and Idle counter BIOS BIOS is in countrol of DDR CKE mode and idle timer value PCODE pcode will manage the modes Refresh 2x Support Disabled T...

Страница 62: ...2 Previous Values F3 OptimizedDefaults F4 Save Exit ESC Right Click Exit Graphics Core Ratio Limit 22 This item allows you to control the internal GFX core ratio Press Esc to return to the M I B III Menu page North Bridge Configuration Scroll to this item to view the following screen Graphics Core Ratio Limit Intel Graphics Configuration Graphics Core Ratio Limit 22 ...

Страница 63: ...Defaults F4 Save Exit ESC Right Click Exit PCH Core Voltage 1 056V Auto DIMM Voltage 1 500V Auto Processor Input Voltage Auto Vdroop Enabled CPUAdaptive Voltage Target mV 0 CPU Voltage Mode Adaptive CPU Voltage Offset mV 0 Offset Preflx RINGAdaptive Voltage Target mV 0 RINGVoltage Mode Adaptive RING Voltage Offset mV 0 Offset Prefix SVID Control Enable Enabled SVID Override Voltage Target mV 0 FIV...

Страница 64: ...mV FIVR Faults Enable Enabled This item allows you to enable or disable the FIVR faults If this function is disabled it will not be changed until CPU powers down FIVR Efficiency Enable Enabled This item allows you to enable or disable the FIVR efficiency If this function is disabled it will not be changed until CPU powers down Press Esc to return to the M I B III Menu page Intel R Core TM i7 4765T...

Страница 65: ...ly if system runs in User Mode Main Advanced Chipset M I B III Security Boot Exit Change Opt Enter Dbl Click Select Select Screen Click Select Item F1 General Help F2 Previous Values F3 OptimizedDefaults F4 Save Exit ESC Right Click Exit Set Administrator Password SystemModestate Setup Secure Boot state Not Active SecureBoot Disabled Administrator Password Administrator Password Status Not Install...

Страница 66: ...ptions Bootup NumLock State On This item enables you to select NumLock state Quiet Boot Enabled This item enables or disables quiet boot Update System BIOS Disabled This item enables or disables to update system BIOS Boot mode select LEGACY Use this item to select boot mode Set Boot Priority This item enables you to set boot priority for all boot devices Boot Option 1 2 3 4 5 6 7 These items show ...

Страница 67: ...hout saving any changes This page enables you to exit system setup after saving or without saving the changes Exit Menu Save Changes and Exit This item enables you to exitt the system setup after saving the changes Save Changes and Reset This item enables you to reset system setup after saving the changes Main Advanced Chipset M I B III Security Boot Exit Go back to EZ Mode Back to EZ Mode SaveCha...

Страница 68: ...bootable system disk Refer to Windows online help for information on creating a bootable system disk 4 Download the Flash Utility and new BIOS file from the manufacturer s Web site Copy these files to the bootable device 5 Turn off your computer and insert the bootable device in your computer You might need to run the Setup Utility and change the boot priority items on the Advanced BIOS Features S...

Страница 69: ...Chapter 3 Z97M PK USER MANUAL 64 Memo ...

Страница 70: ...h for all software and drivers available on the disk Open Windows Explorer and show the contents of the support disk Click Exit button to close the Auto Setup window Browse CD Click the Setup button to select and run the software installation program Click the Utilities button to select and install ECS Intelligent Utility Information Follow these instructions to install device drivers and software...

Страница 71: ... the items 4 Click Next to run the Installation Wizard An item installation screen appears Drivers and software are automatically installed in sequence Follow the onscreen instructions confirm commands and allow the computer to re start a few times to complete the installation Windows 8 8 1 will show the following screen after system restart you must select Desktop in the bottom left to install th...

Страница 72: ...Software Intelligent EZ Utility ECS Intelligent EZ Utility provides friendly interfaces under Windows O S which makes your computing more easily and conveniently If the driver you want to install does not have a setup program browse to the oper ating system subfolder and locate the readme text file README TXT or README DOC for information on installing the driver or software for your operating sys...

Страница 73: ...hassle by listing all the latest drivers online Just select the one you prefer and start to download and install the drivers eSF eSF Smart Fan utility provides easy and safe way to adjust fan speed in accordance with your PC s system loading and temperature It has five modes to adjust fan speed in a safe range without entering the BIOS to optimize your system cooling environment Microsoft NET Fram...

Страница 74: ... driver Complete the following steps before you create a RAID set Prepare the following items Determines how SATA controller s operate Main Advanced Chipset M I B III Security Boot Exit Change Opt Enter Dbl Click Select Select Screen Click Select Item F1 General Help F2 Previous Values F3 OptimizedDefaults F4 Save Exit ESC Right Click Exit SATAConfiguration SATAMode AHCI Mode SATAPort1 Not Present...

Страница 75: ... Intel R Matrix Storage Manager option ROM 11 0 0 1204 Copyright C 2003 07 Intel Corporation All Rights Reserved RAID Volumes Nonedefined Physical Disks Port Drive Model Serial Size Type Status Vol ID 4 Maxtor 7H500F0 H81D3FLH 465 8GB Non RAID Disk 5 ST3500320AS 5QM0KLEY 465 8GB Non RAID Disk Press CTRL I to enter Configuration Utility Main Menu 1 Create RAID Volume 4 RecoveryVolumeOptions 2 Delet...

Страница 76: ...l be selectable Then users can select the HDD that you want to belong to the RAID set Please be noticed that selecting a wrong disk will result in losing the original data of the HDD Main Menu 1 Create RAID Volume 4 RecoveryVolumeOptions 2 Delete RAID Volume 5 Acceleration Options 3 Reset Disks to Non RAID 6 Exit CREATE VOLUME MENU Name Volume0 RAID Level RAID0 Stripe Disks Select Disks Strip Size...

Страница 77: ...rm the action Press Y to confirm otherwise press N CREATE VOLUME MENU Name Volume0 RAID Level RAID0 Stripe Disks Select Disks Strip Size 128KB Capacity 931 5 GB Change TAB Next ESC Previous Menu ENTER Select Intel R Matrix Storage Manager option ROM 11 0 0 1204 Copyright C 2003 07 Intel Corporation All Rights Reserved Press ENTER to create the specified volume WARNING ALLDATAON SELECTED DISKS WILL...

Страница 78: ... Exit CREATE VOLUME MENU Name Level Drives Capacity Status Bootable Volume0 RAID0 Stripe 2 931 5GB Normal Yes Select ESC Previous Menu DEL Delete Volume Intel R Matrix Storage Manager option ROM 11 0 0 1204 Copyright C 2003 07 Intel Corporation All Rights Reserved Deleting a volume will reset the disks to non RAID WARNING ALL DISK DATAWILL BE DELETED ALL DATAIN THE VOLUME WILL BE LOST Are you sure...

Страница 79: ... to Non RAID 1 In the main Intel Rapid Storage Technology RAID BIOS menu highlight Reset Disks to Non RAID using the up down arrow key then press Enter 2 Use the space bar to select the HDD to reset to Non RAID 3 A dialogue box appears to confirm the action Press Y to confirm otherwise press N Pressing Y deletes all the data in the HDDs When you have finished highlight Exit using the up down arrow...

Страница 80: ...Make sure that your graphics card driver supports the AMD CrossFireXTM technology Download the latest driver from the AMD website www amd com 4 Make sure that your power supply unit PSU can provide at least the mini mum power required by your system Installing CrossFireXTM graphics cards 1 Insert the CrossFireXTM graphics cards into the PCIEX16 PCIEX16_S slots Make sure that the card is properly s...

Страница 81: ...ER MANUAL Chapter 6 The CatalystTM Control Center Dialog Box To enable CrossFireXTM Install AMD graphic card driver Enter the Catalyst Control Center Dialog Box check the Enable CrossFireXTM item Click Apply button ...

Страница 82: ...N connector is connected to the motherboard 4 For Intel platforms check the pins on the CPU socket for damage or bent A bent pin may cause failure to boot and sometimes permanent damage from short circuit 5 Check the 12V power connector is connected to the motherboard 6 Check that the 12V power ATX connectors are fully inserted into the motherboard connectors Make sure the latches of the cable and...

Страница 83: ...eplace a new one if necessary 3 Check that the 12V power ATX connectors are fully inserted into the motherboard connectors Make sure the latches of the cable and connector are locked into place 4 Remove the hard drive optical drive or DDR memory to determine which of these components may be at fault areas of high moisture content 3 Routinely clean the CPU cooler fan to remove dust and hair 4 In pl...

Страница 84: ... o r p t o n y r o m e m M M I D e r u l i a f y r o m e m r o d e t r e s n i s p e e b t r o h s 8 d n a p e e b g n o l 1 f I d e t c e t e d t o n A G V s e Y s e Y n e e r c s T S O P t a t l a H s e Y O M C R L d n a S C t s e r t r a A M R t c a t n o c l i a f f I s e Y o N e u s s i e c i v e d l a r e h p i r e P m e l b o r p D D H r o r r e p u t e s S O M C d S O M C R L C o t e e n t...

Страница 85: ...80 Z97M PK USER MANUAL Chapter 7 Memo ...

Отзывы: