


English
47
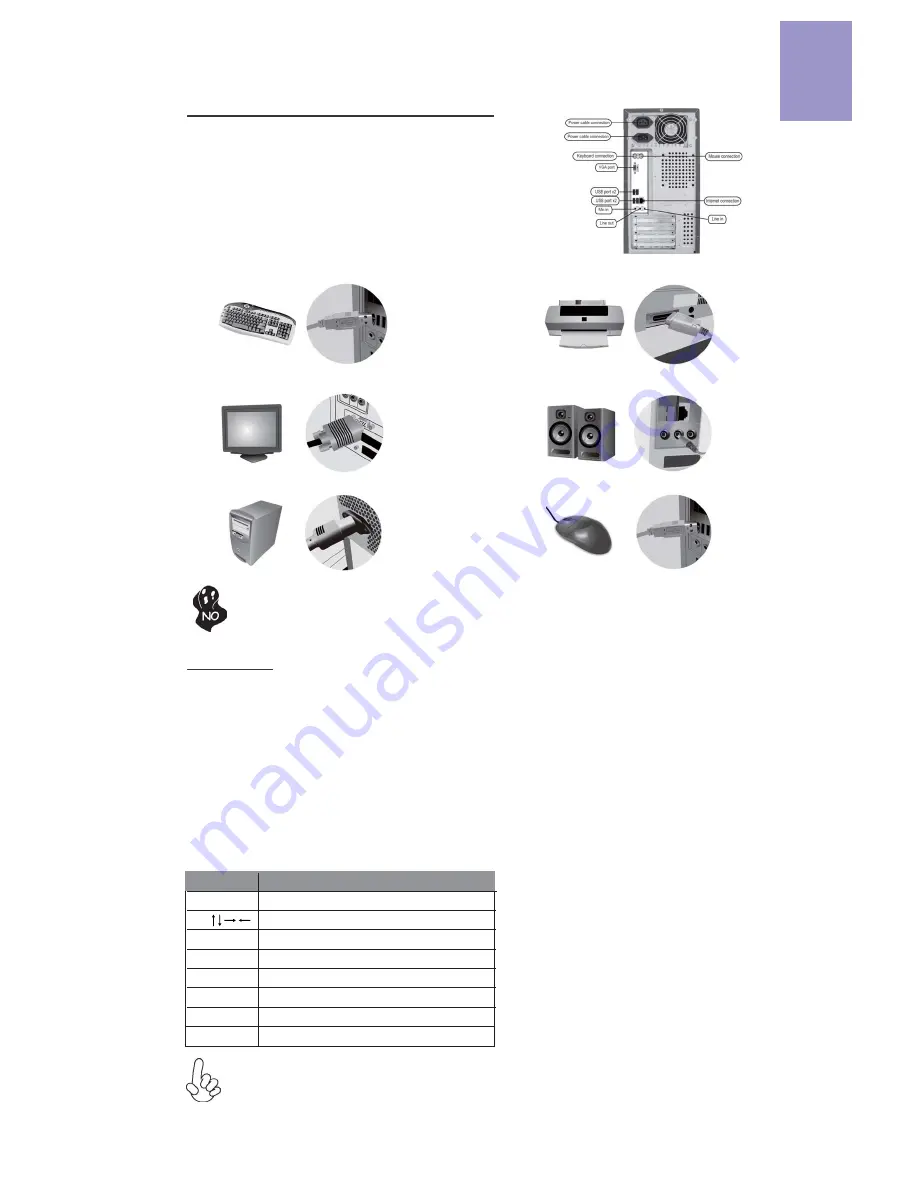
Once the steps above have been completed, please
connect the peripherals such as the keyboard,
mouse, monitor, etc. Then, connect the power and
turn on the system. Please install all the required
ƐŽŌǁĂ
re.
Step 8: Connec
ƟŶ
g ports on the case:
Please install all peripheral devices.
8-1. Keyboard connec
ƟŽ
n
To prevent component damage, do not power up the system un
Ɵů
the
ŝŶƐƚĂůůĂƟŽŶ
is
ĐŽŵƉů
ete.
8-2. Printer
ĐŽŶŶĞĐƟŽ
n
8-3. Monitor
ĐŽŶŶĞĐƟŽ
n
8-4. Speaker
ĐŽŶŶĞĐƟŽ
n
8-5. Power conne
ĐƟŽ
n
8-6. Mouse conne
ĐƟŽ
n
The sequence of
ŝŶƐƚĂůůĂƟŽŶ
may
Ěŝī
er depending on the type of case and
devices used.
BIOS Nav
ŝŐĂƟ
on Keys
Scrolls through the items on a menu
Using BIOS
The BIOS (Basic Input and Output System) Setup
hƟ
lity displays the system’s
c
ŽŶĮ
gu
ƌĂƟ
on status and provides you op
Ɵ
ons to set system parameters. When
you power on the system, BIOS enters the Power-On Self Test (POST) rou
Ɵ
nes,
please
press <DEL> or F2 to enter setup
.
When powering on for the
ĮƌƐƚ ƟŵĞ͕
the
POST screen may show a
“CMOS
^ĞƫŶŐƐ
Wrong”
message. Please
enter BIOS and
choose “Load Default Se
ƫ
ngs”
to reset the default CMOS values. (Changes to
system hardware such as di
īĞƌĞ
nt CPU, memories, etc. may also trigger this
message.)
KEY
+/-
Modi
Į
es the selected
Į
eld’s values
F2
Previous Value
F3
KƉƟŵŝnj
ed Defaults
F1
General Help
ESC
Exits the current menu
Enter
Select
F4
Save & Exit
KEY
FUNCTION
Содержание H61H2-I5
Страница 8: ...Chapter 1 H61H2 I5 USER MANUAL 4 Motherboard Components ...
Страница 40: ...H61H2 I5 USER MANUAL 36 Chapter 2 Memo ...
Страница 48: ...44 Chapter 4 H61H2 I5 USER MANUAL Memo ...
Страница 82: ...78 H61H2 I5 USER MANUAL Memo ...