background image

Chapter 3

A68F2P-M2 USER MANUAL

48

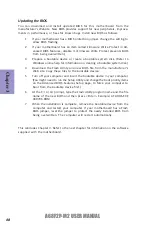
Updating the BIOS

You can download and install updated BIOS for this motherboard from the
manufacturer’s Website. New BIOS provides support for new peripherals, improve-
ments in performance, or fixes for known bugs. Install new BIOS as follows:

This concludes Chapter 3. Refer to the next chapter for information on the software
supplied with the motherboard.

1

If your motherboard has a BIOS protection jumper, change the setting to

allow BIOS flashing.

2

If your motherboard has an item called Firmware Write Protect in Ad-

vanced BIOS features, disable it. (Firmware Write Protect prevents BIOS
from being overwritten.)

3

Prepare a bootable device or create a bootable system disk. (Refer to

Windows online help for information on creating a bootable system disk.)

4

Download the Flash Utility and new BIOS file from the manufacturer’s

Web site. Copy these files to the bootable device.

5

Turn off your computer and insert the bootable device in your computer.

(You might need to run the Setup Utility and change the boot priority items
on the Advanced BIOS Features Setup page, to force your computer to
boot from the bootable device first.)

6

At the C:\ or A:\ prompt, type the Flash Utility program name and the file

name of the new BIOS and then press <Enter>. Example: AFUDOS.EXE
040706.ROM

7

When the installation is complete, remove the bootable device from the

computer and restart your computer. If your motherboard has a Flash
BIOS jumper, reset the jumper to protect the newly installed BIOS from
being overwritten. The computer will restart automatically.

Содержание A68F2P-M2

Страница 1: ...A68F2P M2 USER GUIDE Version 1 0 40 012 KJ1100...

Страница 2: ...s been tested and found to comply with the limits for a Class B digital device pursuant to Part 15 of the FCC Rules These limits are designed to provide reasonable protection against harmful interfere...

Страница 3: ...page 7 page 25 page 49 Installing the Motherboard IntroducingtheMotherboard Provides information on us ing the BIOS Setup Utility Describes the motherboard software Limits and methods of mesurement of...

Страница 4: ...ve 19 ConnectingCaseComponents 20 Front Panel Header 23 TABLE OF CONTENTS Preface i Chapter 1 1 Introducing the Motherboard 1 Introduction 1 PakageContents 1 Specifications 2 MotherboardComponents 4 I...

Страница 5: ...tallingunderWindows7 8 8 1 49 Running Setup 49 ManualInstallation 51 ECSUtilitySoftware IntelligentEZUtility 51 Chapter 5 53 Trouble Shooting 53 Start up problems during assembly 53 Start up problems...

Страница 6: ...two USB 2 0 headers support additional four USB 2 0 ports and four USB 3 0 ports two USB 3 0 ports at the rear panel and one USB 3 0 header supports additional two USB 3 0 ports This motherboard integ...

Страница 7: ...e Due to the limitation of chipset spec it supports up to 2133 1866 MHz 1 5V memory with a single DIMM per channel Please go to ECS website for the latest Memory support list 1 x 24 pin ATX Power Supp...

Страница 8: ...Supports Hardware Monitor Supports STR S3 STD S4 Supports Audio LAN can be disabled in BIOS F7 hot key for boot up devices option Supports PgUp clear CMOS Hotkey Has PS2 KB Model only System BIOS For...

Страница 9: ...Chapter 1 4 A68F2P M2 USER MANUAL Motherboard Components...

Страница 10: ...ANEL Front panel switch LED header 9 F_USB1 2 Front panel USB 2 0 headers 10 USBPWR_F Front panel USB power select jumper 11 COM Onboard serial port header 12 LPT Printer header 13 CASE Case open head...

Страница 11: ...rts to connect USB 3 0 devices 6 LAN Port Connect an RJ 45 jack to the LAN port to connect your computer to the Network 7 USB 2 0 Ports Black Use the USB 2 0 ports to connect USB 2 0 devices 8 Line in...

Страница 12: ...in the motherboard Place the motherboard over the mounting brackets and secure the motherboard onto the mounting brackets with screws Follow these safety precautions when installing the motherboard We...

Страница 13: ...nd users to enter the main BIOS setting page to Load Default Settings and then Save and Exit Setup 2 Make sure the power supply provides enough VCC_DUAL voltage before selecting the VCC_DUAL function...

Страница 14: ...internal cache memory and external cache memory You may be able to change the settings in the system Setup Utility We strongly recommend you do not over clock processor or other compo nents to run fas...

Страница 15: ...oling fan in a well lit work area so that you can clearly see the motherboard and processor socket Avoid using cooling fans with sharp edges in case the fan casing and the clips cause serious damage t...

Страница 16: ...n you handle the modules You must install at least one module in any of the two slots Total memory capacity is 16 GB Refer to the following to install the memory modules C The slot latches are levered...

Страница 17: ...phics card that is fully compliant to the PCI Express Base Specification revision 3 0 Before installing an add on card check the documentation for the card carefully If the card is not Plug and Play y...

Страница 18: ...card to the system case with a screw 1 For some add on cards for example graphics adapters and network adapt ers you have to install drivers and software before you can begin using the add on card 2 T...

Страница 19: ...Components 1 USB3F 5 LPT 2 SATA3_1 4 6 CASE 3 F_USB1 2 7 F_AUDIO 4 COM Please make sure that the USB cable has the same pin assignment as indicated above A different pin assignment may cause damage o...

Страница 20: ...Parallel ATA 2 SATA3_1 4 Serial ATA Connectors The motherboard has two USB 2 0 headers supporting four USB 2 0 ports Additionally some computer cases have USB ports at the front of the case If you ha...

Страница 21: ...M Onboard Serial Port Header Connect a serial port extension bracket to this header to add a serial port to your system 5 LPT Onboard Parallel Port Header This is a header that can be used to connect...

Страница 22: ...ith instrusion detection switch and needs to be enabled in BIOS The front panel audio header allows the user to install auxiliary front oriented microphone and line out ports for easier access This he...

Страница 23: ...tick off the option of Using Front Jack Detect For reference only If you use AC 97 Front Panel please tick off the option of Disabled Front Panel Detect If you use HD Audio Front Panel please don t ti...

Страница 24: ...elow to install the SATA hard drives To install the Serial ATA SATA hard drives use the SATA cable that supports the Serial ATA protocol This SATA cable comes with a SATA power cable You can connect e...

Страница 25: ...n begin connecting the motherboard components Refer to the following Connect the CPU cooling fan cable to CPU_FAN Connect the system cooling fan connector to SYS_FAN Users please note that the fan con...

Страница 26: ...t the case speaker cable to SPK 2 SPK Speaker Header 3 6 ATX_POWER ATX 24 pin Power Connector ATX12V ATX 12V Power Connector Connect the standard power supply connector to ATX_POWER Connect the auxili...

Страница 27: ...that when installing 24 pin power cable the latches of power cable and the ATX match perfectly Connecting 24 pin power cable 24 pin power cable The ATX12V4P power connector is used to provide power t...

Страница 28: ...g indication Reset Switch Supporting the reset function requires connecting pin 5 and 7 to a momentary con tact switch that is normally open When the switch is closed the board resets and runs POST Po...

Страница 29: ...Chapter 2 24 A68F2P M2 USER MANUAL Memo...

Страница 30: ...This chapter provides explanations for Setup Utility options The Standard Configuration A standard configuration has already been set in the Setup Utility However we rec ommend that you read this chap...

Страница 31: ...you to verify that you wish to execute that option Other options lead to dialog boxes that prompt you for informa tion Some options marked with an icon lead to submenus that enable you to change the v...

Страница 32: ...revious Value F3 Optimized Defaults F1 General Help ESC Exits the current menu Enter Select In this manual default values are enclosed in parenthesis Submenu items are denoted by an icon F4 Save Exit...

Страница 33: ...m Language English This item is used to set system language This menu shows the information of BIOS and enables you to set the system language date and time Choosethesystemdefault language Main Advanc...

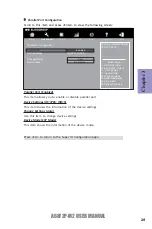
Страница 34: ...ters Main Advanced Chipset M I B III Boot Security Exit Change Opt Enter Dbl Click Select Select Screen Click Select Item F1 General Help F2 Previous Values F3 OptimizedDefaults F4 Save Exit ESC Right...

Страница 35: ...this item to enable or disable Onboard LAN Press Esc to return to the Advanced Menu page Main Advanced Chipset M I B III Boot Security Exit Change Opt Enter Dbl Click Select Select Screen Click Selec...

Страница 36: ...Click Select Select Screen Click Select Item F1 General Help F2 Previous Values F3 OptimizedDefaults F4 Save Exit ESC Right Click Exit CPU Tct1 68 SystemTemperature 46 O C CPU Fan Speed N A SystemFan...

Страница 37: ...em fan speed etc Press Esc to return to the Advanced Menu page Smart Fan Mode Normal This item allows you to select the fan mode Normal Quiet Silent or Manual for a better operation environment If you...

Страница 38: ...e By PS2 MS S3 Disabled This item enables or disables you to allow mouse activity to awaken the system from power saving mode Resume By PS2 KB S3 Disabled This item enables or disables you to allow ke...

Страница 39: ...Suspend to RAM Sleep State default Press Esc to return to the Advanced Menu page Main Advanced Chipset M I B III Boot Security Exit Change Opt Enter Dbl Click Select Select Screen Click Select Item F1...

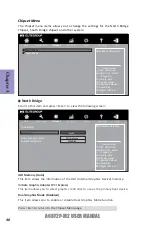
Страница 40: ...1 Data Cache 16 KB 4 Way L2 Cache 1024 KB 16 way Enabled CPU C6 Report AMD Turbo Core Auto AMD C Q Enabled Max Intended Speed 3600 MHZ These items show the maximum intended speed of the CPU Microcode...

Страница 41: ...l Click Select Select Screen F1 General Help F2 Previous Values ESC Right Click Exit Main Advanced Chipset M I B III Boot Security Exit Click Select Item F3 Optimized Defaults SATAConfiguration OnChip...

Страница 42: ...III Boot Security Exit Change Opt Enter Dbl Click Select Select Screen Click Select Item F1 General Help F2 Previous Values F3 OptimizedDefaults F4 Save Exit ESC Right Click Exit USB Configuration Al...

Страница 43: ...rity Exit Change Opt Enter Dbl Click Select Select Screen Click Select Item F1 General Help F2 Previous Values F3 OptimizedDefaults F4 Save Exit ESC Right Click Exit Set Parameters of Serial Port 0 CO...

Страница 44: ...to change device settings Device Mode ECP Mode This item shows the information of the device mode Main Advanced Chipset M I B III Boot Security Exit Change Opt Enter Dbl Click Select Select Screen Cl...

Страница 45: ...4 Save Exit ESC Right Click Exit Main Advanced Chipset M I B III Boot Security Exit Change Opt Enter Dbl Click Select Select Screen Click Select Item F1 General Help F2 Previous Values F3 OptimizedDef...

Страница 46: ...iguration Azalia HD Audio Enabled Azalia Internal HDMI codec Enabled Case Open Warning Disabled Chassis Opened Restore AC Power Loss Power Off This item enables your computer to automatically restart...

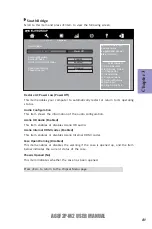
Страница 47: ...This item shows the information of Command Rate CPU Ratio Voltage Auto This item is used to set CPU Ratio Voltage Memory Profile1 2 3 None This item is show Memory parameter and only the Memory suppo...

Страница 48: ...y tFAW 24 This item controls the four bank activate time in memory clock cycles Row Cycle Time tRC 39 This item specifies the row cycle time SB Spread Spectrum Enabled This item enables or disables th...

Страница 49: ...o select boot mode Set Boot Priority This item enables you to set boot priority for all boot devices Boot Option 1 2 3 4 5 6 7 These items show the boot priorities Boot Configuration This item shows t...

Страница 50: ...nter Dbl Click Select Select Screen Click Select Item F1 General Help F2 Previous Values F3 OptimizedDefaults F4 Save Exit ESC Right Click Exit Sets the system boot order Scroll to this item and press...

Страница 51: ...d to control the secure boot flow it is possible only if system runs in User Mode Platform Mode Setup This item allows you to set the platform mode Main Advanced Chipset M I B III Boot Security Exit C...

Страница 52: ...you have made Save Changes This item enables you to save the changes that you have made Discard Changes This item enables you to discard any changes that you have made Restore Defaults This item enab...

Страница 53: ...bootable system disk Refer to Windows online help for information on creating a bootable system disk 4 Download the Flash Utility and new BIOS file from the manufacturer s Web site Copy these files to...

Страница 54: ...th for all software and drivers available on the disk Open Windows Explorer and show the contents of the support disk Click Exit button to close the Auto Setup window Browse CD Click the Setup button...

Страница 55: ...ll the items 4 Click Next to run the Installation Wizard An item installation screen appears Drivers and software are automatically installed in sequence Follow the onscreen instructions confirm comma...

Страница 56: ...y Software Intelligent EZ Utility ECS Intelligent EZ Utility provides friendly interfaces under Windows O S which makes your computing more easily and conveniently If the driver you want to install do...

Страница 57: ...hassle by listing all the latest drivers online Just select the one you prefer and start to download and install the drivers eSF eSF Smart Fan utility provides easy and safe way to adjust fan speed in...

Страница 58: ...N connector is connected to the motherboard 4 For Intel platforms check the pins on the CPU socket for damage or bent A bent pin may cause failure to boot and sometimes permanent damage from short cir...

Страница 59: ...eplace a new one if necessary 3 Check that the 12V power ATX connectors are fully inserted into the motherboard connectors Make sure the latches of the cable and connector are locked into place 4 Remo...

Страница 60: ...r p t o n y r o m e m M M I D e r u l i a f y r o m e m r o d e t r e s n i s p e e b t r o h s 8 d n a p e e b g n o l 1 f I d e t c e t e d t o n A G V s e Y s e Y n e e r c s T S O P t a t l a H s...

Страница 61: ...56 A68F2P M2 USER MANUAL Chapter 5 Memo...

Отзывы: