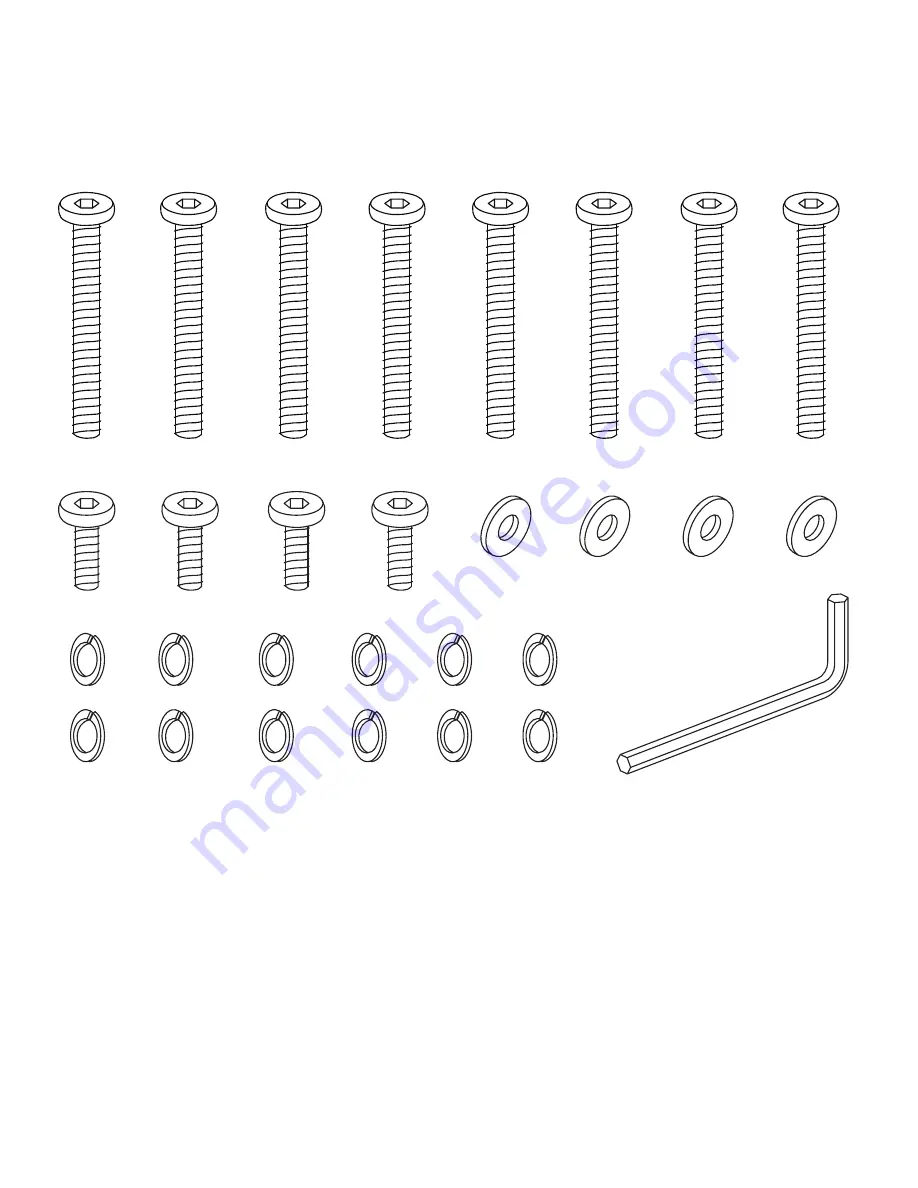
HARDWARE FOR CRIBS
SEPERATE HARDWARE FIRST FOR EASIER INSTALLATION
Zola Crib
Page 3
Страница 1: ...ZOLA Crib Instructions ...
Страница 2: ...LE UNIT IN A DEBRIS FREE LOCATION TO PREVENT SCRATCHING OF PIECES USING A POWER SCREWDRIVER MAY DAMAGE AND STRIP THE WOOD DO NOT USE DO NOT FULLY THIGHTEN THE BOLTS UNTIL THE CRIB IS COMPLETELY ASSEMBLED 2 MACHINE BOLT WASHER LOCK WASHER ALLEN WRENCH 1 MACHINE BOLT Zola Crib Page 2 ...
Страница 3: ...HARDWARE FOR CRIBS SEPERATE HARDWARE FIRST FOR EASIER INSTALLATION Zola Crib Page 3 ...
Страница 4: ...1 2 3 3 4 Parts List 1 Left Headboard 2 Right Headboard 3 Stationary Side 4 Mattress Support Zola Crib Page 4 ...
Страница 5: ...3 C A A C 1 2 Step one Attach Stationary Side to the Two Headboards DO NOT OVERTIGHTEN Zola Crib Page 5 ...
Страница 6: ...mportant to lower the mattress support as the child grows older Please review the caution and warning statements for more important information Step two Attach Mattress Support Make Sure the Mattress Support is installed FLAT SIDE UP Make Sure the Mattress Support is level Zola Crib Page 6 ...
Страница 7: ...A C C A 3 Step three Attach Stationary Side to the Crib Zola Crib Page 7 Recheck all screws and bolts to be sure they are fastened securely DO NOT OVERTIGHTEN ...
Страница 8: ...5 8 INCHES 131CM WITH A THICKNESS NOT EXCEEDING 6 INCHES 15CM WARNING PLEASE DO NOT REMOVE ANY WOOD SCREWS IN THE NORMAL DISASSEMBLY OF THE CRIB BE SURE TO READ ALL WARNINGS AND CAUTIONARY STATEMENTS BEFORE USAGE KEEP THIS MANUAL IN THE SLEEVE ATTACHMENT TO THE MATTRESS SUP PORT FOR FUTURE REFERENCE ...
Страница 9: ... cord of a blind or curtain and be strangled Fall Hazard When a child is able to pull to a standing position set the mattress to the lowest position and remove bumper pads large toys and other objects that could serve as steps for climbing out Check this product for damaged hardware loose joints loose bolts or other fasteners missing parts or sharp edges before and after assembly and frequently du...