


16
3 INCH CHIPPER/SHREDDER
SERVICE & MAINTENANCE
BEFORE INSPECTINg OR SERVICINg ANy PART OF THIS MACHINE, SHuT OFF POWER SOuRCE,
AND MAKE SuRE All MOVINg PARTS HAVE COME TO A COMPlETE STOP.
WaRNING
5.13 TRaILER sERvIcE TIps
5.12 REmovING THE RoToR
5.11 REmovE/REpLacE dRIvE bELT
Check wheel bolt torque monthly.
1.
Check air pressure in tires monthly.
2.
Check and repack wheel bearings with grease every
3.
12 months.
When towing, always connect the safety chains. Make
4.
sure trailer hitch bolts are tight.
Check trailer lights periodically.
5.
5.14 LubRIcaTIoN
ImpoRTaNT
Polyurea and lithium-based greases are not compatible.
Mixing the two grease types may lead to premature
failure.
NoTE
Do not over grease bearings. Overfilling can lead to
excessive heat and/or unseating of the seals. Add
grease slowly and under light pressure. Whenever
possible, rotate bearing slowly while lubricating.
lubricate the machine periodically with a lithium-based
grease. Extreme working conditions will require more
frequent greasing.
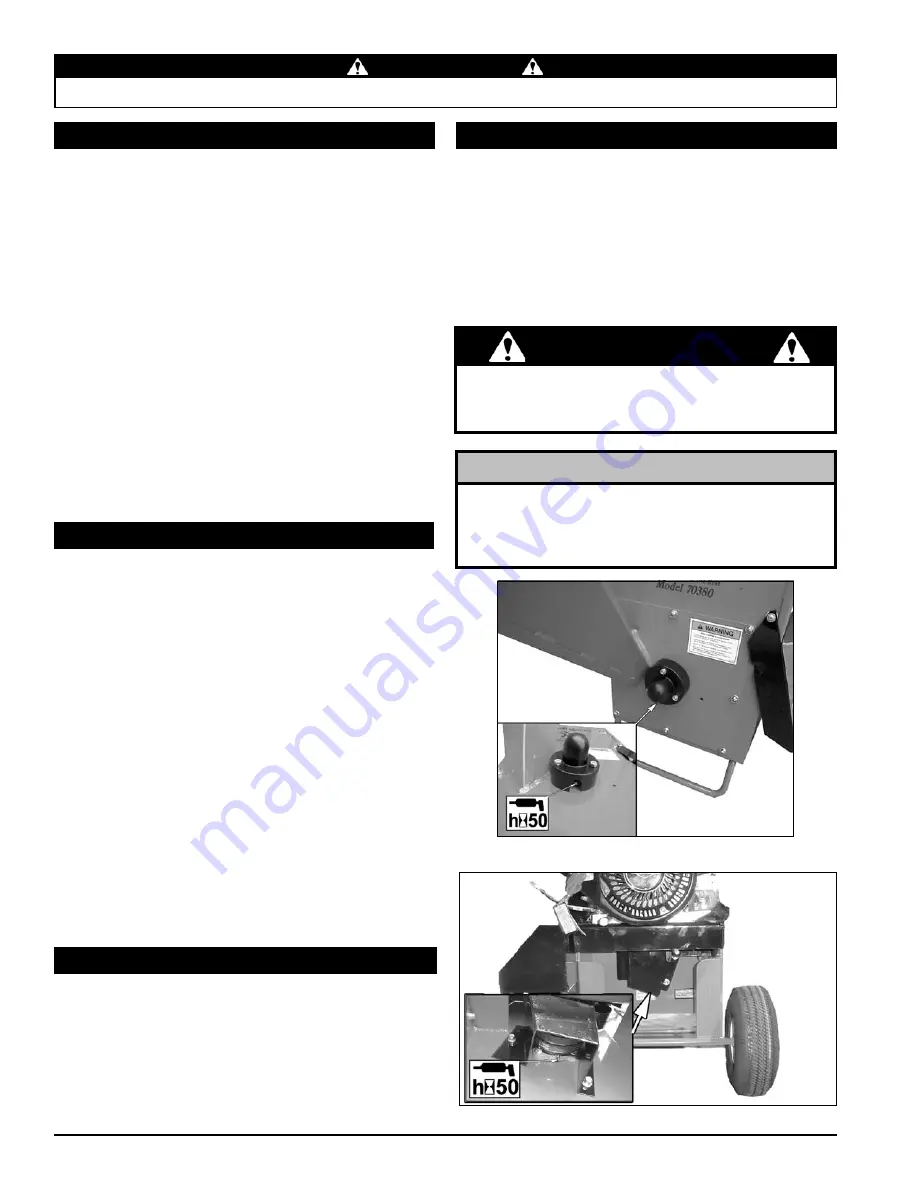
grease the following points every 50 hours of operating
time:
Remove the upper shield, upper belt guide and lower
1.
belt guard.
Remove idler pulley.
2.
Slip the drive belt off the belt pulleys.
3.
Inspect pulleys for wear. Replace the pulleys if they
4.
are cracked or worn so that the belt contact area is
not smooth and flat.
Place the new belt over pulleys. Do not force or pry the
5.
belt over pulleys as this may cause cord breakage.
Reinstall the idler pulley.
6.
Check alignment (Section 5.10).
7.
Replace all shields, guides and guards.
8.
Check the condition of the drive belt annually or after every
25 hours of operating, whichever comes first. If the belt is
cracked, frayed, or worn, replace it. To replace or adjust
drive belt, proceed as follows:
Figure 5.5 - Chute Side Bearing
Figure 5.6 - Engine Side Bearing
Chute side bearing (Figure 5.5).
1.
Engine side bearing (Figure 5.6).
2.
Remove discharge door/shield, screen and rotor shaft
1.
end cap.
loosen the set screws on the lock collar securing the
2.
chute side bearing on the rotor shaft.
using a punch and hammer, tap the lock collar in
3.
the opposite direction of normal rotation until loose;
remove lock collar and bearing.
Remove the upper shield, upper belt guide and
4.
lower belt guard to allow access to the engine side
bearing.
Remove the drive belt (Section 5.11).
5.
loosen the set screws holding the belt pulley on the
6.
rotor shaft and remove the pulley.
Repeat steps 2 and 3 on the engine side rotor
7.
bearing.
Remove the bolts securing the chipper chute cover to
8.
the frame and remove chipper chute cover.
Remove rotor.
9.


