5.If the SCART connection is not successful,
connect the microphone.Simply plug the
3.5mm plug of the microphone cable into
the Mic socket on the transmitter (see Fig
5) and then fix the microphone onto the
TV speaker using the Velcro.
6.The transmitter base has a switch that
allows you to switch between stereo and
mono operation. Leave the switch set to
mono.
7.Plug the 12V DC mains power adapter
into a standard electrical power socket,
then plug the power lead into the EchoLink
(IR) TM
charging cradle socket (see g 2).
8.Rotate the volume wheel ON/OFF switch
u n t i l t h e O N / O F F L E D i s o ff o n t h
e receiver and place the receiver on
the charging base.
9.When charging the charge LED on
the receiver will be red, when fully
charged t h e c h a r g e L E D w i l l t u r n t
o g r e e n . R e m o v e f r o m b a s e a n d f
u l l y i n s e r t the Headset or Neckloop
plug into the receiver phone jack .
10.Put on Headset or Neckloop, if you are using
the Neckloop, set your hearing aids to the
“T” setting. Ensure the volume is set to zero
then adjust the volume to a comfortable
listening level using the yellow on/off volume
wheel. (the ON/ OFF LED will be GREEN).
6
Fig 5
Содержание EchoLink IR
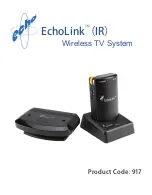
Страница 1: ...EchoLink IR Wireless TV System TM Product Code 917...
Страница 7: ...Fig 3 Fig 4 5...
Страница 14: ......
Страница 15: ......


