background image

6

Using The ECHO-TOUCH Controller

FIRST TIME USE & CONTROLLER SETUP

  Before the controller will function properly, it must be matched to the type of 

system you have. The ECHO-TOUCH is compatible with many different sys-

tems so please follow these steps to configure it for yours:

1)

 Press the 

HOME

 button to turn on the controller. 

2)

 Tap the screen to see the control icons

3)

 Press the 

UP ARROW

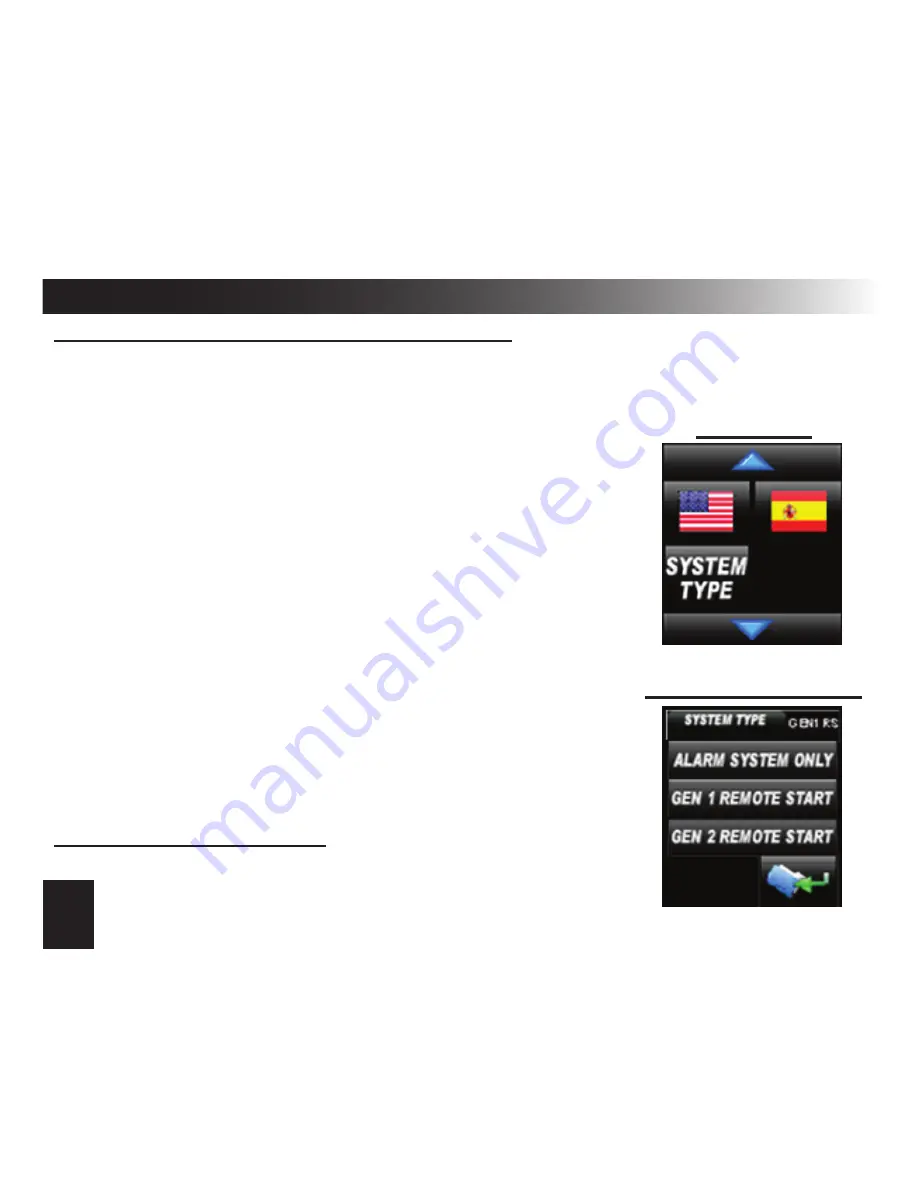
 once until you see SCREEN  

  6 (pictured to the right).

4)

 Press the 

SYSTEM TYPE

 button

5)

 Select one of the following options:

Alarm System Only

: Use this setting for systems with-

out a built-in remote start option.

GEN 1 Remote Start

: Use this setting if you press 

LOCK+UNLOCK to activate your remote starter.

GEN 2 Remote Start

: Use this setting if you press the 

“|||” button or a single dedicated “START” button to 

activate your remote starter.

6)

 Press the “FOLDER” button to save the setting.

SCREEN 6

System Type Select

LANGUAGE SELECTION

Go to SCREEN 6 and choose: American flag = 

ENGLISH 


             Spanish flag = 

SPANISH

Содержание 160

Страница 1: ...1 THIS IS A TEMPORARY COVER THE FINAL COVER IS IN A SEPARATE FILE OWNER S INSTALLATION GUIDE TOUCH SCREEN COLOR 2 WAY UPGRADE KIT...

Страница 2: ...ehicle name 12 Selecting car1 or car2 13 Selecting the vehicle image 13 Programming The Controller Options 14 Selecting button beep melody vibrate modes 14 Clock time options overview 15 Setting the t...

Страница 3: ...is recommended to fully charge the controller before use Step 1 Locate Remove the security system s Echo port jumper connector it has a Red wire loop Step 3 Program the Echo controller and the origina...

Страница 4: ...splays all controller function buttons as well as the status of your system 3 Home Button This wakes up the controller when the screen is off and returns you back to the status screen 4 Charger Port T...

Страница 5: ...ion Mode Indicator Lock Unlock Indicator Alarm Trigger Indicator In Range Indicator The controller is powered by a built in rechargeable battery When the battery level indicator shows a low battery pl...

Страница 6: ...once until you see SCREEN 6 pictured to the right 4 Press the SYSTEM TYPE button 5 Select one of the following options Alarm System Only Use this setting for systems with out a built in remote start o...

Страница 7: ...RECEIVING CONFIRMATION FROM YOUR SYSTEM IT WILL PLAY the lock arm animation and voice alert NOTE Pressing lock twice in 5 seconds starts the parking timer The clock will change to 0 00 and start coun...

Страница 8: ...E START Press and release the icon us ing the same method as with the original controller i e 1 or 2 presses etc YOUR SYSTEM SHOULD REACT THE SAME AS WITH YOUR ORIGINAL CONTROLLER UPON RECEIVING CONFI...

Страница 9: ...N FROM YOUR SYSTEM IT WILL PLAY the CHANNEL 3 animation AND voice alert CHANNEL 3 GEN 1 GEN 2 REM START Press and release the CH3 icon using the same method as with the original controller i e 1 or 2...

Страница 10: ...CONTROLLER NOTE The CH3 ICon will not be visible when the controller is set for alarm only under the system Type setting YOUR SYSTEM SHOULD REACT THE SAME AS WITH YOUR ORIGINAL CONTROLLER NOTE The CH3...

Страница 11: ...r original controller i e 1 or 2 presses etc AUX4 is a virtual channel output on the system s data port If used it was config ured by your installer YOUR SYSTEM SHOULD REACT THE SAME AS WITH YOUR ORIG...

Страница 12: ...each vehicle Use the following steps to change vehicle profiles as well as select the vehicle image and name 1 Access SCREEN 3 press the HOME button tap the screen press the down arrow twice 2 Press...

Страница 13: ...to select that profile CAR 1 CAR 2 Selecting the vehicle image You can select a different vehicle image for each vehicle profile if desired The controller is preloaded with 3 different vehicle images...

Страница 14: ...r receives a confirmation or alert from the vehicle s system MELO DY turns on off all audible alerts including voice alerts VIBRATE mode turns on off vibration alert To change these options 1 Access S...

Страница 15: ...am these options you must first access SCREEN 4 by pressing the home button tapping the screen and pressing the DOWN ARROW 3 times SCREEN 4 Clock Format 12 24 Hour Demo Mode See pg 17 Set Time Date Se...

Страница 16: ...r 24 Hour 1 Access SCREEN 4 see page 15 2 Press the TIME FORMAT icon pictured on page 15 to toggle between 12 24 hour formats Setting the alarm clock 1 Access SCREEN 4 see page 15 2 Press the ALARM CL...

Страница 17: ...MO icon pictured on page 15 LCD screen display options overview The LCD screen has two adjustable parameters SCREEN ON TIME and SCREEN BRIGHTNESS Both settings have an effect on battery life So it is...

Страница 18: ...n see page 17 3 Choose any of the 1 5 brightness settings to your liking 4 Press the FOLDER icon to save the setting Setting the screen brightness The controller will store recent alarm trigger events...

Страница 19: ...ARKING TIMER tells you how long you ve been parked in case you are at a parking meter or other parking areas with time restrictions The REMOTE START TIMER tells you how long your engine has been runni...

Страница 20: ...20 THIS IS A TEMPORARY COVER THE FINAL COVER IS IN A SEPARATE FILE...

Отзывы: