background image

EXCEL 50 INSTALLATION INSTRUCTIONS

19

EN1B-0101

Power Supply

The Excel 50 Controller is powered by an external trans-

former.

Transformer requirements for one Excel 50 Controller:

Voltage

24 Vac 

±

20%

Current

3 A, if fully equipped (6 DO's x 0.4 A)
2 A, if current of DO's does not exceed 1.8 A

Power

72 VA, if fully equipped

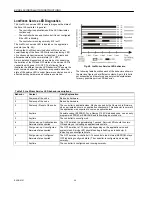
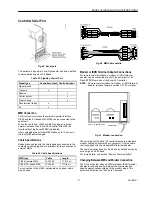
The transformer, already installed in the cabinet, can be used

to supply several controllers, communication devices or peri-

pherals like actuators, etc. if the transformer provides

sufficient power.

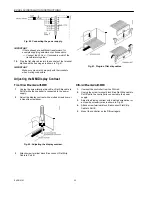
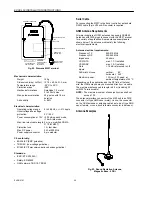
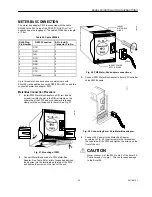
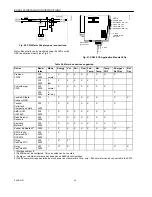
Fig. 33. Transformer example.

CRT-Series

Table 12. Number of controllers connected to one

transformer.

Transformer

Controller Excel 50

CRT 2

1 (1.8A max.)

CRT 6

2

CRT 12

4

Use quick-acting backup fuse 10 A (or automatic H16 or L16)

to protect transformer primary side. On the primary side of

the CRT 2, there is a fusible output of type M 0.315 A (T)

250 V for the purpose of fine fusing.

Table 13. Overview of CRT Series AC/DC current.

Transformer

max. AC current

max. DC current

CRT 2

2 A

0.5 A =

500 mA

CRT 6

6 A

1.3 A = 1300 mA

CRT 12

12 A

2.5 A = 2500 mA

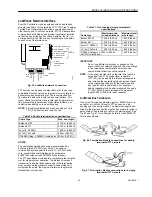
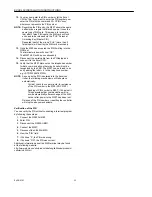
Fig. 34. AC/DC current graphs.

1450 Series

All transformers of the 1450 series are designed for 50/60 Hz

AC and have insulated accessory outputs. The transformers

include built-in fuses, line transient/surge protection and AC

convenience outlets and meet NEC class 2 requirements.

Table 14. 1450 Series transformers.

Part #

1450 7287

Primary Side

Secondary Side

-001

120 Vac

24 Vac, 50 VA

-002

120 Vac

2 x 24 Vac, 40 VA and

100 VA from separate

transformer

-003

120 Vac

24 Vac, 100 VA and

24 Vdc 600 mA

-004

240/220 Vac

24 Vac, 50 VA

-005

240/220 Vac

2 x 24 Vac, 40 VA and

100 VA from separate

transformer

-006

240/220 Vac

24 Vac, 100 VA and

24 Vdc 600 mA

Standard Transformers

Standard commercially available transformers must fulfill the

following specifications:

Table 15. Requirements for Standard Transformers.

Output voltage

Impedance

AC current

24.5 Vac to 25.5 Vac

 1.15 ohms

max. 2 A

24.5 Vac to 25.5 Vac

 0.40 ohms

max. 6 A

24.5 Vac to 25.5 Vac

 0.17 ohms

max. 12 A

Содержание Excel 50

Страница 1: ...EN1B 0101GE51 R1000 Excel 50 CONTROLLER INSTALLATION INSTRUCTIONS...

Страница 2: ...Builder NodeBuilder LonManager LonTalk LonUsers LonPoint Neuron 3120 3150 the Echelon logo the LONMARK logo and the LonUsers logo are trademarks of Echelon Corporation registered in the United States...

Страница 3: ...6 Technical Specification 16 Connection Examples 16 Analog Inputs 17 Technical Description 17 Technical Specification 17 Relay Modules 17 Digital Outputs 18 Technical Description 18 Technical Specific...

Страница 4: ...house Telephone Systems 28 Set up for Limited Communication Speed 29 Troubleshooting 29 TCP IP Dial Up via TCP IP Modem XM500 29 GSM Communication Europe only 29 M20T Safety Precautions 29 Required T...

Страница 5: ...personnel If the unit is modified in any way except by the manu facturer all warranties concerning operation and safety are invalidated Make sure that certain local standards and regulations are obse...

Страница 6: ...sories Version Overview Housing With Man Machine Interface MMI Without MMI Application Module Standalone EPROM Standalone Flash EPROM C Bus Flash EPROM C Bus serial port for Meter Bus Flash EPROM LONW...

Страница 7: ...DULE 2 83 in 72 mm 3 94 in 100 mm APPLICATION MODULE C BUS PORT SERIAL PORT STANDARD DIN CUTOUT FAST ACCESS KEYS BASIC FUNCTION KEYS LCD DISPLAY 1 34 in 34 mm 1 34 in 34 mm 3 34 in 85 mm 3 34 in 85 mm...

Страница 8: ...ps No Inside cabinet DIN rail DIN rail Mounting clips The DIN rail mounting clips are part of the delivery The Accessory kit XL 50 ACC3 for front door mounting must be ordered separately Housing Front...

Страница 9: ...Fig 12 Fig 12 Fixing controller with front door mounting clamps Inside Cabinet without MMI 1 Break plastic tabs covering the slots on the controller for the DIN rail mounting clips using a screwdriver...

Страница 10: ...re 4 Optional Connect the C Bus to the application module as described in chapter C Bus Connection Procedure and or connect the application module serial port to the Meter Bus adapter as described in...

Страница 11: ...ions from the chapter Phoenix Terminal Block Installation Procedure Fig 16 Wiring options The two screw terminal blocks are attached directly to the controller housing The Phoenix terminal blocks are...

Страница 12: ...32 33 34 A01 A02 A03 A04 DI1 DI2 DI3 DI4 AI1 AI2 AI3 AI4 AI5 AI6 AI7 AI8 AGND GND 00000044 10V 5mA REF DI POWER Fig 20 Phoenix Terminal Block B IMPORTANT The numbering of the Phoenix terminals differ...

Страница 13: ...ightning protection Cable Lengths and Cross Sectional Areas Table 6 Signal types and cross sectional areas Cross sectional area Type of signal 300 ft 100 m 550 ft 170 m 1 300 ft 400 m Power supply 24...

Страница 14: ...Vdc If any input is sourced with more than 40 Vdc or negative voltage the other inputs will be influenced This could result in wrong values Sensors and Transducers AGND 00000061 31 33 35 37 39 41 43 4...

Страница 15: ...tage For long cable distances the analog input signal may be sensitive to interference In this case an external relay may also be used for normally closed contacts Firmware Release 2 04 xx L N AGND 00...

Страница 16: ...nd overvoltage up to 24 Vac and 40 Vdc Parameter requirements If the digital inputs are used for normal digital or analog signals the signals have to meet the static and dynamic requirements stated in...

Страница 17: ...nnection examples for the relay modules MCD 3 and MCE 3 are shown here IMPORTANT The external supply of the relay modules must be 24 Vac the same as of the supply of the controllers The analog outputs...

Страница 18: ...tal output is short circuited the fuse will be blown and will interrupt the main power In that case the con troller does not work If the CPU is running into the WATCHDOG caused by a software or hardwa...

Страница 19: ...rview of CRT Series AC DC current Transformer max AC current max DC current CRT 2 2 A 0 5 A 500 mA CRT 6 6 A 1 3 A 1300 mA CRT 12 12 A 2 5 A 2500 mA Fig 34 AC DC current graphs 1450 Series All transfo...

Страница 20: ...tuators etc to the digital output terminals 9 Select one of the transformers of the CRT series or 1450 series from the Table 13 or Table 14 or take a commercially available standard transformer fulfil...

Страница 21: ...the transformers listed in chapter Power Supply page 15 b Connect the chosen transformer directly to the actuator or sensor 7 Connect sensors transducers etc to the digital input terminals 8 Connect v...

Страница 22: ...with MMI 1 Unplug the screw terminal block B or Flat Strip cable to Port B while the controller is connected to the power supply 2 Adjust the display contrast with a slotted screwdriver or a cross tip...

Страница 23: ...D RESERVED C BUS TERMINATION SWITCH 0000060c 4 5 6 Fig 43 C Bus connection and LEDs Up to 30 controllers can communicate with one another and the Excel Building Supervisor PC XBS via the C Bus Instead...

Страница 24: ...0 m For the US the repeater is available either with or without housing In Europe only the version with housing is allowed Table 19 Ordering No for Repeaters Description US Ordering No European Orderi...

Страница 25: ...9D220150 non plenum The FTT specification includes two components that must be met for proper system operation The distance from each transceiver to all other transceivers and to the termination must...

Страница 26: ...t contexts Again this list is not exhaustive and therefore does not provide explanations for every possible service LED behavior Table 22 LONWORKS Service LED behavior descriptions Behavior Context Li...

Страница 27: ...pecifications MMI type Cable Length XI582 remote MMI XW 582 17 ft 5 m XI584 PC based MMI XW 585 17ft 5 m For connection to the XI584 a standard null modem cable may be used Fig 50 MMI Cable details Mo...

Страница 28: ...ction The Excel 50 Controller will automatically detect whether the modem ISDN terminal adapter is initialized in auto answer or manual answer mode and it will set the modem to the manual answer mode...

Страница 29: ...6 Kbaud Due to a special transmission mechanism the effective communication throughput is lower than 9 6 Kbaud however this will be noticeable only when high data volumes are transmitted e g when app...

Страница 30: ...Serial Cable For connecting the M20T to the Excel controller a standard RS232 cable 9 pin V24 sub D sockets is required GSM Antenna Requirements All major suppliers of GSM antennas can supply GSM900 A...

Страница 31: ...ximately 3 meters there should not be any vertical barriers that would block the antenna signal such as doors PCs cupboards etc Select the most suitable antenna Location and mounting limitations may r...

Страница 32: ...otherwise its call will not be recognized by the XBS The M20T can be forced to do so by adding the letter i to the telephone number e g ATDi1234567891234 NOTE As soon as the PIN is entered into the E...

Страница 33: ...he underside of the PW3 and pry downward to loosen clamp until the unit snaps onto the rail See Fig 57 0000108a 1 2 3 DIN RAIL Fig 57 Mounting of PW3 2 Connect Meter Bus devices to PW3 Meter Bus Adapt...

Страница 34: ...ast X X X X X X 300 2400 1 normal X X X X X X X Schlumberger CF50 300 2400 2 ref day X Landis Staefa Sonogyr WSD 300 1 X X X X X X X X Techem Delta tech Kompact and Split 300 2400 1 X X X X X X ABB SV...

Страница 35: ...e value previously displayed will be restored If Time is selected Set the time using the or keys Use the arrow keys to move from field to field Confirm with ENTER Use the CANCEL key to return to the p...

Страница 36: ...d Set the controller number using the or keys Confirm with ENTER IMPORTANT If no controller number is set or if the number shown is not reconfirmed the controller will not go online on the C Bus after...

Страница 37: ...of Remote Trend Buffer Entries is 104 If a new value for Appl Mem Size has not been entered the cursor is at NEXT Confirm with ENTER and continue to the next screen To increase the size of the buffer...

Страница 38: ...il you have reached the configuration screen again Codes which are not allowed have the value 1 instead of the previously entered code Change the codes until all codes are correct You will now come to...

Страница 39: ...NTER to select the value Change the value using the or keys Confirm with ENTER In the case of digital points the following screen is displayed user addr STATE VALUE 0 Press ENTER to select the value C...

Страница 40: ...ll Inc Honeywell Limited Honeywell Limitee Honeywell AG Honeywell Plaza 155 Gordon Baker Road B blinger Stra e 17 Manufacturing P O Box 524 North York Ontario D 71101 Sch naich location certified to M...

Отзывы: