


Chapter 1
10
B. Power Supply Configuration
WARNING
Never enable the 12V without the customer display attached and be
sure to disable the 12V before removing the customer display.
1. Power up the
XPOS855
and hit the
DEL
key to enter the BIOS. When the BIOS
screen appears use the
or
key on your external computer keyboard to select
Advanced
. Use the arrow keys of the external keyboard to select
IO Configuration
,
and then press the
ENTER
key.
2. The screen below will appear. Use the
or
key to scroll the screen and
highlight the
COM6 RI/12V/15V,
and then press the
Enter
key.
Содержание XPOS85-5W-D525
Страница 1: ...User s Manual XPOS85 5W D525 XPOS84 5B D525...
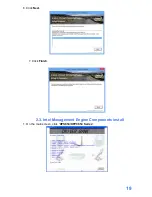
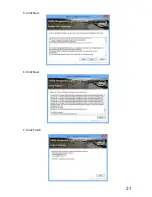
Страница 19: ...18 3 Click Next 4 Read the License Agreement carefully and click Yes 5 Click Next...
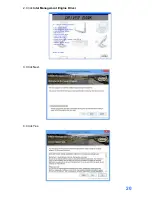
Страница 21: ...20 2 Click Intel Management Engine Driver 3 Click Next 4 Click Yes...
Страница 22: ...21 5 Click Next 6 Click Next 7 Click Finish...
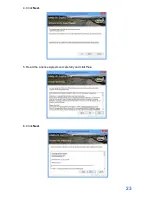
Страница 24: ...23 4 Click Next 5 Read the License Agreement carefully and click Yes 6 Click Next...
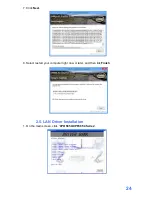
Страница 27: ...26 4 Click Finish 2 6 Audio Driver Installation 1 The driver is preparing to install...
Страница 28: ...27 2 Click Next 3 Driver installation in progress...
Страница 30: ...29 3 The procedure starts 4 Click Next 5 Check the Install PS 2 interface driver box and click Next...
Страница 32: ...31 10 Click Next 11 The driver starts to install 12 Click OK...
Страница 34: ...33 Click Next button to install Cash drawer Drver Click Next button...
Страница 36: ...35 Please wait the OPOS CCO v 1 13 utility initial Click Next button Click Next button...
Страница 37: ...36 Click Next button Click Next button...
Страница 38: ...37 Click Next Click the Next button to begin the installation...
Страница 39: ...38 Please wait the install progress bar finish Click the Finish button to exit the installer...
Страница 45: ...44 Cash Drawer Control Status Address Value Open 280H Bit 4 0 Close 280H Bit 4 1 Read Status 281H Bit 0 0 1...
Страница 46: ...45 4 5 Specification...