4
– CLA Series
CLA Series –
5
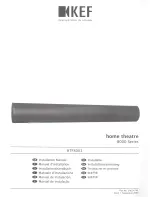
3. INSTALLATION
The two support brackets provided can be used for installing the sound column on the
wall or ceiling. Use the supplied bolts, plain washers and split lock washers to bolt the
brackets to the loudspeakers.
WARNING:
Make sure that the loudspeaker is installed in a stable and secure
way in order to avoid any conditions that may be dangerous for persons or structures:
• Check to make sure that the support surface (e.g., wall, etc.) has the necessary
mechanical characteristics to support the weight of the loudspeaker without the
danger of it falling.
• Always use support elements suitable for the material of the wall that will support
the loudspeaker (e.g., screw anchors for bricks, screw anchors for cement, etc.).
• Before suspending the loudspeaker, carefully check all the components to be used to
make sure there is no damage, deformation, corrosion and/or missing or damaged
parts that could reduce the safety of the installation.
•
Consult a professional rigger or structural engineer prior to suspending loudspeakers
from a structure not intended for that use. Always know the working load limit of the
structure supporting the loudspeaker. Always make sure that the rigging hardware
minimum rating is at least five times the actual load.
Installation precautions
• Use speaker cables with an adequate cross-section (gauge). The greater the distance
between the amplifier and loudspeaker, the larger the connection cable cross-section
should be.
• To prevent inductive phenomena causing humming or distortion, the speaker cables
should not be run together with electrical energy conductors, microphone cables,
or line-level audio lines. Use speaker cables that have markings to distinguish the
polarity, such as insulation or conductors of different colors.
• Avoid installing the loudspeaker in places exposed to harsh weather conditions.