

3. INSTALLATION
• Use the provided MAC address label to identify the card.
• Connect the ETHERNET cable.
• Check the ETHERNET port indications.
• Wait until the Data LED flashes regularly (approx. three minutes), indicating that card start-up has terminated correctly.
Note: You can set the parameters via Service port even if the network is not connected. At connection, the card will restart keeping the settings.
4. IP SETTINGS
Once the card has started, proceed as indicated below:
• Connect the serial cable to card’s service port and PC’s COM port (shipped with the card)
• Use a terminal emulator such as PuTTY with these settings:
"Echo typed characters locally" option: disabled
• Type admin.
The main configuration menu is displayed:
Your network is equipped with a BOOTP/DHCP server (default)
The card is configured by default with this service enabled. No manual configuration is required. The IP parameters are
automatically collected by the card.
From the main configuration menu: (see above)
• Press the 2 key (Network configuration).
• Press the 1 key (Read Network settings).
The settings supplied by the server are displayed:
• Note the IP address.
• Press the 0 key (Exit).
Press the 0 key (Exit).
-------------------------------------------------------------------------------------
EAT
O
N
NETW
O
R
K
MANA
G
EMENT
CARD
-------------------------------------------------------------------------------------
1
:
Reset
2
:
Network
configuration
3
:
Set
Login
Password
to
Default
4
:
Return
to
Default
Configuration
0
:
Exit
Network
configuration
:
MAC
address
:
00:20:
85
:
F
D:1C:0
7
Mode
:
DHCP
IP
address
:
xxx.xxx.xxx.1
8
Subnet
mask
:
2
55
.2
55
.2
48
.0
G
ateway
:
xxx.xxx.xxx.1
1
:
Read
Network
settings
2
:
Modify
Network
settings
3
:
Set
ethernet
speed
0
:
Exit
F
or
each
of
the
following
questions,
you
can
press
"
Return
"
to
select
the
value
shown
in
braces,
or
you
can
enter
a
new
value.
Should
this
target
obtain
IP
settings
from
the
network
?[
N
]
N
Static
IP
address
[
1
9
2.1
68
.1.2
]?
1
9
2.1
68
.1.
8
2
Subnet
mask
IP
address
[
2
55
.2
55
.0.0
]?
2
55
.2
55
.2
55
.0
G
ateway
address
IP
address
[
0.0.0.0
]?
1
9
2.1
68
.1.1
Done
Bits per second
Data bits
Stop bits
Parity
Flow control
96
00
8
1
None
None
Your network is not equipped with a BOOTP/DHCP server (manual configuration is required)
To set the network configuration, use terminal emulation (see above)
From the main configuration menu:
• Press the 2 key (Network configuration).
• Press the 2 key (Modify Network settings).
• Follow the instructions and enter the IP parameters:
Wait until "Done" is displayed, indicating that the IP parameters have been saved.
• Press the 0 key (Exit).
• Press the 1 key (Reset).
• Press the 2 key (Restart).
The card restarts with the new IP settings (after approx. one minute).
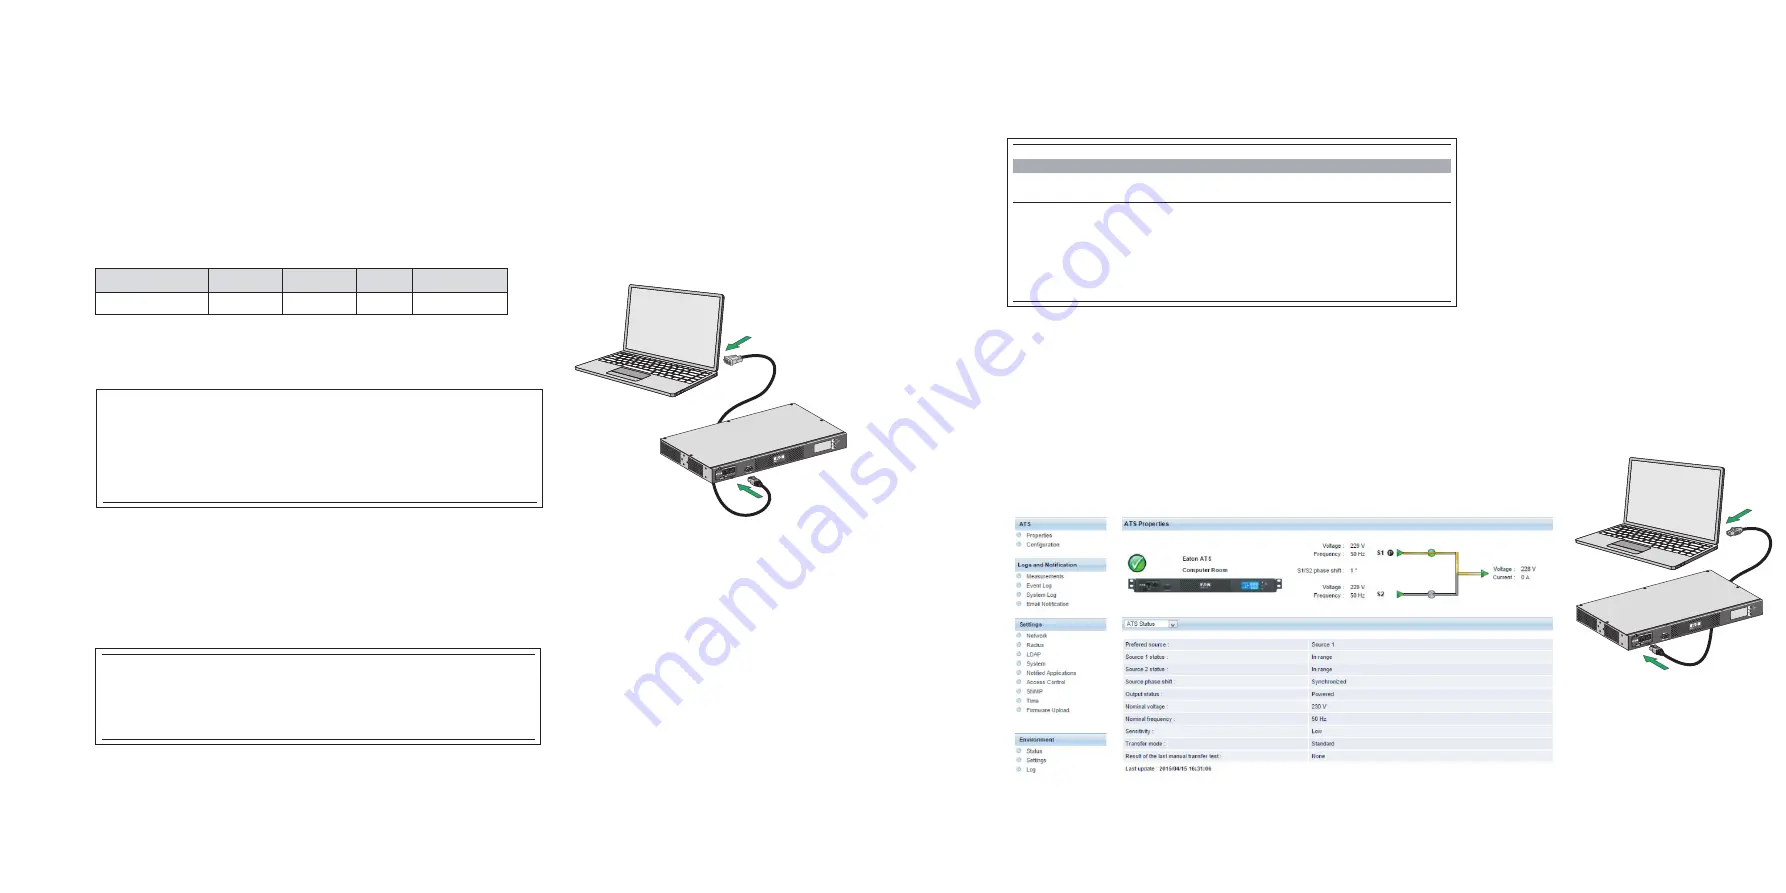
5. ACCESS TO SUPERVISION
To check whether the Network Card-MS is operational after installation and IP settings, please proceed as follows.
• Run a browser
• Enter in the address bar: http://IP address/ (e.g. http://192.168.1.82)
• The home page is displayed
• Set the time by clicking the Settings >> Time command.
• Continue configuration via the sections in the Settings menu.


