background image

2

Montage- und Betriebsanleitung GuideLed 10011...11026 LED CG-S   40071860108 (F)   www.eaton.com

DISCLAIMER OF WARRANTIES AND LIMITATION OF LIABILITY

The information, recommendations, descriptions and safety notations in this document are based on Eaton 

Corporation’s (“Eaton”) experience and judgment and may not cover all contingencies. If further informa-

tion is required, an Eaton sales office should be consulted. Sale of the product shown in this literature 

is subject to the terms and conditions outlined in appropriate Eaton selling policies or other contractual 

agreement between Eaton and the purchaser.

THERE ARE NO UNDERSTANDINGS, AGREEMENTS, WARRANTIES, EXPRESSED OR IMPLIED, INCLUDING 

WARRANTIES OF FITNESS FOR A PARTICULAR PURPOSE OR MERCHANTABILITY, OTHER THAN THOSE 

SPECIFICALLY SET OUT IN ANY EXISTING CONTRACT BETWEEN THE PARTIES. ANY SUCH CONTRACT 

STATES THE ENTIRE OBLIGATION OF EATON. THE CONTENTS OF THIS DOCUMENT SHALL NOT BECOME 

PART OF OR MODIFY ANY CONTRACT BETWEEN THE PARTIES. 

In no event will Eaton be responsible to the purchaser or user in contract, in tort (including negligence), 

strict liability or other-wise for any special, indirect, incidental or consequential damage or loss whatsoev-

er, including but not limited to damage or loss of use of equipment, plant or power system, cost of capital, 

loss of power, additional expenses in the use of existing power facilities, or claims against the purchaser 

or user by its customers resulting from the use of the information, recommendations and descriptions con-

tained herein. The information contained in this manual is subject to change without notice. 

Содержание GuideLed Series

Страница 1: ...1 11026 LED CG S Mounting and Operating Instructions GuideLed 10011 11026 LED CG S Zielgruppe Elektrofachkraft Target group Skilled electricians Verwendungszweck Notbeleuchtung nicht f r privaten Gebr...

Страница 2: ...FOR A PARTICULAR PURPOSE OR MERCHANTABILITY OTHER THAN THOSE SPECIFICALLY SET OUT IN ANY EXISTING CONTRACT BETWEEN THE PARTIES ANY SUCH CONTRACT STATES THE ENTIRE OBLIGATION OF EATON THE CONTENTS OF...

Страница 3: ...ungsbereich 5 3 Ersatzteile 7 4 Umr stung 8 5 Technische Daten 11 6 Inspektion Wartung Instandhaltung 11 7 Entsorgung Recycling 11 Table of Contents 1 Conformity with standards 4 2 Brief Description S...

Страница 4: ...and flawless condition Only genuine CEAG spare parts may be used for replacement and repair When working on the emergency luminaire the system must first be blocked battery operation must be interrupt...

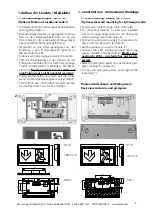
Страница 5: ...nd der Piktogrammscheibe 8 mit dem Versorgungs modul V CG SLS 28 7 verbinden 2er Steck klemme Bipolarer Anschluss der LEDs auf eine Polung muss nicht geachtet werden Piktogrammscheibe von oben auf die...

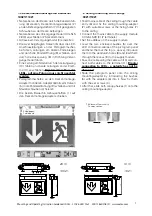
Страница 6: ...uss nicht geachtet werden Piktogrammscheibe von oben auf den Wand rahmen aufschieben bis H ckchen 6 einras tet Zum ffnen bzw L sen der Piktogrammschei be mit einem d nnen Gegenstand z B Nagel gegen da...

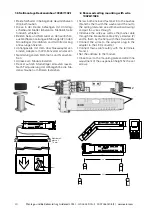
Страница 7: ...eleinf hrung 9 schieben und mit Madenschrauben 4 fixieren Die beiden Baldachin Geh useh lften 1 auf den Deckenmontage Adapter schieben Feed mains cable of the ceiling trough the cable entry 6 and fix...

Страница 8: ...fixieren LED Anschlussleitungen an Versorgungsmodul anschlie en Bipolarer Anschluss der LEDs auf eine Polung muss nicht geachtet werden Beide Baldachin Geh use 1 auf den Decken montage Adapter schieb...

Страница 9: ...Abl ngen Aderendh lse anbringen und an das Versorgungsmodul an schlie en Bipolarer Anschluss der LEDs auf eine Polung muss nicht geachtet werden Abschlie end die beiden Baldachin Geh use auf den Decke...

Страница 10: ...leitung an den Klemmen L und N anschlie en Adresse am Modul einstellen Deckel auf den Modultr ger einrasten lassen Nach Feinjustierung der Abh ngeh he die Ma denschrauben am Bolzen festziehen Screw bo...

Страница 11: ...s Versorgungsmodul anschlie en Die Piktogrammscheibe mit der Blende auf den Deckeneinbau setzen Achtung keine Leitungen einklemmen mit Schrauben 3 die Blende befestigen und die Abdeckpl tt chen 9 auf...

Страница 12: ...euchtungsanlagen nach EN 50 172 DIN VDE 0100 718 und E DIN VDE 0108 100 geeignet Die besondere Schalt und berwachungsfunktion wird nur mit CEAG CG S Technologie erm g licht 4 1 Montage Eine genaue Bes...

Страница 13: ...anschlussklemmen Terminals Steckklemme 2 5 mm2 plug in terminal 2 5 mm2 Gewicht Weight 10011 CG S 0 47kg 10012 CG S 0 41kg 10013 CG S 0 41kg 10021 CG S 0 39kg 10022 CG S 0 49kg 10023 CG S 0 54kg 10024...

Страница 14: ...14 Montage und Betriebsanleitung GuideLed 10011 11026 LED CG S 40071860108 F www eaton com...

Страница 15: ...15 Mounting and Operating Instruction GuideLed 10011 11026 LED CG S 40071860108 F www eaton com...

Страница 16: ...rf llen Wir sind darauf fokussiert stets die richtige L sung f r jede Anwendung zu finden Dabei erwarten Entscheidungstr ger mehr als lediglich innovative Produkte Unternehmen wenden sich an Eaton wei...

Отзывы: