background image

Battery Upgrade Instructions for 9355 (20–30 kVA)

—Rev 01

7

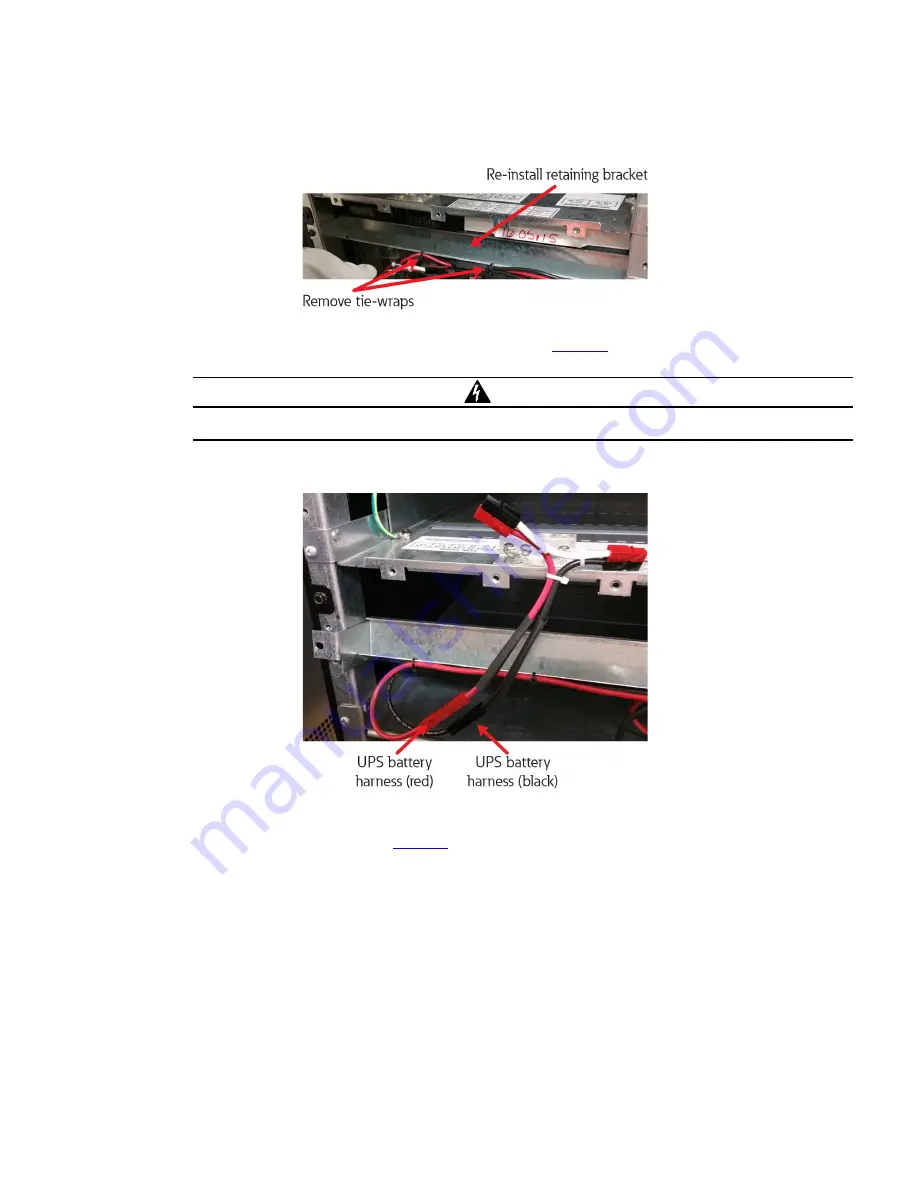
Figure 10. Re-install Battery Retaining Bracket and Remove Tie-Wraps

11. Install the adapter on the UPS side battery harness (see

Figure 11

). Connect the adapter to the UPS battery

harness (red–to–red and black–to–black).

WARNING

It is critical that these connections are correct. A harmful arc flash will occur if these connections are crossed.

Figure 11. Install Battery Harness Adapter

12. Slide a heat shrink tubing and center it over the connectors. Use tie-wraps at each end of the heat shrink

tubing to hold it in place (see

Figure 12

).

Battery Upgrade Procedure

Содержание Eaton series

Страница 1: ...Revision 01 Battery Upgrade Instructions For use with the Eaton 9355 20 30 kVA Eaton Series...

Страница 2: ...his manual contains important instructions that you should follow during installation and maintenance of the UPS and batteries Please read all instructions before operating the equipment and save this...

Страница 3: ...20 30 kVA Rev 01 iii T Ta ab blle e o of f C Co on nt te en nt ts s 1 1 I In nt tr ro od du uc ct tiio on n 1 1 2 2 B Ba at tt te er ry y U Up pg gr ra ad de e P Pr ro oc ce ed du ur re e 3 3 2 1 Com...

Страница 4: ...iv Battery Upgrade Instructions for 9355 20 30 kVA Rev 01 Table of Contents...

Страница 5: ...existing two row battery tray assembly with two single row battery assemblies with two circuit connectors Along with an adapter harness it is permanently installed in the UPS to convert from single ci...

Страница 6: ...the most positive connection while the black is the negative connection The white connector presents the middle point in the single tray configuration where 108V is measured from the white to the red...

Страница 7: ...erformed by qualified personnel 1 Remove the 9355 20 30kVA front door see Figure 4 Figure 4 Remove the UPS Front Door IMPORTANT In the event of input power failure while performing this procedure batt...

Страница 8: ...and Remove the Battery Dead Front 5 As shown in Figure 6 disconnect the positive red and negative black battery connectors for all the battery trays NOTE If an external battery cabinet is attached it...

Страница 9: ...nected before proceeding 6 Remove the two M5 bolts that secure the retaining bracket on the battery shelf for the battery tray to be replaced see Figure 7 Figure 7 Remove the Battery Retaining Bracket...

Страница 10: ...ys are now side by side with one old dual row tray on the same shelf forming two battery strings see Figure 9 Figure 9 Slide Two Single Row Battery Trays into Place 9 Re install the battery retaining...

Страница 11: ...adapter to the UPS battery harness red to red and black to black WARNING It is critical that these connections are correct A harmful arc flash will occur if these connections are crossed Figure 11 In...

Страница 12: ...e 13 Figure 13 Anchor Battery Harness to Battery Retaining Bracket CAUTION Observe proper precautions when verifying polarity It is recommended that polarity checks are performed by qualified personne...

Страница 13: ...first then make all black connections 17 Re install the battery cover panel dead front using the thirteen M5 bolts removed in Step 4 NOTE If an external battery cabinet is attached reconnect it to the...

Страница 14: ...01 01...

Отзывы: