


Easytech s.r.l.
– Genu Iso/Plus User’s Manual
rev. C
Pag.
34
di
97
1 - ENABLE/DISABLE LOCK
–
Enable/Disable software blocks at flexion/extension
angle.
2
–
SET ANGLES AND LIMIT (Soft stop) - Use this option to set a limitation for the
limb range. Setting limit angles during the exercise ensures that the limb moves only
within the set arc, as if there were physical stops.
In order to correctly position the limit angles, it is first necessary to set the correct
limb angle:
➢
Move the limb as far as the flexion limit angle and press button Auto next to
the option for setting the flexion limit angle.
➢
Move the limb as far as the extension limit angle and press button Auto next
to the option for setting the extension limit angle.
3 - ENABLE/DISABLE ACTIVE ROM (Range of movement)
–
Use this option to limit
the range used to process the exercise data.
4 - ENABLE/DISABLE TORQUE TARGET
–
Use this option to display on the chart
during the exercise a limit that the patient can refer to as the target to be reached.
By default, this corresponds to the maximum value of the previous exercise.
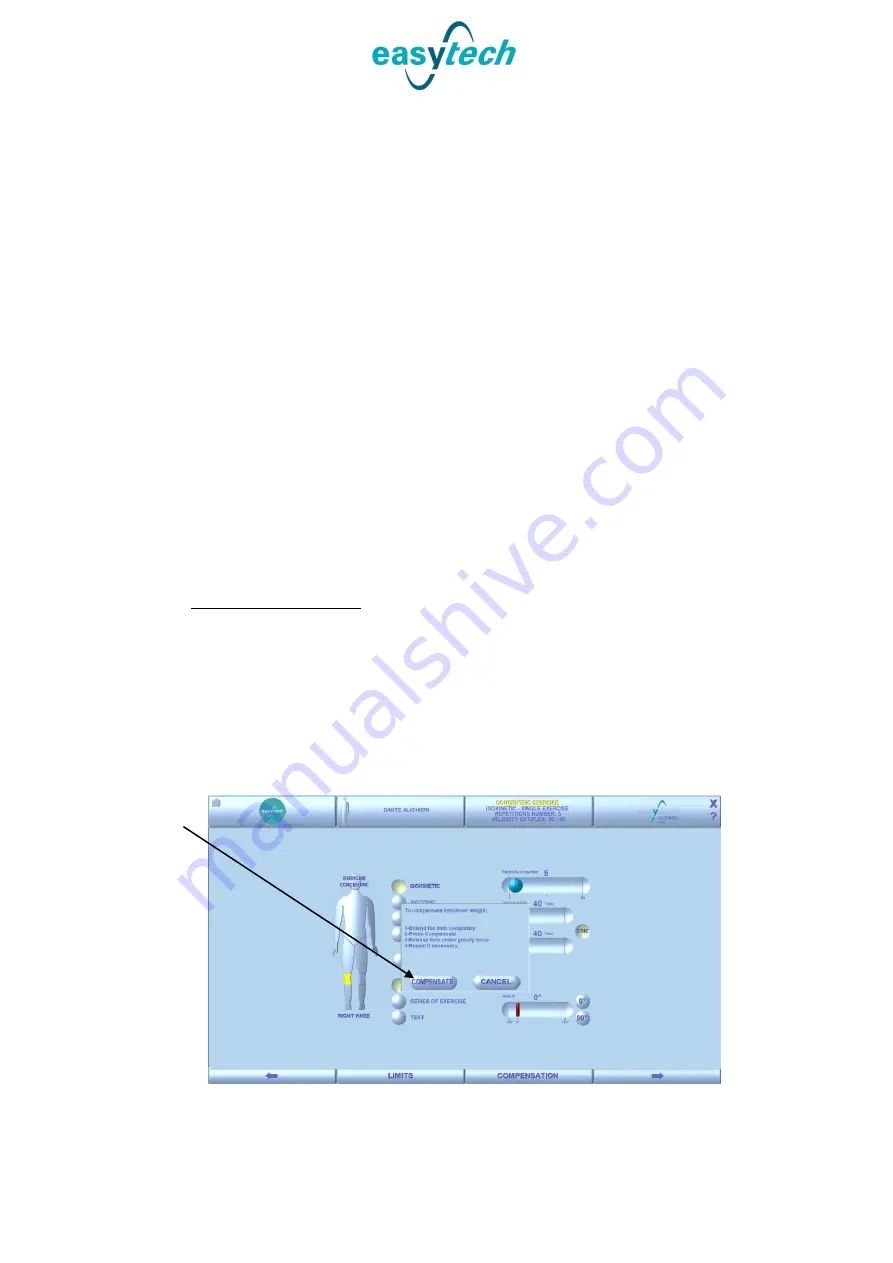
5.3.1.3
Gravity compensation
This operation compensates the weight of the lever and limb being treated and
ensures that the results are accurate.
To access to the gravity compensation window from the limit settings screen, press
the BACK arrow and thus return to the main screen of the concentric exercise. From
here it is possible to access the COMPENSATION tab through the relative button.
This will open the following window:
1
Содержание Isokinetic Genu Iso
Страница 65: ...Easytech s r l Genu Iso Plus User s Manual rev C Pag 65 di 97 ...
Страница 84: ...Easytech s r l Genu Iso Plus User s Manual rev C Pag 84 di 97 ...
Страница 95: ......
Страница 96: ......


