


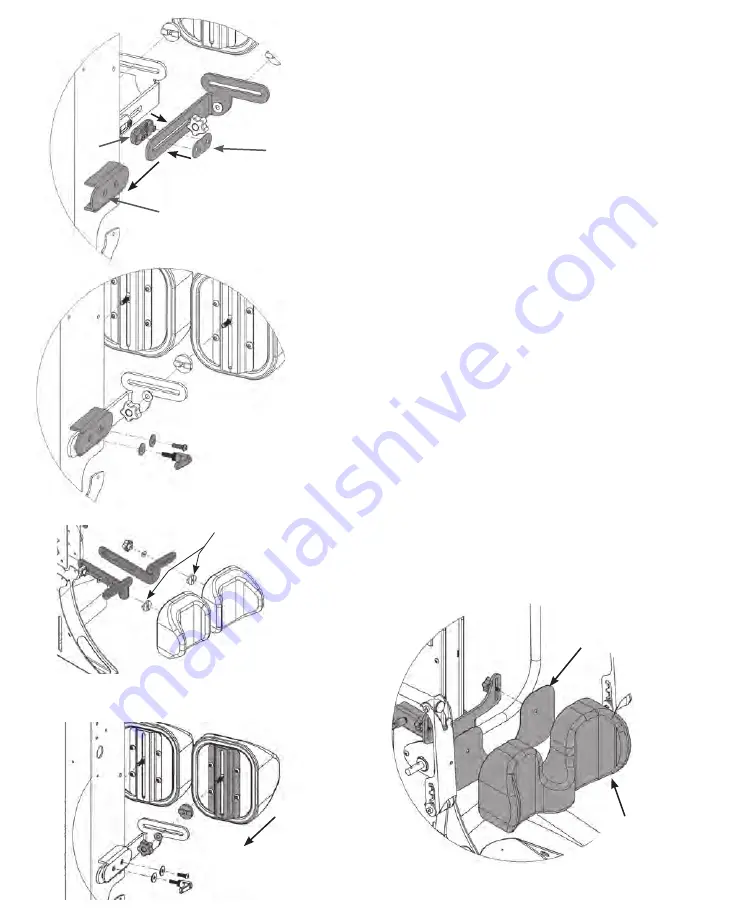
FIG . 6- Remove all hardware from the knee bracket. Make
sure the 2 nuts are in the back side of the clamp, place the
clamp into the knee slot on the unit. Place the knee
bracket and the spacer into the slot making sure the
spacer is between the knee bracket and knee slot, lining up
with the clamp.
Note the curve of the knee bracket is up.
FIG . 7- Place washer onto the ratchet handle insert handle
through the knee bracket, spacer and into the clamp.
Place washer onto the bolt, insert bolt through the knee
bracket, spacer and into the clamp. Tighten snug, but allow
knee assembly to slide freely.
FIG . 8- For standard knee pads, remove the three bolts from
the knee pad, making sure the plastic insert stays in place.
Place the knee pad onto the bracket and insert top two bolts
before inserting the middle bolt. Tighten
securely.
For independent knee pads, place the knee pads onto the
knee pad brackets, tighten knobs securely. The narrow end
of the slotted washer for the knee pads will be inserted into
the bracket.
REFERENCE DRAWING ON P . 11 .
FIG. 6
FIG. 8
Spacer
Clamp
FIG. 7
FIG.8
Knee Pad
Plastic Insert
Slotted Washers
Knee Slot
4
Standard
Knee Pads
Independent
Knee Pads
Содержание StrapStand
Страница 1: ...Please ensure the Assembly Manual stays with the unit at all times Assembly Manual P2100 1...
Страница 14: ...StrapStand Options Parts Detail 11...
Страница 15: ...12...


