Easypix goXtreem REEF Скачать руководство пользователя страница 16

 
Manual transfer of photo and video files to computer 


1. Turn on the camera,   
2. Select playback mode 
3. Connect the camera to a computer via a USB cable,   
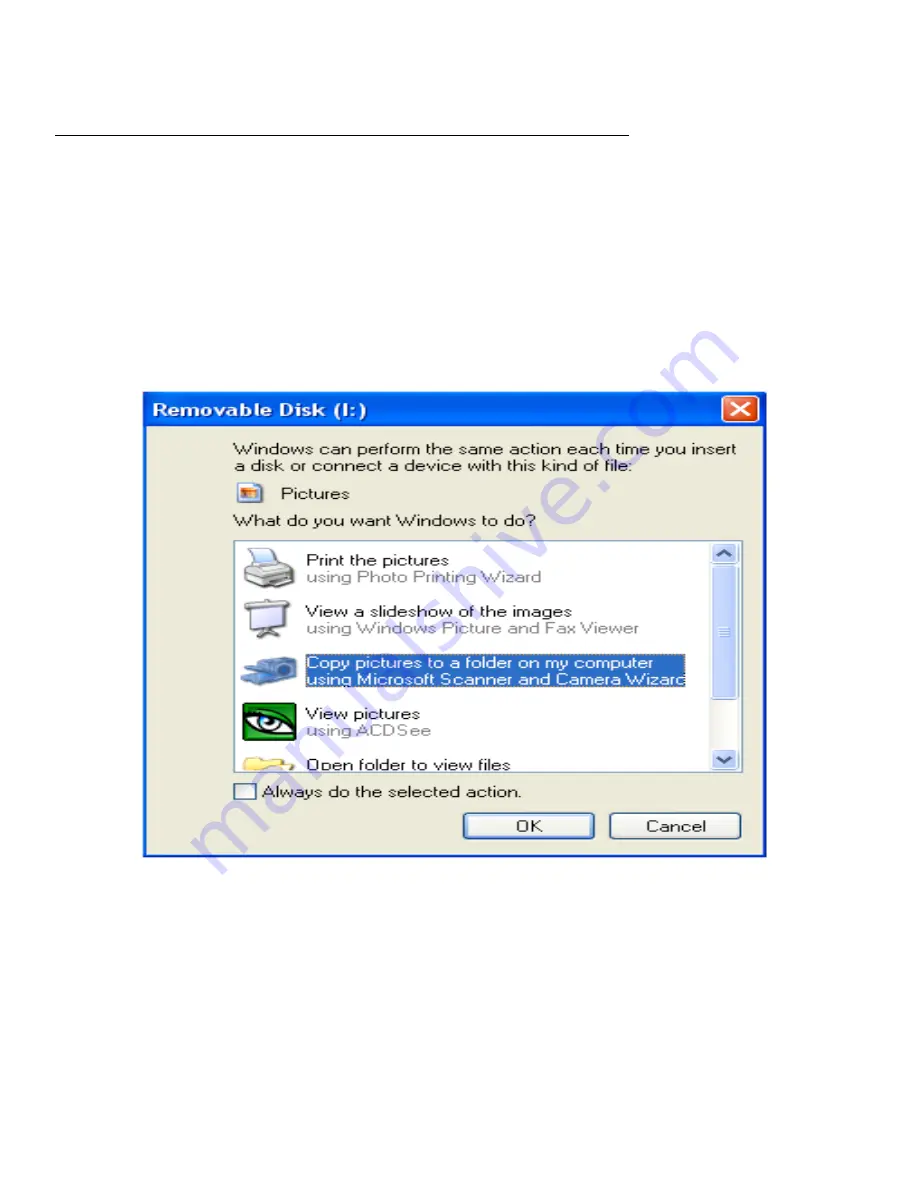
4. The removable disc image will pop up on the screen as shown below 
5. Click the removable disk to view the photos, which will be stored in the sub file of DICM. 
6. You can the copy and paste the photos to your chosen folder or location. 


Содержание goXtreem REEF

Страница 1: ...User manual ...

Страница 2: ...x480 QVGA 320x240 Max 24M pixels Convenient dual screens 1 8 inch front screen 2 7 inch TFT rear screen Face detection image stabilization web cam function various scene modes 4x digital zoom High speed continuous shooting Built in speaker microphone Micro SD card support up to 32GB not included Built in LED flash ...

Страница 3: ...our camera before first use 1 Slide the battery cover on the bottom of the camera 2 Please install the battery in a right direction 3 Close battery cover Note Please remove the battery when you know the camera will not be used for extended periods Installing lithium battery ...

Страница 4: ... available disk space USB Interface Recommended display resolution 1024x768 resolutions 16 bit color or higher Computer requirements Windows Vista If using Windows Vista your computer should have the following minimum requirements in order to transfer photos and videos 800 MHZ processor and 521MB system memory 20GB Hard disk with at least 15GB available space Support for SVGA graphics USB Interfac...

Страница 5: ...Camera overview ...

Страница 6: ...lash On Auto Flash Flash Off Anti Red Eye Flashing Light Mode Photo Playback video Self timer 10s Self timer 5s Self timer 2s Self timer off Digital Zoom 1 00X 4 00X Protect Protect Anti shake Anti shake On Anti Shake Off Scenes Auto Night Portrait Night scene Portrait Landscape Beach High Sensitivity ...

Страница 7: ...irmly and it will pop out of the memory card slot Note 1 All photos will saved on the Micro SD card once the Micro SD card installed 2 Formatting will delete all data on the memory card 3 Please do not remove the Micro SD card when formatting as this may damage the card Turning on the camera Press the power key on the top of camera to turn on the camera The LCD screen will activate to confirm the ...

Страница 8: ...tton to zoom out Built in Flash Press the Flash key to activate the various flash modes The icon indicates Flash Off The flash will not operate when this mode is selected The icon indicates Auto Flash mode and the camera will activate the flash automatically if required in low light conditions The icon indicates Flash Mode and the flash will operate every time a photo is taken The icon indicates A...

Страница 9: ...0x4200 20M 5200x3900 18M 4896X3672 16M 4608x3456 14M 4416x3312 12M 4000x3000 10M 3648x2736 8M 3264x2448 7M HD 3648x2048 7M 3072x2304 5M 2592x1944 3M 2048x1536 2MHD 1920x1080 2M 1600x1200 VGA 640X480 4 Press the OK key to confirm your selection The photo size icon will be displayed on the LCD screen Anti shake Your camera features an anti shake function to deliver better photo quality when a tripod...

Страница 10: ... Press the up down keys to select continuous shooting on off 4 Press OK key to confirm your selection Please Note When using the Continuous Shooting function the photo resolution automatically changes to VGA Self timer 1 Press the Menu key 2 Press the left right keys to select the self timer icon 3 Press the up down keys to review the self timer options 4 Press the OK key to confirm your selection...

Страница 11: ...der the settings menu 2 Press the OK key to enter the ISO sub menu 3 Press the up down keys to select the ISO Auto 100 200 400 4 Press the menu key to save The relative icon will be displayed on the LCD screen White balance This option adjusts the photo color and can be adjusted according to light source 1 Press the up down keys to select White Balance option under setting menu 2 Press the OK key ...

Страница 12: ...d fashioned Red Green Blue Sun set Warm Cold 4 Press the OK key to confirm and save your selection Auto shut down Please Note The default setting for auto shut down for camera is 3 minutes This can be adjusted as follows 1 Press the up down key to select the Auto shut down option 2 Press the OK key to enter the auto shut down sub menu 3 Press the up down keys to select 1min 3mins 5mins Off 4 Press...

Страница 13: ...y default PLEASE NOTE all user defined settings will be lost unless they match some of the default settings 1 Press the up down keys to select factory default option under settings menu 2 Press the OK key to enter the sub menu 3 Press the up down keys to select factory default or Cancel 4 If you select Cancel press the OK key to confirm the camera will revert to photo mode 5 Alternatively select Y...

Страница 14: ...tate protect delete cut slide play or print Rotate 1 Press the Menu key in playback mode 2 Press the left right keys to select the Rotate icon 3 Press the up down keys to select 90º 180º 270º cancel 4 Press the OK key to confirm your selection Slide Show Playback You can choose how long you want each photo to be displayed on the screen when using the preview mode Option in seconds 3s 5s 10s Protec...

Страница 15: ... Press the OK key to delete Print Photos can be printed wirelessly to any Pict Bridge enabled printer 1 Select a photo to be printed 2 Press the Menu key 3 Press the left right keys to select the Print icon 4 Press the up down keys to select Print Cancel 5 Press the OK key to enter the print option 6 Should wireless printing fail please connect the camera to your printer via a USB cable Play Video...

Страница 16: ...ck mode 3 Connect the camera to a computer via a USB cable 4 The removable disc image will pop up on the screen as shown below 5 Click the removable disk to view the photos which will be stored in the sub file of DICM 6 You can the copy and paste the photos to your chosen folder or location ...

Страница 17: ...External memory Micro SD cards max up to 32 GB not included Digital zoom 4x EV 3 3 White balance Auto Sunny Cloudy Tungsten Lamp Fluorescent Lamp Scene Auto Night Landscape Portrait Night Landscape Portrait Landscape Beach High Sensitivity Sport Party ISO Auto 100 200 400 Self timer 2s 5s 10s File format JPEG format Still image AVI format video Anti shake Yes Flash light Auto force flash light fla...

Страница 18: ...s all photos are stores to the micro SD card inserted in your camera please ensure that there is always enough space available on the card to allow you to take photos It is recommended that you download the photos stored on the card regularly to make more room for the memory card and also as a back up for your files Q Whether my device will be working in MAC system A The device can be worked as a ...

Отзывы: