PANTONE 072 C
PANTONE 123 C
Support Line: 0333 030 0777
For more innovative products from Easylife please visit:
www.easylifegroup.com
Paper weight 60gsm
Genius blue is
C90, M7, Y0, K0
Genius green is
C90, M7, Y0, K0
everyday solutions
™
Est. 1992
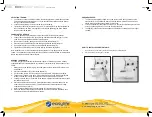
HOW TO INSTALL EXPANSION TABLE:
1. Open the feet on underside of the table and lay on a flat, stable surface.
2. Slot the machine into the gap on the table
ADJUSTING TENSlON:
1. You should not need to adjust the tension. Tension for maximum performance has been
set and adjusted at the factory However, if you should find that stitches are too loose or
too tight, you can adjust the stitch.
2. Loosen stitch by turning the tension screw (N) anti-cIockwise.
3. Tighten the stitch by turning the tension screw (N) clockwise. Sewing heavier fabric may
require loosening the stitch. Very light fabric may require tightening the stitch. Bobbin
tension cannot be adjusted.
CHANGlNG THE NEEDLE:
1. Turn the hand wheel (K) clockwise to raise the needle (R) to its highest position.
2. Loosen the needle clamp screw (O) by turning it anti-clockwise (toward you). You may
need to use a short slotted screwdriver or small plyers.
3. Remove the needle (R), pulling down, away from the needle clamp (P).
4. Place the new needle with the flat side facing in against the needle clamp (P).
5. Push it gently as far up as it will go, and against the needle clamp (P).
6. Tighten the needle clamp screw (O) while holding the needle (R) in place.
Note: Needles come in various sizes designated by numbers. They designate the left of the
needle. The smaller the number. the thinner the needle. Use smaller needles for more delicate
fabrics and larger needles for heavier fabrics.
WINDlNG THE BOBBIN:
You can wind your own bobbins with thread from spools (not included) to have a virtually
unlimited thread color selection. Match your fabrics or contrast with the thread shades of your
choice.
1. Always remove the bobbin (S) from the bobbin case on the machine before you wind a
new bobbin.
2. Place the thread spool (E) on the thread spindle (C).
3. Put the bobbin pin into the hole on the hand wheel and turn it slightly anti-clockwise.
4. Take an empty bobbin in one hand. PulI the thread down from the thread spooI (E)and
thread the loose end through the smalI hole on the bobbin rim from the inside.
5. Leaving the loose end on the outside of the bobbin, wind the thread several turns around
the inside of the bobbin.
6. Place the bobbin on the bobbin pin, making certain that the thread is winding onto the
bobbin in a anti-cockwise direction. (This would mean the thread should be winding
under the bobbin, not over it).
7. Hold the thread Iightly guiding it gently through your thumb and index finger.
8. When the bobbin is full, switch off the machine. Insert the bobbin into the bobbin case
using the instructions for threading the machine.
SEWING SLEEVES:
1. The machine is designed to allow you to sew sleeves more easily. First take up the
presser foot (F) and position the sleeve under the needle. Put the bobbin part of the
sleeve in the gap between the platform and the base.
2. Lower the presser foot and follow the step 5-13 in the section of operating the machine
on the previous page. Now you can sew the sleeves easily.
3. The light(W) in the sewing machine head can illuminate your sewing when more light
needed.


