


QUESTIONS?
Call 1-888-991-1559 or
Email: [email protected]
Instruction Guide
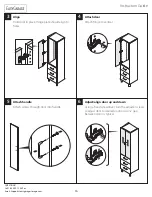
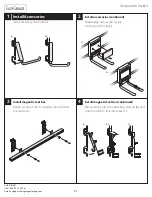
Secure legs
Align two (2) legs to front corners of cabinet. The
long edge of the leg base will align with the front
of the cabinet. Secure each leg to cabinet using
four (4) 3/4” screws.
Assemble legs
Lower cap onto leg and tap with mallet (a). Insert
glide into hole and turn clockwise to tighten (b).
Install legs on base and tall cabinet
Rotate cabinet so it is laying on it’s back. Leg
installation is for base and tall cabinets only (not
overhead cabinets).
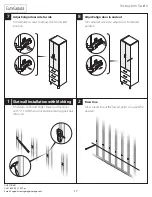
Install 2 1/2˝ screws
Using provided square drive tip, install three (3)
2 1/2˝ screws through decks into cleats at each end
of deck.
12
11
10
9
6
a)
b)


