The following will help you get the most enjoyment from your DVD receiver system.
BEST LOCATION
The unit should be placed on a firm, flat surface, away from VCRs, stereos, radios, or large
speakers, as the magnetic flux from these devices may cause distortion in the sound and a poor
picture. If placed in a cabinet, be sure there is at least 1 o f f ree space completely around the unit
for proper ventilation.
TO OBTAIN A CLEAR PICTURE
A DVD receiver is a precision device. If the optical pick-up lens and disc drive parts become dirty
or worn down, picture quality will become poor. Store DVD player in a clean dust free environment.
PLAYABLE DISCS
This DVD receiver system will play the following types of discs: DVD, MP3, CD, CD-R,and
CD-RW with super-error correction ability. It is also capable of displaying picture CDs and digital
photo albums. It supports eight languages, up to 32 subtitles, and multi-angle viewing. It features
easy setup and operation with on-screen menus. It has full function CPU upgrading able capability.
DIGITAL AUDIO OUTPUT
The unit's coaxial output capability enables you to connect an external six-channel AV amplifier
and processor with built-in Dolby Digital code with just one cord. This enables you to conveniently
enjoy different DVD, CD, and Mp3 discs.
ANALOG AUDIO O UTPUT
Speaker system plug-and-play convenience through the built-in downmix 2-channel power
amplifier eliminates the use of an external power amplifier.
LASER-HEAD OVER-CURRENT
PROTECTION SYSTEM
To extend the service life of the laser head, the unit includes a unique laser-head over-current
protection system, ensuring a constant laser current.
" "
ABOUT YOUR
DVD PLAYER
This page contains valuable information regarding the handling, cleaning, and storage of discs
played in this unit.
Handling
Do not touch the playback side of the disc.
Do not attach paper or tape to discs.
Do not stick or write anything on the surface. Protect against fingerprints.
Always hold a disc by the center and edge portions.
Cleaning
Fingerprints and dirt on the disc may cause picture and/or sound deterioration. Wipe the disc from
the center outward with a soft cloth. Always keep the disc clean.
If you cannot wipe the dirt off, lightly use a slightly moistened soft cloth and finish with a dry cloth.
Do not use any type of solvent such as: Paint thinner, benzene, commercially available cleaners or
anti-static spray for vinyl LPs.
Storing
Do not store discs in places subject to direct sunlight or near heat sources.
Do not store discs in places subject to moisture and dust.
Store discs vertically in a case. Stacking or placing objects on discs outside of their case may
cause warping.
NOTE:
This DVD is not responsible for damage that may occur to any disc that is operated
in this unit or not handled, cleaned, or stored as suggested above.
USE OF DISCS
TABLE OF CONTENTS
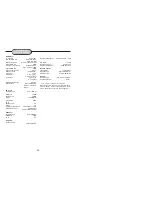
Precaution ................................................ 1
Table of Contents .......................................2
About Your DVD Player ............................ 3
Best Location..........................................................3
To Obtain a Clear Picture......................................... 3
Playable Discs........................................................3
Digital Audio Output ................................................3
Laser-Head Over-Current Protection System ............3
Use of Disc ...............................................3
Handling.................................................................3
Cleaning.................................................................3
Storing...................................................................3
Front and Back panels .. .............................4
Front Panel.............................................................4
Back Panel.............................................................5
Remote Control..........................................6
Operating the remote control.......................7
Connecting Devices................................... 8
Speakers.................................................. 9
Arrangement of speakers........................... 9
Connecting speakers.................................10
Connecting antenna..................................11
Connecting power supply...........................12
Basic DVD operation .......................13 14 15
Playing the radio......................................16
PLAYING WMA MP3 AND JPEG.................17
System Setup......................18 19 20 21 22 23
LANGUAGE Setup .............................. 24 25
AUDIO SETUP... .................................. 26
VIDEO SETUP .................................... 27 28
SPEAKER Setup ................................. 29
DIGITAL Setup ...................................... . 3 0
Trouble shooting...................................... 31
Technical specifications ........................... 32
-3-
-2-


