8
Eastwood Technical Assistance: 800.343.9353 >> [email protected]
BLADE INSTALLATION
1.
Set the Cutting Head on a firm sur-
face with the slot facing upward.
2.
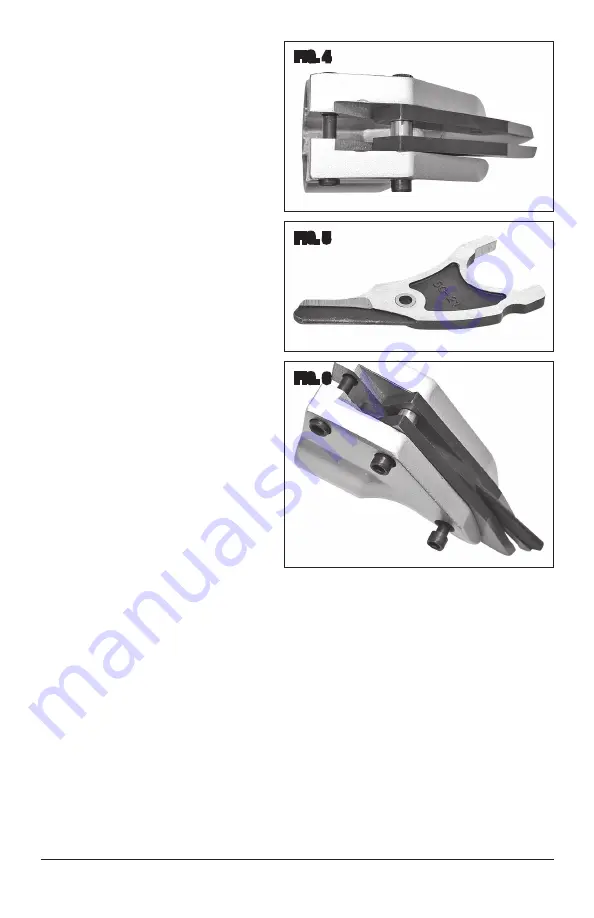
Set the two Fixed Blades into the
machined lands of the Cutting Head
(FIG 4)
.
3.
Place one of the two Bushing/Spac-
ers between the rearmost holes
of the blades and insert one of the
Socket Head Screws through the
Cutting Head, Left Blade, Spacer/
Bushing and Right Blade
(FIG 4)
.
4.
Partially thread the Socket Head
Screw into the opposite side of the
Cutting Head. DO NOT TIGHTEN.
5.
Set a Bushing/Spacer into the center
pivot hole of the Center Moving Blade
making sure it is flush on both sides
(FIG 5)
.
6.
Pass the Center Moving Blade
through the round opening of the
Cutting Head and set in place with
the “notch” under the Bushing/
Spacer
(FIG 6)
.
7.
Pass the Socket Head Screw
through the Cutting Head, Left Blade,
Center Moving Blade and Right Blade
(FIG 6)
.
8.
Partially thread the Socket Head Screw into the opposite side of the Cutting Head.
DO NOT TIGHTEN.
9.
Check for proper alignment and Center Blade movement. Add some light machine oil to all
contact and pivoting points of the Center Blade and also to the Eccentric Bearing at the front
of the Shears.
10.
Re-install the Head Assembly to the Main Shears Body.
NOTE:
The Body may need to be rotated from side to side to allow the eccentric bearing to
align within the arms of the Center Blade.
11.
Tighten all three Socket Head Screws securely.
12.
The Electric Metal Shears are, once again, ready for use.
FIG. 4
FIG. 5
FIG. 6


