background image

Setting the TIMER

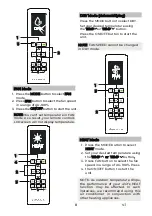
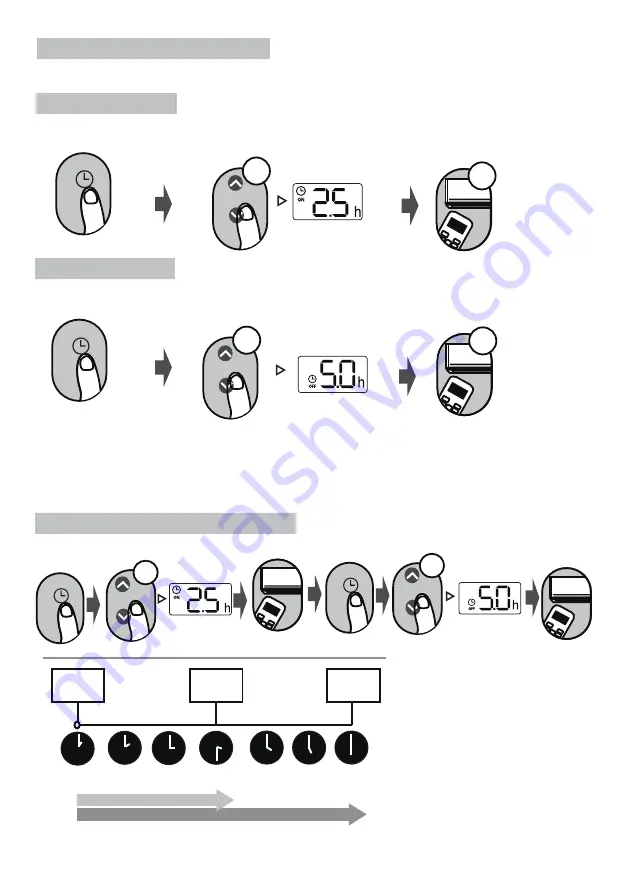
TIMER ON setting

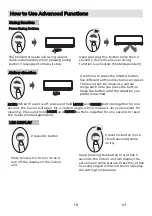
TIMER OFF setting

TIMER ON/OFF - Set the amount of time after which the unit will automatically turn on/off.

Press TIMER button to 

initiate the ON time 

sequence.

Press  Temp.  up  or  down  but-

ton  for  multiple  times  to  set 

the desired time to turn on the 

unit.  

Press Temperature up or down 

button for multiple times to set 

the desired time to turn off the 

unit.  

NOTE:

Point remote to unit and wait 

1 sec, the TIMER ON will be 

activated.

Press TIMER button to 

initiate the OFF time 

sequence.

Point remote to unit and wait 

1sec, the TIMER OFF will be 

activated.

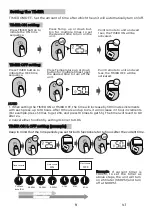
Current

time 1PM

2:00PM

3:00PM

4PM

5PM

6PM

Timer starts 

Unit turns

ON

Unit turns

OFF

2.5 hours later

5 hours later

3:30PM

Example:  If  current  timer  is 

1:00PM,  to  set  the  timer  as 

above steps, the unit will turn 

on 2.5h later (3:30PM) and turn 

off at 6:00PM. 

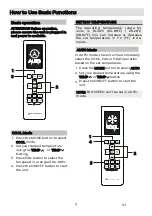
ON/

OFF

MO

DE

FAN

CU

SH

OTRT

TIMER N

TIMER O

O

FF

TEMP

SLEEP

1

sec

ON/OFF

MODE

FAN

OR

SHCUTT

TI

M

MER ON

TIER OFF

TEMP

SLEEP

ON/OFF

MODE

FAN

CUOR

SHTT

TI

M

MER ON

TIER OFF

TEMP

SLEEP

ON/

OFF

MO

DE

FAN

CU

SH

OTRT

TIMER N

TIMER O

O

FF

TEMP

SLEEP

1

sec

x5

x10

xn 

xn

1. When setting the TIMER ON or TIMER OFF, the time will increase by 30 minutes increments

with each press, up to 10 hours. After 10 hours and up to 24, it will increase in 1 hour increments.

(For example, press 5 times to get 2.5h, and press 10 times to get 5h,) The timer will revert to 0.0

after 24.
2. Cancel either function by setting its timer to 0.0h.

TIMER ON & OFF setting (example)

Keep in mind that the time periods you set for both functions refer to hours after the current time.

9

V.1

Содержание ECRL10A2

Страница 1: ...ANUAL DE INSTRUCCIONES INSTRUCTION MANUAL V 1 Escanee para ver este manual en otros idiomas y actualizaciones Scan for manual in other languages and further updates Manuel dans d autres langues et mis à jour Manual em outras línguas e actualizações ...

Страница 2: ...eño de los botones de su unidad puede ser algo distinto al de los ejemplos Si la unidad interior no cuenta con una función en concreto pulsar ese botón del mando no tiene efecto alguno Si hay una gran diferencia entre el Manual del mando a distancia y el Manual de instrucciones en cuanto a la descripción de las funciones prevalecen las descritas en el Manual de instrucciones V 1 ...

Страница 3: ...ECRL10A2 8m 3 0V Pilas secas R03 LR03 2 5 C 60 C 23 F 140 F PONGA LAS PILAS PULSE EL BOTÓN DE ENCENDIDO ELIJA MODO SELECCIONETEMPERATURA ELIJA VELOCIDAD DEL VENTILADOR 1 6 2 5 4 Turb o Swi ng Tim er Self Clea n Mod e On Off Fan My Mod eIoF nios lleo rwL ED MSe leep HEA DRY TCA UTO OLO MED LOW HFA NIG H SET TEMPER ATURE 3 AUTO COOL DRY HEAT FAN AU 100 Modelo Voltaje nominal Rango de recepción de se...

Страница 4: ...eche las pilas junto con otros residuos Consulte la normativa local para el reciclaje de pilas El dispositivo debe cumplir con las regulaciones locales y nacionales Este equipo genera usa y puede irradiar energía de radiofrecuencia y si no se instala y usa de acuerdo con las instrucciones puede causar interferencias en otras comunicaciones de radio Sin embargo no hay garantía de que no se produzca...

Страница 5: ...empo posible MODO Cambia de modo según la secuencia AUTO COOL DRY HEAT FAN NOTA los aparatos que no llevan bomba de calor no funcionan en modo HEAT ECO GEAR Pulse este botón para acceder al modo ahorro de energía según la secuencia ECO GEAR 75 GEAR 50 Ajuste anterior ECO ON OFF Para encender apagar el aparato TEMP Subelatemperaturaen incrementosde1ºC 1ºF La temperaturamáximaes30ºC 86ºF NOTA Pulsea...

Страница 6: ...cador de transmisión Se ilumina cuando el mando envía señal a la unidad interior Icono VELOCIDAD Muestra la velocidad del ventilador seleccionada Iconos de MODO Muestra el modo actual 2 20 21 40 41 60 61 80 81 100 1 AUTO Esta velocidad no se puede configurar en el modo AUTO o DRY Icono ECO Se muestra cuando el modo ECO está activo Icono GEAR Se muestra cuando está activa la función GEAR Icono LOCK...

Страница 7: ...COOL FAN o HEAT según la temperatura de consigna 1 Pulse el botón MODE para seleccionar AUTO 2 Configure la temperatura deseada pulsando TEMP o TEMP 3 Pulse ON OFF para iniciar la unidad NOTA La velocidad del ventilador no puede ajustarse en AUTO Modo COOL Funcionamiento básico 1 Pulse el botón MODE para seleccionar el modo COOL 2 Elija la temperatura deseada pulsando TEMP o TEMP 3 Pulse el botón ...

Страница 8: ...ura deseada pul sando TEMP o TEMP 3 PulseFANparaseleccionarlavelocidad delventiladorenelrangoAU 100 4 Pulse ON OFF para poner en marcha la unidad 4 1 3 2 1 3 2 Modo DRY deshumidificador NOTA No se puede cambiar la velocidad del ventilador en modo DRY Modo HEAT NOTA Si la temperatura exterior baja en exceso el rendimiento en calefacción de la máquina podría verse afectado Se recomienda usar calefac...

Страница 9: ... horas después 5 horas después 15 30 Ejemplo Si la hora actual son las 13 00 con la máquina configu rada según la secuencia anterior se encenderá 2 5h después 15 30 y se apagará a las 18 00 ON O FF MO DE FA N CU SH OT RT TIM ER N TIM ER OO FF TE MP SL EE P 1seg ON OF F MO DE FA N OR SH CU TT TIM ME R ON TIE R OF F TE MP SL EE P ON OF F MO DE FA N CU OR SH TT TIM ME R ON TIE R OF F TE MP SL EE P ON...

Страница 10: ... para activar la función del swing horizontal disponible según modelo Si continúa pulsando el botón SWING se pueden configurar cinco direcciones distintas del flujo de aire La lama se desplaza una posición cada vez que se pulsa el botón continúe pulsándolo hasta que alcance la dirección deseada 2s Mantenga pulsado el botón más de 5 segundos para mostrar la temperatura real de la habitación Manteng...

Страница 11: ...pulse el botón ECO y la velocidad del ventilador cambiará a AUTO sin cambiar la temperatura NOTA Si se pulsa el botón ECO GEAR se modifica el modo o se ajusta la temperatura a menos de 24ºC 75ºF la función ECO se detendrá Con el programa ECO la temperatura consignada de 24ºC 75ºF puede no enfriar lo suficiente según las circunstancias Si lo necesita pulse el botón ECO de nuevo para detener la func...

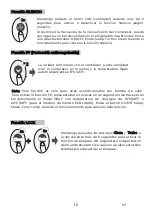
Страница 12: ...r a alta velocidad con el compresor en marcha y la temperatura fijada automáticamente a 8ºC 46ºF 2 Mantenga pulsados los botones Clean y Turbo a la vez durante más de 5 segundos para activar la función de bloqueo No responderá ningún botón del mando excepto si se vuelven a pulsar estos dos botones para desactivar el bloqueo 2s Nota Esta función es sólo para aires acondicionados con bomba de calor ...

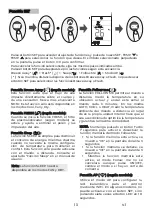
Страница 13: ...l flujo de aire impacte directamente sobre el cuerpo y da una sensación fresca más envolvente NOTA Esta función sólo está disponible en los modos Cool Fan y Dry Función FRESH según modelo Cuando se inicia la función FRESH el filtro de plasma ionizador según modelo se activa y ayuda a eliminar el polen y las impurezas del aire Función Sleep La función SLEEP se emplea para disminuir el consumo de en...

Страница 14: ...El diseño y especificaciones están sujetos a cambios sin previo aviso para mejora del producto Consulte con el fabricante o distribuidor para más detalles 14 V 1 ...

Страница 15: ...TE Button designs on your unit may differ slightly from the example shown If the indoor unit does not have a particular function pressing that function s button on the remote control will have no effect When there are wide differences between Remote controller Manual and USER S MANUAL on function description the description of USER S MANUAL shall prevail 3 4 5 7 10 6 V 1 ...

Страница 16: ...ck Start Guide ECRL10A2 8m 3 0V Dry batteries R03 LR03 2 5 C 60 C 23 F 140 F FIT BATTERIES PRESS POWER BUTTON POINT REMOTE TOWARD UNIT SELECT MODE SELECT TEMPERATURE SELECT FAN SPEED 1 6 2 5 4 Turb o Swi ng Tim er Self Clea n Mod e On Off Fan My Mod eIoF nios lleo rwL ED MSe leep HEA DRY TCA UTO OLO MED LOW HFA NIG H SET TEMPER ATURE 3 AUTO COOL DRY HEAT FAN AU 100 Model Rated Voltage Signal Recei...

Страница 17: ...e FCC Rules Operation is subject to the following two conditions 1 This device may not cause harmful interference and 2 this device must accept any interference received including interference that may cause undesired operation This equipment has been tested and found to comply with the limits for a Class B digital device pursuant to part 15 of the FCC Rules These limits are designed to provide re...

Страница 18: ...ach preset temperature in shortest possible time MODE Scrolls through operation modes as follows AUTO COOL DRY HEAT FAN NOTE HEAT mode is not supported by the cooling only appliance ECO GEAR Press this button to enter the energy efficient mode in the following sequence ECO GEAR 75 GEAR 50 Previous setting mode ECO ON OFF Turns the unit on or off TEMP Increasestemperaturein1 C 1 F increments Max te...

Страница 19: ... LOW MED HIGH Transmission Lowbatterydetectiondisplay Ifflashes Indicator Lights up when remote sends signal to indoor unit FAN SPEED display Displays selected fan speed MODE display Displays the current mode including 2 20 21 40 41 60 61 80 81 100 1 AUTO This fan speed cannot be adjusted in AUTO or DRY mode Note ECO display Displays when ECO feature is activated GEAR display Displays when GEAR fe...

Страница 20: ...utomatically select the COOL FAN or HEAT operation based on the set temperature 1 Press the MODE button to select AUTO 2 3 Set your desired temperature using the TEMP or TEMP button Press the ON OFF button to start the unit NOTE FAN SPEED can t be set in AUTO mode COOL Mode Basic operation 1 Press the MODE button to select COOL mode 2 Set your desired temperature using the TEMP or TEMP button 3 Pr...

Страница 21: ...ature using the TEMP or TEMP button 3 4 Press FAN button to select the fan speed in a range of AU 100 Press the ON OFF button to start the unit 4 1 3 2 1 3 2 DRY Mode dehumidifying NOTE FAN SPEED cannot be changed in DRY mode HEAT Mode NOTE As outdoor temperature drops the performance of your unit s HEAT function may be affected In such instances we recommend using this air conditioner in conjunct...

Страница 22: ...Example If current timer is 1 00PM to set the timer as above steps the unit will turn on 2 5h later 3 30PM and turn off at 6 00PM ON O FF MO DE FA N CU SH OT RT TIM ER N TIM ER OO FF TE MP SL EE P 1sec ON OF F MO DE FA N OR SH CU TT TIM ME R ON TIE R OF F TE MP SL EE P ON OF F MO DE FA N CU OR SH TT TIM ME R ON TIE R OF F TE MP SL EE P ON O FF MO DE FA N CU SH OT RT TIM ER N TIM ER OO FF TE MP SL ...

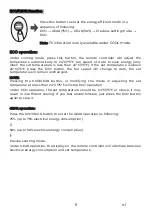
Страница 23: ... pressing this button more than 2 seconds the vertical louver swing function is activated Model dependent If continue to press the SWING button five different airflow directions can be set The louver can be move at a certain range each time you press the button Press the button until the direction you prefer is reached 2s Keep pressing this button more than 5 seconds the indoor unit will display t...

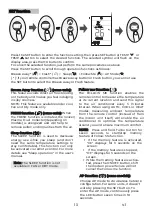
Страница 24: ...change to Auto the set temperature will remain unchanged NOTE Pressing the ECO GEAR button or modifying the mode or adjusting the set temperature to less than 24ºC 75ºF will stop ECO operation Under ECO operation the set temperature should be 24ºC 75ºF or above it may result in insufficient cooling If you feel uncomfortable just press the ECO button again to stop it GEAR operation Press the ECO GE...

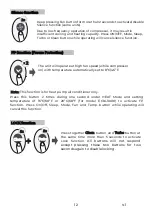
Страница 25: ...gh fan speed while compressor on with temperature automatically set to 8ºC 46ºF 2 Press together Clean button and Turbo button at the same time more than 5 seconds to activate Lock function All buttons will not respond except pressing these two buttons for two seconds again to disable locking 2s Note This function is for heat pump air conditioner only Press this button 2 times during one second un...

Страница 26: ...Away function some units This feature avoids direct air flow blowing on the body and makes you feel indulging in silky coolness NOTE This feature is available under cool Fan and Dry mode only FRESH function some units When the FRESH function is initiated the Ionizer Plasma Dust Collector depending on models is energized and will help to remove pollen and impurities from the air Sleep function The ...

Страница 27: ...The design and specifications are subject to change without prior notice for product improvement Consult with the sales agency or manufacturer for details 14 V 1 ...

Страница 28: ...pdates Manuel dans d autres langues et mis à jour Manual em outras línguas e actualizações EAS ELECTRIC SMART TECHNOLOGY S L U P I San Carlos Camino de la Sierra S N Parcela 11 03370 Redován Alicante ESPAÑA Toda la documentación del producto Complete documents about the product Documentation plus complète sur le produit Mais documentação do produto ...

Отзывы: