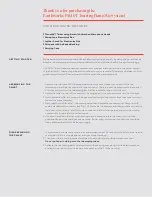
2 PianoMic™ Telescoping Bars with Attached Microphone Heads
1 Microphone Electronics Box
1 Leather Pouch for Electronics Box
2 Felt pads with Adhesive Backing
1 Carrying Case
YOUR PURCHASE INCLUDES
Thank you for purchasing the
Earthworks PM40T Touring PianoMic System!
Before setting up the microphone, pull back all existing settings and EQ. By doing this, you will have a
baseline understanding of how our microphones sound, and will then be able to adjust accordingly.
CAUTION – the microphone heads and goosenecks are permanently attached to the center section
of the PianoMic™ telescoping tube and cannot be moved, or removed. The distance between the two
goosenecks is fixed at 16 inches (one-third of the width of a piano keyboard).
1.
Remove the two PianoMic™ telescoping bars from the case. Notice that on each of the two
telescoping bars, there is a special XLR type connector. There is a rotating collar next to the special
XLR type connector on the telescoping bar that has a cable coming out of one end.
2. Rotate the collar on the XLR connector so it is snug against the connector cover, but not too tight.
3.
Next, rotate the collar two turns in the opposite direction (moving it away from the connector cover
toward the connector pins).
4. Now, take the two PianoMic™ telescoping sections and mate the connectors just like you would
mate a standard XLR connector (see Fig. 1-D). First mate the keyways and then push the connectors
together until you hear a “click.” If you do not hear a click, then change the position of the rotating
collar and try to mate the two sections again.
5. Once you have heard the click when mating the two sections, rotate the collar until it is firmly
positioned against the mating connector cover (finger tight). At this point two sections should be
firmly attached and will not be loose or wiggle.
1.
To disassemble the PianoMic, rotate the collar between the XLR connectors the full distance from its
mating half until it is snuggly against the right connector body.
2.
Then grab the two mating connectors (one with each hand) and pull the two sections apart.
Do not pull apart holding onto the telescoping tubes.
3. Collapse the telescoping bars and place them in the carrying case along with the electronics box
and leather pouch. Now you’re ready to take your PianoMic™ to the next gig.
GET TING STARTED
A SSEMBLING THE
PM40T
DISA SSEMBLING
THE PM40T


