4
5
In Figure 1 the microphones are positioned about two feet above the drum
-
mer’s head. This placement will provide excellent results in a drum room or
an acoustically treated small room. If you do not have a drum booth or are in
a larger room, you can also use another variation of the X/Y pattern by facing
the microphones straight down (see Figure 4). In this case the microphones
should be one or two feet above the drummer’s head and about one foot in
front of the drummers face, looking down.
Figure 4. Overhead miking with VERTICAL X/Y positioning
Closer Overhead Miking
There is a closer miking approach that we also used in our sessions. This method
would be ideal for those who do not have a drum room or drum booth. Closer
miking will reduce some of the ambient room sound while picking up subtle
details of the drum set. This method is shown in Figures 3 and 4. In Figure 3,
you can see the positioning of the microphones from a front view and Figure 4
shows where the microphones are pointed.
Miking the Kick Drum and using the KickPad™
A good kick drum microphone must be designed and optimized for that specific
purpose. This means the microphone is great for kick drum and nothing else.
Therefore we designed our kick drum optimization in an external XLR package
- the KickPad™. Just plug the KickPad™ into the mic line going to the SR25 kick
drum mic for magnificent results. With the KickPad™ removed, you can use
the same SR25 microphone for recording most anything. All three high quality
Earthworks High Definition Microphones™ in the DrumKit™ System can be used
for other instruments and vocals. As an added bonus, the KickPad™ will improve
the sound of other popular microphones used for kick drum. The KickPad will
provide outstanding results on other popular kick drum microphones such as
the E-V RE20, Audix D-6, Shure 57 and others. Simply plug the KickPad into the
mic line feeding the kick drum mic and you will be astonished with the sound.
Important Please Read
The Earthworks SR25 supplied for miking kick drum is a precision condenser
microphone and is sensitive to large bursts of air. However, this microphone
used properly will produce an incredible kick drum sound. For optimum results
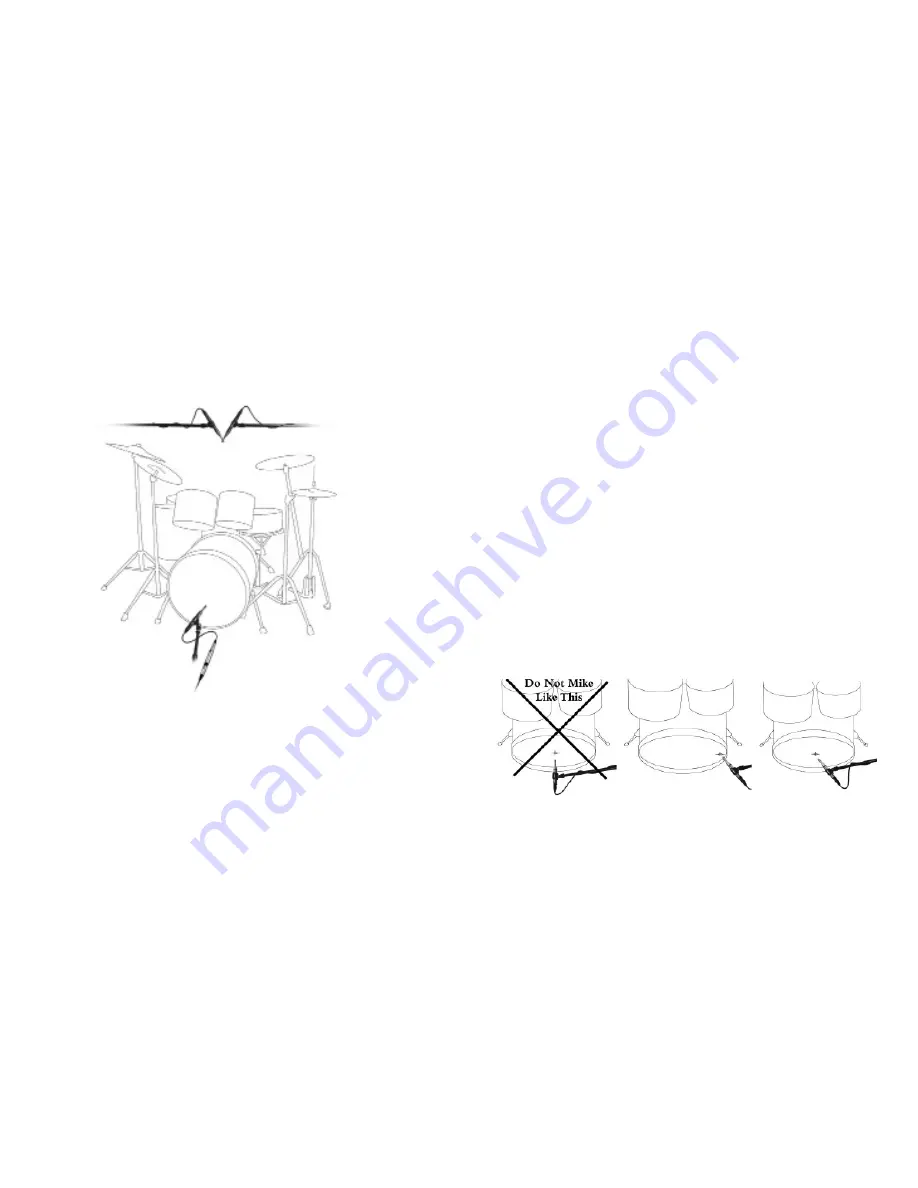
it is crucial to place the SR25 at a 45 degree angle to the head (which reduces
the air burst at the front of the microphone). Whether your kick drum has a front
head or not, place the SR25 at a 45 degree angle to the front of the drum as
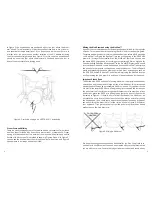
indicated in Figure 1. If there is a hole in the front head of the kick drum, do
not place the mic in front of the hole as there will be a large burst of air hitting
the microphone. In our field tests, we achieved the best results and the best
sound by miking the drum just off of the rim as shown in Figure 5. Whatever
your approach, if you get any popping from the air bursts, place the enclosed
windscreen on the kick drum mic.
We hope these suggestions have been beneficial for you. Don’t be afraid to ex
-
periment with mic placement. You can be as creative with your mic placement as
you are with your music. You are the judge of what works best and sounds best.
Figure 5. Miking a kick drum


