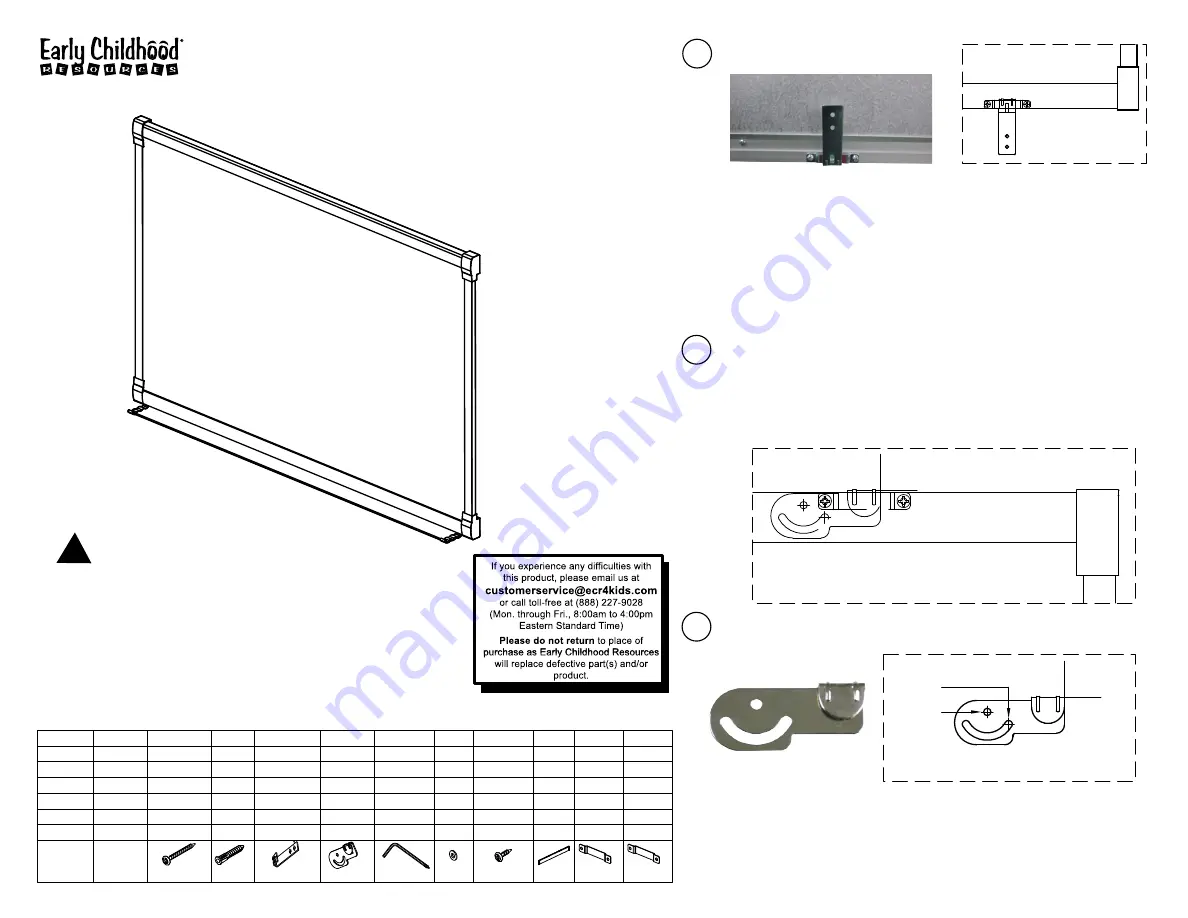
Figure 3
Figure 2
2
1
Figure 1
Hole 1
Hole 2
Washer
Top hanger
Bottom hanger
Anchor
Phillips screw
Board size
Model #
Allen wrench
Small screws Pen tray
Installed top
brackets
5PCS
2PCS
2PCS
2PCS
3PCS
3PCS
3PCS
4PCS
4PCS
4PCS
3PCS
2PCS
2PCS
2PCS
4PCS
4PCS
4PCS
3PCS
2PCS
2PCS
2PCS
8PCS
8PCS
8PCS
6PCS
4PCS
4PCS
4PCS
4PCS
4PCS
4PCS
3PCS
2PCS
2PCS
2PCS
4PCS
4PCS
4PCS
3PCS
2PCS
2PCS
2PCS
16PCS
16PCS
16PCS
12PCS
8PCS
8PCS
8PCS
16PCS
16PCS
16PCS
12PCS
8PCS
8PCS
8PCS
48"x144"
48"x120"
48"x96"
48"x72"
48"x48"
36"x48"
24"x36"
ELR-0830
ELR-0829
ELR-0828
ELR-0827
ELR-0825
ELR-0823
ELR-0822
1PC
1PC
1PC
1PC
1PC
1PC
1PC
1PC
1PC
1PC
1PC
1PC
1PC
1PC
Porcelain DE Board
Parts List : Before assembling, make sure there are no missing parts for the applicable model #.
Model # ELR-0822, 0823, 0825, 0827, 0828, 0829, 0830
Installed bottom
brackets
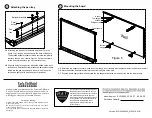
1-A With the help of 2 other people, position the board on the wall, approximately
4" above where you want to mount it. Place the bottom hangers upside down
on the pre-installed bottom brackets. Use a pencil to mark the position of the
holes in the bottom hangers.
1-B Remove board from the wall. Drill 1/4" diameter holes where marked and insert
an anchor into each hole. Align the holes in the bottom hangers with anchors
and secure with the Phillips screws.
3-A Remove the board from the wall and place the top hanger in the marked
position on the wall-use a pencil to mark the holes. See figure 3.
3-B Drill 1/4" diameter holes where marked and insert an anchor into each hole.
Align the holes in the top hangers with anchors and secure with washers
and Phillips screws.
2-A With the help of 2 people, place the pre-installed bottom brackets into the
bottom hooks on the wall. Push the board against the wall.
2-B Place the top hangers into the pre-installed top brackets as shown in Figure 2.
Use a pencil to mark the top and right side position of the top hangers - as
shown in Figure 2.
Attaching the bottom hangers
Attaching the top hangers - Part 1
3
Attaching the top hangers - Part 2
Mount Laurel,NJ 08054 USA
www.ecr4kids.com
!
WARNING:
-
Adult Assembly Required.
Two adults recommended.
- Contains small parts, sharp points and edges.
- Do not climb, lean or pull on unit or support.
- Never leave children unattended.
- Do not place unit near high heat or moisture.
- Adult Supervision Recommended.
Version: ELR-0822-0830_AI.F.2010.01.01


