background image

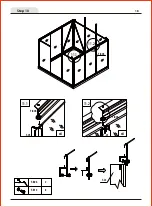
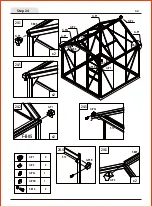
Step 24

32   

F-13

F-B07

G-P2

x2

24.3

24.4

G-P3L

G-P3R

F-13

G-P1

F-B05

F-B05

G-P1

x2

24.1

x2

24.1

x2

24.2

G-P3R

G-P3L

G-P2

F-B14

G-P1

1

1

2

2

4

G-P3L

G-P3R

G-P2

G-P2

G-P1

G-P1

G-P1

G-P1

24.1

24.2

24.3

24.4

24.5

24.5

Содержание IM GHPC36-GRN-AZ

Страница 1: ...GLE PEAK 6 ft x 6 ft PC GREENHOUSE INSTRUCTION MANUAL Do not return your greenhouse to the place of purchase For warranty service repair parts or product questions please contact Eagle Peak through the website and we ll reply immediately ...

Страница 2: ...ground utilities before digging or driving stakes into the ground During installation follow all safety warnings provided with yourtools and use safety glasses If you set up more than one greenhouse keep a minimum distance of 10 3 m between the greenhouses Any assembly or maintenance of the product must be carried out by adults only Arrange necessary manpower when assembling or moving the product ...

Страница 3: ...he box in a cleared area and position them on the floor in front of you Remove all packing materials and place them back into the box Do not dispose of the packing materials until assembly is complete Read each step carefully before beginning any assembly and make sure you understand each step If you are missing a part please call our toll free number for assistance 1 844 805 0378 Needed for assem...

Страница 4: ... F B05 F B06 F 24 F 09 F 18i F 06 F 07 F B07 F 17i F 01 F 05 F 08 F 02 F 15 F 11 F 10 F 21 F 13 F 02 F 04 F 25 F 28 F 04 F 26 F 27 F 23 F B06 F 20 F 18 F 18 F 23 G P1 G P2 F 12 G P3L G P2 F B05 G P3R F 16b F 03b F 14b F 29 F 30 F 48 F 48 ...

Страница 5: ... sun Two sides of PC sheet are covered with thin film one side s film is transparent another s film is opal white The UV protected side of the sheet is covered with opal white film and must face towards the sun Front Rear F 31a F 31a F 31a F 33a F 31b F 32a F 32a F 33a F 31a F 31a F 38 F 40 F 38 F 39 transparent film PC sheet Opal white film POLYCARBONATE PANEL SUN F 34 F 35 F 34 F 35 F 34 F 34 F ...

Страница 6: ... F 23 F 09 F 08 F 07 F 06 F 05 F B13 F 04 F 03b F 02 F 01 BASE WALL AND ROOF Length 1644 568 1100 1240 1650 1650 1105 1105 1240 1833 1833 1882 280 1 F 11 1644 1 5 4 4 1 1 2 2 4 16 3 1 4 4 Sketch Label QTY Part List 5 ...

Страница 7: ...4 F 33a F 32a F 31b F 31a F B07 F 29 F 18 F 18i F 17i F B06 Length 540x585 1110x585 1238x585 412x585 412x585 618x585 1217x585 1833 1815 1360 F 30 1328 1815 618 1833 1 F 19 8 1 5 6 2 2 1 5 1 4 4 2 1 2 2 F B05 1836 2 Sketch Label QTY ...

Страница 8: ... 38 F 22b F 21 F 16b F 15 F 14b F 13 F 12 F 28 F 27 F 26 F 25 F 20 Length 590x598 376 1615 600 600 1240 572 5 580 620 F 37 577x583 550 580 360 2 F 39 251x598 1 4 1 2 2 2 1 1 1 1 1 2 1 1 Sketch WINDOW DOOR Label QTY ...

Страница 9: ...Part List 8 0 1 2 3 4 5 6 7 8 mm F B15a F B16 G P3R G P3L G P2 G P1 Length ST4x10 ST4x8 F B14 12 6 142 1 1 2 4 Sketch PLASTIC SCREW Label QTY ...

Страница 10: ...Step 1 9 F 02 1 1 x4 x4 1 1 F 02 F 01 F 01 F 01 F B14 F 01 F 02 F 02 F 02 F 02 F 02 4 4 16 1 1 ...

Страница 11: ...Step 2 10 2 1 x2 x2 2 2 F 04 F 04 F 03b F 04 F 04 F 03b F 03b F 04 3 1 F B14 8 F 04 F 04 2 1 2 2 ...

Страница 12: ...Step 3 11 F 05 F B13 3 1 x4 3 1 x4 F 05 F B13 F B14 F 05 F 05 F 05 F 05 4 8 8 3 1 ...

Страница 13: ...Step 4 12 F 19 F 18i F 19 F B14 4 F 19 2 F 18i 1 4 1 4 2 4 1 x2 F 19 F 05 4 1 F 18i F 19 4 2 ...

Страница 14: ...Step 5 13 5 1 5 2 20mm 5 1 x4 F 18 F 29 5 2 x4 F 29 F B13 F 18 F 18i F 18 F 29 F 29 F 05 F B14 8 F 18 2 F 29 4 F B13 4 ...

Страница 15: ...Step 6 14 6 1 x2 F 30 F 30 F B13 6 2 x4 F 19 F 30 6 3 x2 6 2 6 3 F 30 F 30 F 19 F 19 F B14 8 F 19 2 F 30 4 6 1 F B13 4 ...

Страница 16: ...Step 7 15 7 3 7 1 7 2 7 2 7 1 x4 F 08 F 18i x2 F 19 F 30 7 3 F 17i x2 F 30 F 17i F 08 F 09 F 10 F 11 F B14 4 F 17i 2 F 08 F 09 1 1 F 10 F 11 1 1 F 17i F 08 ...

Страница 17: ...Step 8 16 F 23 F 04 F B14 4 F 23 4 F 23 F 23 F 23 F 23 8 1 x4 F 23 F B13 20mm x4 8 2 F 18 F 23 8 1 8 2 ...

Страница 18: ...Step 9 17 F 34 F 34 F 34 F 31a F 34 F 34 F 34 F 31a F 34 5 6 F 31a F 31a F 31a F 31a ...

Страница 19: ...Step 10 18 11 1 x4 11 2 x4 F 23 F 23 F B06 F 05 F B06 11 1 11 2 F B06 F B06 F B14 2 8 ...

Страница 20: ...Step 11 19 10 1 F 31a F 18i F 48 F 33a 10 2 F 31a F 17i F 48 F 48 F 31a F 18i F 17i F 48 F 48 F 33a F 32a 10 2 F 48 F 48 F 48 F 18i F 33a F 32a F 31b 10 1 F 48 F B14 5 10 2 2 1 F 32a F 33a F 31b ...

Страница 21: ...Step 12 20 F 08 F B14 20 x4 12 1 12 2 F 08 F 18i x2 F 17i 12 3 x2 F 10 F 11 12 1 12 2 12 3 F 09 ...

Страница 22: ...Step 13 21 F B14 8 F 07 F 06 2 2 F 19 4 13 2 F 07 F 06 F 19 F 19 13 1 F 06 F 19 13 3 F 07 13 1 x4 x4 13 1 13 2 x2 F 19 13 3 F 07 F 06 F 19 13 3 F 07 F 06 ...

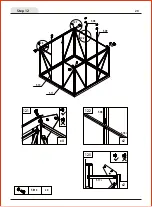
Страница 23: ...Step 14 22 F 06 F 07 F B07 F B14 4 F B07 1 14 1 14 1 x2 14 1 F 06 F 07 F B07 F B14 ...

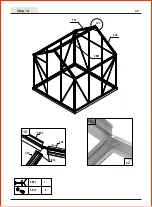
Страница 24: ...Step 15 23 F 12 F 40 F B14 2 F 40 1 F 12 1 F 40 15 1 x2 F 12 F 19 15 1 F B14 15 1 ...

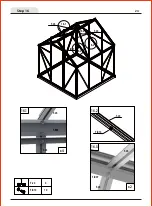
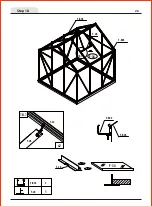
Страница 25: ...Step 16 24 16 3 F 24 F B14 10 F 24 4 F 24 16 1 16 2 F B14 16 2 x4 16 1 16 3 x2 F 24 F 23 F B07 F 24 F 24 F B06 F 24 F B14 16 2 ...

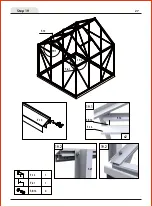
Страница 26: ...Step 17 25 F 35 F 35 F 35 F 35 F 35 F 36 F 35 F 36 5 1 F 35 F 24 ...

Страница 27: ...Step 18 26 F B05 F B05 2 F 28 1 F 28 F 36 F B05 F B05 F B06 F 36 F 28 F 28 F 24 18 1 x2 18 1 ...

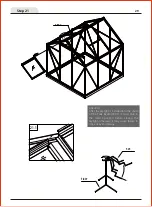
Страница 28: ...Step 19 27 F 13 F 21 F 13 1 F B14 4 F 21 1 19 2 19 1 19 1 x2 F 13 F 12 F B14 F 13 19 2 19 2 F 13 F 21 ...

Страница 29: ...Step 20 28 F 37 F 26 F 25 F 26 F 27 F 20 F 25 1 F 26 2 F 27 1 F B16 F 20 1 F 37 1 2 4 F B14 F 27 F 20 F B16 20 3 20 1 x2 x2 20 2 20 3 20 2 20 1 ...

Страница 30: ...B07 F B07 F 25 21 1 Attention After the skylight is installed into the chute of the Peak Beam FC07 it must slide in the correct position before closing the skylight otherwise it may cause failure to close or even damage ...

Страница 31: ...F 38 F 38 F 14b F 14b F 15 F 16b F 16b F 22b F 22b F 22b F 22b F 22b F B15a F 14b F 16b F 15 F B16 F B16 F B15a F B15a F B15a F B16 2 2 2 4 12 4 F 39 F 38 1 2 22 1 22 2 22 3 22 1 x2 F B16 F B15a 22 2 x2 22 3 x2 F B15a F B16 ...

Страница 32: ...Step 23 31 F B14 F B14 F B14 2 23 3 23 2 23 1 F 22b F 13 F 03b F 22b 23 1 x2 23 2 23 3 F B14 ...

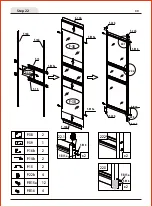
Страница 33: ...24 32 F 13 F B07 G P2 x2 24 3 24 4 G P3L G P3R F 13 G P1 F B05 F B05 G P1 x2 24 1 x2 24 1 x2 24 2 G P3R G P3L G P2 F B14 G P1 1 1 2 2 4 G P3L G P3R G P2 G P2 G P1 G P1 G P1 G P1 24 1 24 2 24 3 24 4 24 5 24 5 ...

Страница 34: ...Step 25 33 I II III IV Attention Make sure the skylight is in the correct position before closing it F 20 ...

Страница 35: ...n also use some glue or tapes between the polycarbonate panel and the aluminum frame to enhance the stability Note Silicone sealant and glue gun are not included in our tool kit You can buy them locally Only use silicone sealant suitable for aluminum ...

Страница 36: ......
Отзывы: