NOVICE-II
1-2S Brushless Micro Drone
8
.
Receiver
configuration
N
otes:
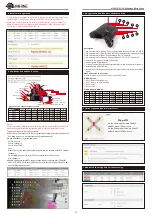
Default vtx setting is 200mw but the VTX power LED indicate will always show 25mw
when the quad was disarmed, because we have "set
vtx_low_power_disarm=on"
There are 3 ways to switch the vtx channels:
1.
S
hort press to choose the VTX channel, press and holding the button to Choose the
VTX Band (Can't save , it will lost the channel while power off)
2.
Go to Betaflight CLI ,type the command:
Set vtx_band=3
Set vtx_channel=1
Set vtx_freq=5705
save
Notes: The vtx_freq should match the vtx_band and vtx_channle as the VTX Channel
list shows.
For example, if you set vtx_freq=5732, you should set vtx_band=5 and
VTX_channel=3
3.
E
nable Smartaudio for UART2, then move the stick of the transmitter (THR MID+
YAW LEFT+ PITCH UP) to enter OSD Menu, Enter to Features, then enter to VTX SA
to set VTX Band and channel
9
.
VTX Bands and Channels setup
10
.
Goggles and VTX Receiver channel setting
Firmware update
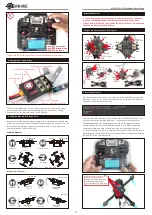
Fix the CW propeller onto the M1
and M4 motor (CW motors)
Fix the CCW propellers onto the M2
and M3 motor (CCW motors)
Props IN
11
.
Mixer type and ESC/motor protocol
12
.
Default PID setting
and
cur rents
setting
-
3
-
Frequency (5.8GHz):
Band
A
B
E
F
R
CH2
5845
5752
5685
5760
5695
CH3
5825
5771
5665
5780
5732
CH4
5805
5790
5645
5800
5769
CH5
5785
5809
5885
5820
5806
CH6
5765
5828
5905
5840
5843
CH7
5745
5847
5925
5860
5880
CH8
5725
5866
5945
5880
5917
CH1
5865
5733
5705
5740
5658
4
3
2
1
9
5
7
8
Key 1: Short press for MENU mode; Long press (More than 3 sec) for Power ON/OFF.
Key 2: Short press for Auto-Searching (Automatic selection of the strongest channel).
Key 3: Short press for Band+ (Change bands A-B-E-F-R circularly).
Key 4: Short press for (Change channels 1-2-3-4-5-6-7-8 circularly).
Micro-USB Charging port: Supports DC5V only.
Antenna port B: RP-SMA male.
Charging indicator: Red light when charging light; full power, the indicator goes off.
Antenna port A: RP-SMA male.
AV Jack: In RF receiving mode can output AV signal; In AV mode can enter the video
signal.
①
②
③
④
⑤
⑥
⑦
⑧
⑨
Description:
Menu Operation Instructions:
In normal mode, press Key 1 to enter the MENU mode.
In MENU mode:
①
②
③
④
Key 1: Select the option bar.
Key 2: Return to normal mode.
Key 3: Value -.
Key 4: Value +.
6
Frequency
and
channel
frequency
table
CH
FR
Band1
Band2
Band3
Band4
Band5
CH1
5865M
5733M
5705M
5740M
5658M
CH2
5845M
5752M
5685M
5760M
5695M
CH3
5825M
5771M
5665M
5780M
5732M
CH4
5805M
5790M
5665M
5800M
5769M
CH5
5785M
5809M
5885M
5820M
5806M
CH6
5765M
5828M
5905M
5840M
5843M
CH7
5745M
5847M
5905M
5860M
5880M
CH8
5725M
5866M
5905M
5880M
5917M
LED5
LED8
5917MHZ BAND5
CH8
8
,
7
,
6
,
5
,
4
,
3
,
2
,
1
1
,
2
,
3
,
4
,
5
Band
LED
Channel
LED
Channel
LED
Black
GND
Red
+
5V
Input
Green
smare
Audio
Yellow
Video
_
IN
Blue
Video
_
out
200MW
100MW
25MW
U
.
FL
Cam
_
IN
+
5V
out
put
GND
S
witch Button
BUZZ
+
GND
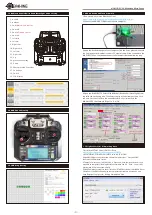
Please set Receiver mode to be SPI RX Support from the Configuration tab of
the Betaflight Configurator, then select A7105_Flysky_2A Provider for
AFHDS-2A Protocol Radio transmitter or Select A7105_Flysky Provider for
AFHDS Protocol Radio transmitter, don't enable Serial RX since the Flight
controller is integrated SPI BUS Receiver


