

• If there is any inconsistency of weather forecast between Local Weather Station
and this unit, the Local Weather Station's forecast should prevail. We will not hold
responsible for any trouble that may come up due to wrong forecasting from this unit.
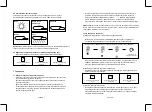
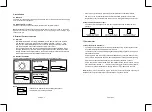
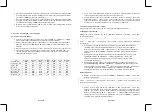
6.3 Barometric Trend Pointer (A1)
The trend pointer displayed on the LCD (A1) indicates the trend of the Barometric
pressure.
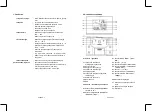
7. Thermometer
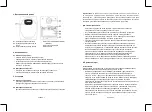
7.1 RF Transmission Procedure:
• The main unit automatically starts receiving transmission from outdoor thermo sensor
for outdoor temperature after batteries are inserted.
• The thermo sensor unit will automatically transmit temperature signal to the main unit
after batteries inserted.
• For having more than one external transmitter (Maximum3), select the Channel, CH1,
CH2 or CH3 to ensure each sensor is transmitting difference channel before inserting
batteries. The channel select switch (D3) is at the back of the thermo sensor.
• If main unit failed to receive transmission from outdoor thermo sensor in irst 3 minutes
after the batteries inserted (“- - . –”display on the LCD), hold “Channel” button (B8) for
3 seconds to receive transmission manually. RF icon “
” lashes on the LCD
Note:
Buttons (except “Channel” & “Light” buttons) will not function while scanning for
thermo sensor’s signal unless they are well received or stopped manually.
Indicating the barometric
pressure trend is rising
Indicating the barometric
pressure trend is steady
Indicating the barometric
pressure trend is falling
ENGLISH 5
ENGLISH 6
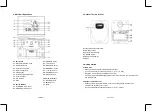
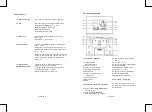
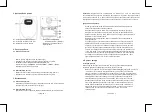
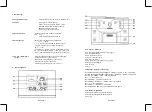
5. Installation
5.1 Main Unit
The main unit can be placed onto any lat surface (C3), or wall mounted by the hanging
hole (C1) at the back of the unit.
5.2 Outdoor Thermo sensor
The remote sensor should be securely mounted onto a horizontal surface.
Note:
Transmissions between receiver and transmitter can reach up to 30m in open area.
Open Area: there are no interfering obstacles such as buildings, trees, vehicles, high
voltage lines, etc.
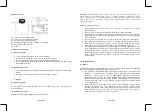
6. Weather Forecast Function
6.1 Operation
• After Batteries inserted, or holding “WEATHER” button (B5) for 3 seconds, weather
icon lash (A2) on the LCD. Enter the current weather pressing “-” (B4) or “+ “(B7)
button. Press “WEATHER” (B5) button to conirm the setting. The weather forecast
may not be accurate if the current weather entered is not correct.
• The current weather status should be entered again if the altitude of the Main Unit is
changed. (Barometric pressure is lower at higher altitude location. Therefore, altitude
change will affect the weather forecast). The weather station will start the irst forecast
at 6 hours later after the current weather status is entered.
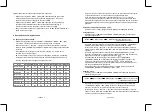
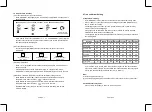
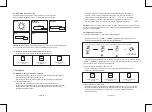
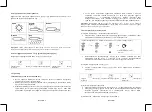
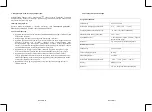
6.2 Weather Conditions
There are totally 5 different weather status animations in the weather forecast.
Note:
• “ “ is shown if the weather forecast is Rainy and outdoor
temperature (any channel) under 0°C.
Sunny
Rain
Freezing or Snow
SlightyCloudy
Cloudy
Freezing or Snow


