background image

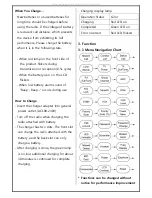
When You Charge… 

New batteries or unused batteries for 
long time should be charged before 
using the radio. If the voltage of battery 
is reduced, call distance, which prevents 
the device from exhibiting its full 
performance. Please charge the battery 
when it is in the following state. 
 

- When red lamp on the front side of 

the product flickers during 
transmission or reception (0.5s cycle) 

- When the battery icon on the LCD 

flickers 

- When low battery alarm sound of 

“Beep~ Beep~” occurs during use 


How to Charge 

- Insert the charger adapter into general 

power outlet. (AC100-240V) 

- Turn off the radio when charging the 

radio attached with battery. 

- The charger has two slots. The front slot 

can charge the radio attached with the 
battery, and the back slot can only 
charge a battery. 

- After charging is done, the green lamp 

is on, but additional charging for about 
30 minutes is continued for complete 
charging. 

- Charging display lamp 

Operation Status 

Color 

Charging 

Red LED on 

Completed 

Green LED on 

Error occurred 

Red LED flickers 

 
3. Function 
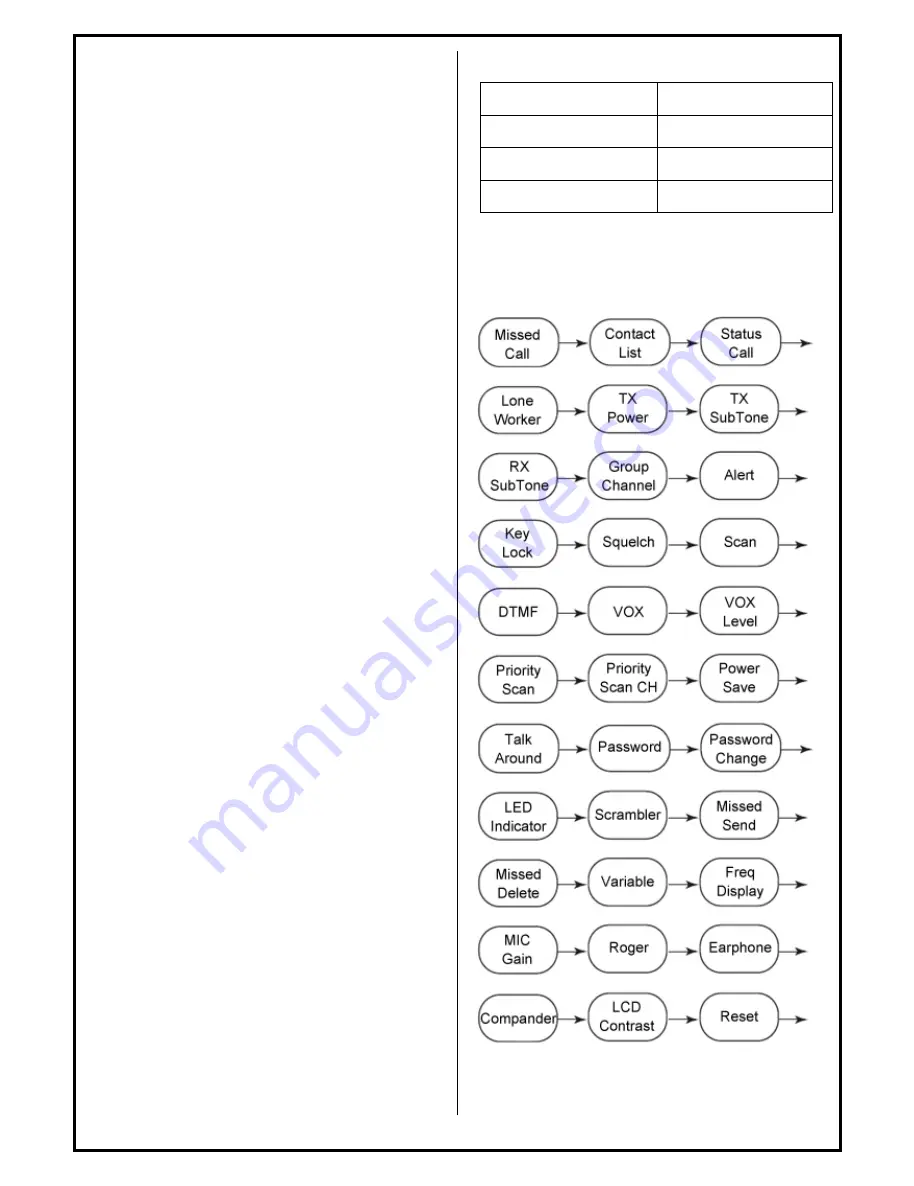
3-1 Menu Navigation Chart 


* Functions can be changed without 

notice for performance improvement 

All manuals and user guides at all-guides.com

Содержание NEP-Series

Страница 1: ...NEP Series User Manual All manuals and user guides at all guides com a l l g u i d e s c o m...

Страница 2: ...All manuals and user guides at all guides com...

Страница 3: ...the antenna clockwise on the antenna connector of the main body 2 3 Installing the Battery How to attach Turn off the radio if it is on Fit the bottom of the battery into the slots at the bottom of th...

Страница 4: ...g use How to Charge Insert the charger adapter into general power outlet AC100 240V Turn off the radio when charging the radio attached with battery The charger has two slots The front slot can charge...

Страница 5: ...status call S displays 5 Select 3 3 Contact List The contact list is the call received 1 Menu 2 Use buttons until Missed appears 3 Select 4 Use and check the list If there is no missed call Not Found...

Страница 6: ...Use to set HIGH or LOW 5 Select 3 7 TX Sub Tone TX sub tone can be changed 1 Menu 2 Use buttons until TX Sub Tone appears 3 Select 4 Use to set wanted sub tone CTCSS 001 053 CDCSS 101 204 CUSTOM 001...

Страница 7: ...s until Alert appears 3 Select 4 Use to set ON or OFF 5 Select 3 11 Key Lock Use of key lock function can be selected 1 Menu 2 Use buttons until Key Lock appears 3 Select 4 Use to set ON or OFF 5 Sele...

Страница 8: ...Select 4 Use to set Disable Encoder Encoder Decoder 5 Select 3 15 VOX Use of VOX function can be selected 1 Menu 2 Use buttons until VOX appears 3 Select 4 Use to set ON or OFF 5 Select 3 16 VOX Leve...

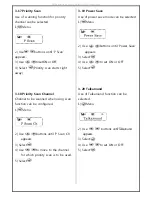
Страница 9: ...figured 1 Menu 2 Use buttons until P Scan Ch appears 3 Select 4 Use to move to the channel for which priority scan is to be used 5 Select 3 19 Power Save Use of power save mode can be selected 1 Menu...

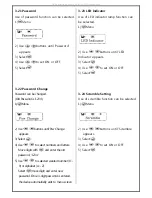
Страница 10: ...word 1234 5 Use to selected wanted number 0 9 or alphabet A Z Select move digit and enter new password Once 4 digit password is entered the device automatically exits to menu screen 3 23 LED Indicator...

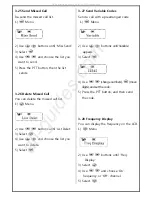
Страница 11: ...and choose the list you want to delete 5 Select 3 27 Send Variable Codes Send a call with a prearranged code 1 Menu 2 Use buttons until Variable appears 3 Select 4 Use change numbers move digits and...

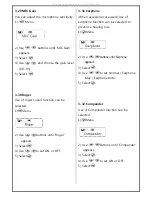
Страница 12: ...rs 3 Select 4 Use to set ON or OFF 5 Select 3 31 Earphone When accessories are used Use of earphone function can be selected to prevent a hearing loss 1 Menu 2 Use buttons until Earphone appears 3 Sel...

Страница 13: ...of reset function can be selected 1 Menu 2 Use buttons until Reset appears 3 Select 4 Use to set ON or OFF 5 Select 3 35 Information You can check the information of the radio 1 Menu 2 Use buttons un...

Страница 14: ...All manuals and user guides at all guides com...

Страница 15: ...All manuals and user guides at all guides com...

Отзывы: