


30
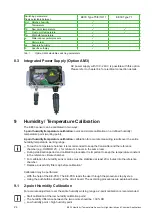
EE33 Humidity / Temperature Sensor for High Humidity and Chemical Applications
2. RH RESET: BUTTON S2:
Pressing the button for 5
seconds starts the procedure for the calibration mode RH. Pressing
both buttons simultanously for 10 seconds customer calibration
settings are reset to factory calibration.
A short flash of the LED "D1" indicates the reset.
or
3. Temp. RESET: BUTTON S1:
Pressing the button for 5 seconds
starts the procedure for the calibration mode T. Pressing both
buttons simultanously for 10 seconds customer calibration settings
are reset to factory calibration.
A short flash of the LED "D2" indicates the reset.
9.6
Adjustment/Calibration of EE33 Type T17
9.6.1
Adjustment/Calibration with Humidity Calibrator HUMOR 20
To be able to calibrate the sensor EE33 Type T17 with the dual probes (Td probe and T probe), a separate
available adapter is needed (see chapter 12 „Replacement Parts / Accessories“ -
HUMOR 20 adapter for EE33
Type T17, HA020401) to achieve the highest possible calibration result. The following steps describe how the
EE33 should be calibrated correctly.
1.
Plug both air vents of the cover of the measurement chamber with the
plugs supplied with the adapter (see left picture).
2.
Insert the Td probe (Ø12 mm) in the measuring chamber through one of
the feed-throughs of the cover and tighten the nut.
3.
Insert and tighten the T probe (Ø6 mm) in the adapter and insert in the
measuring chamber through one of the feed-throughs of the cover and
tighten the nut.
4.
In case that feed-throughs are not in use, close them with the blind
plugs delivered with the cover.
Sensors delivered after June 2009 have the possibility to heat the tube
of the probe continuously to avoid condensation. This function must be
disabled prior to calibration, by detaching the cover of the transmitter
and removing the “heat” jumper in the left top corner of the circuit
board (see picture on left side).


