background image

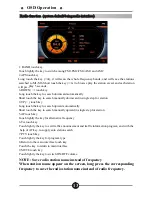
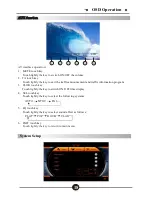
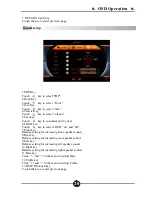
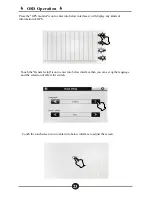
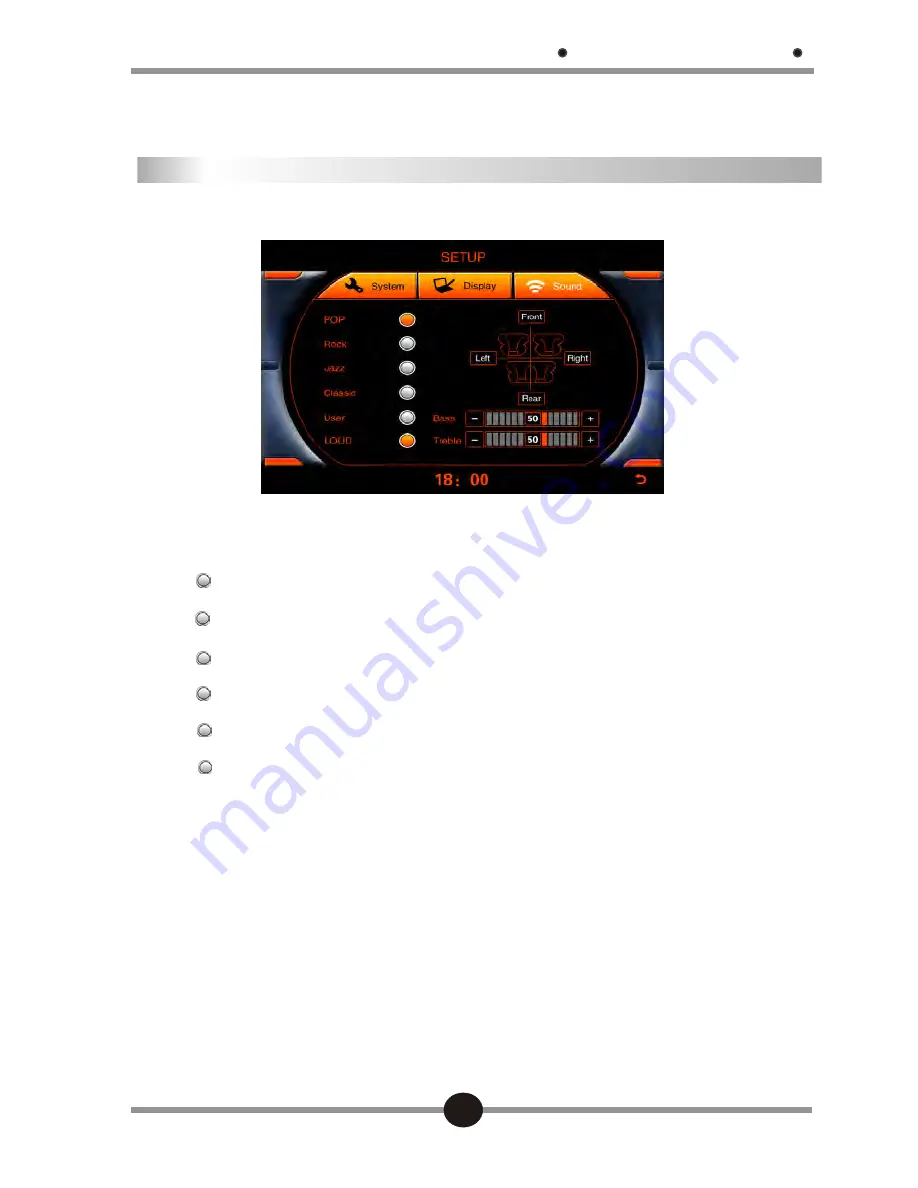
1.POP Key
Touch           key to select“POP”  
2.Rock Key
Touch           key to select  “Rock”
3.Jazz Key
Touch           key to select “Jazz”

4.Classic Key
Touch           key to select “Classic”
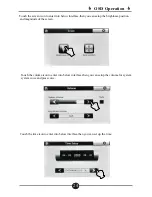
5.User key
Touch           key to customization by user.
6.LOUD key
Touch           key to select LOUD “on” and “off”
7.Front key

Balance setting for increasing front speaker sound.
8.Rear key.
Balance setting for increasing rear speaker sound.

9.Left key
Balance setting for increasing left speaker sound.
10.Right key
Balance setting for increasing right speaker sound.
11.Bass key

Click “+” and “-” in the menu to adjust Bass.

12.Treble key 

Click “+” and “-” in the menu to adjust Treble.

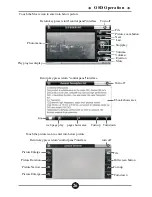
13.RETURN touch key

Touch the key to enter previous page.

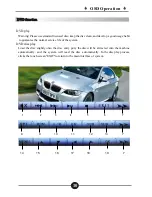
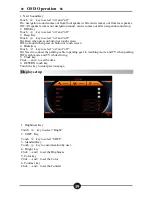
OSD Operation

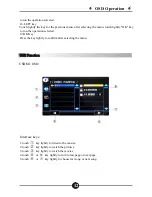
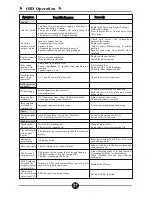
7. RETURN touch key
Touch the key to enter previous page.

Sound setup

20

Содержание DVN-E39

Страница 1: ...U S E R MA N U A L U S E R MA N U A L ...

Страница 2: ...tic diagram of remote controller Functional description of remote controller Description of functions at the front panel OSD Operation Main Menu DVD function USB function Radio function Bluetooth function Troubleshooting 01 01 01 01 01 02 02 03 03 04 04 05 06 13 Description of Ports 12 IPOD function 14 Phone book OSD AUX function System Setup Navigation path setup 09 Display Setup 27 21 19 18 18 1...

Страница 3: ...0 stations 5 3D graphic touch interface all the functions can be realized through touch operation 6 Built in GPS intelligence navigation system optional 7 Built in Bluetooth function with handwritten touch input functions 8 Optional ipod control can be operated by touch screen 9 Connectable with parking sensor 10 11 Auxiliary input function optional external audio video input 12 With USB interface...

Страница 4: ... and to ensure product normal application please invite professional personnel from the sales dealer of the product to install Never disassemble or repair the machine by yourself to prevent machine damage and accident For detail please consult with the local distributor of professional automobile sound system Please don t place the product in a damp environment and in water to prevent electric sho...

Страница 5: ...l point pen etc to clear it away Otherwise the bur may adhere to the disc s playing surface resulting in jitter Don t touch a disc s playing surface sending out colorful iridescence Otherwise fingerprint may be left on the disc surface resulting in jitter phenomena If a disc with dirt is played it may result in the disc score or jitter If a disc is dirty it may be cleaned with disc cleaning agent ...

Страница 6: ...Basic Operation Schematic diagram of remote controller Schematic diagram of remote controller 4 ...

Страница 7: ...ectively two numeric keys e g 1 and 2 meaning 12 19 DEL Clear function under Bluetooth mode 20 Stop play function under DVD mode 21 Play Pause switch function under DVD mode 22 GOTO Selecting function under DVD mode 23 SUB T Subtitle function requiring disc support under DVD mode 24 MENU Enter Exit menu setup under DVD mode 25 Menu operation direction key 26 ENTER Menu operation confirmation key 2...

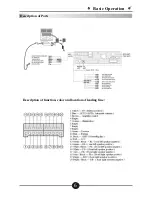
Страница 8: ...Basic Operation Description of Ports Description of function color and location of leading line 6 ...

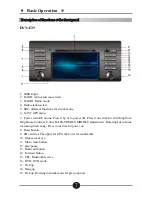
Страница 9: ...arward button 14 Forward button 15 TEL Bluetooth receive 16 DVD DVD mode 17 Pick up 18 Hang up 19 Pick up Rotating in media mode for previous next Basic Operation Description of functions at the front panel Description of functions at the front panel 7 Power switch Volume Press it by 3s to power off Press it one time for switching from Btightness Contrast Color BASS TREBLE MIDDLE adjustment Rotati...

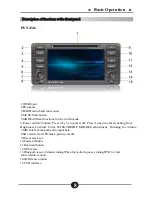
Страница 10: ... for bluetooth audio input hole 8 SD card slot for GPS music picture media 12 GPS menu 14 IR Remote window 15 USB interface 6 Power switch Volume Press it by 3s to power off Press it one time for switching from Btightness Contrast Color BASS TREBLE MIDDLE adjustment Rotating for volume 11 Rearward button 10 Forward button 8 9 Disc access keys 13 Bluetooth receive Manual tuning When the radio frequ...

Страница 11: ...ace 5 CAMERA touch key Touch lightly the key to enter camera status For relevant operation refer to camera operation interface 6 USB touch key without USB no USB status Touch lightly the key to enter USB status For relevant operation refer to USB operation interface 7 SD touch key Touch lightly the key to enter SD card status For relevant operation refer to SD operation interface 8 NAVI touch key ...

Страница 12: ...vice life of the system DVD disc play Load the disc slightly onto the disc entry port the disc will be attracted into the machine automatically and the system will read the disc automatically In the disc play process clicks the touch screen EXIT to return to the main interface of system 1 2 3 4 5 6 7 8 9 10 11 12 13 7 14 15 16 17 18 19 7 OSD Operation 10 ...

Страница 13: ... Touch lightly the key for UP selection of menu after selecting the menu touch lightly OK 13 SUB_T Key Touch lightly the key to convert subtitles in different languages CD ROM titles such as no more information will be invalid clicks 16 DOWN key 17 RIGHT key Touch lightly the key for the next menu after selecting the menu touch lightly OK key Touch lightly the key for DOWN selection of menu after ...

Страница 14: ...rn to last page or next page 5 touch or key lightly to choose last song or next song USB Function USB Function 18 LEFT key 19 OK Key Press the key lightly to confirm after selecting the menu Touch lightly the key for the previous menu after selecting the menu touch lightly OK key to run the operation selected to run the operation selected Interface keys USB SD OSD 12 ...

Страница 15: ...uency 6 TA touch key Touch lightly the key to exit traffic announcement and traffic information program and with the help of AF key to supply auto station search 7 PTY touch key Touch lightly the key for program type 8 Return to the main interface touch key Touch the key to return to main interface 9 MUTE touch key Touch lightly the key to switch ON OFF volume Long touch the key 2s it will scan th...

Страница 16: ...ÿÿÿÿÿÿ ÿÿÿ ÿÿÿÿ ÿÿ ÿÿÿÿ ÿÿÿ ÿÿÿÿÿÿ ÿÿÿÿ ÿÿÿÿÿÿÿ ÿÿÿ ÿÿÿÿÿ ÿÿÿÿ ÿÿÿÿÿÿÿÿ ÿÿÿÿÿ ÿÿ ÿÿÿÿÿÿÿÿ ÿÿÿÿÿÿÿ ÿÿÿÿÿÿÿ ÿÿÿ ÿÿÿ ÿÿÿÿ ÿÿÿÿ ÿÿÿ ÿÿÿÿ ÿÿÿÿ ÿÿÿ ÿÿÿ ÿÿÿÿÿ ÿÿÿÿÿÿÿ ÿÿÿÿÿ ÿÿÿÿÿÿÿ ÿÿÿ ÿÿÿÿÿÿÿ ÿÿ ÿÿÿ ÿÿÿÿÿÿÿÿÿÿÿ ÿÿÿÿÿ ÿÿÿ A The system provides Bluetooth hands free communications function for the first time connection if your cellular phone has Bluetooth function It can create point to point connection of...

Страница 17: ...eturn the last catalogue 4 Answer a call When there is an incoming call the system will switch to the Bluetooth hands free function automatically under any mode and convert the play voice mute of original mode to incoming ring and press the key to select answer or reject the voice from cellular phone to car bone speaker system and you will hear the dial tone and the other party s voice through the...

Страница 18: ...button menu 1 MUTE touch key Touch lightly the key to switch ON OFF the volume 2 PREVIOUS FRW touch key Short touch the key or previous track and long touch the key for fast rewind 3 NEXT FFW touch key Short touch the key for next track and long touch the key for fast forward 4 PLAY PAUSE touch key Touch lightly the key for play and pause function Ipod operation instruction 16 ...

Страница 19: ... lightly the key for menu play 15 UP Key Touch lightly the key for UP selection of menu after selecting the menu touch lightly OK key to run the operation selected 16 DOWN key Touch lightly the key for DOWN selection of menu after selecting the menu touch lightly OK key to run the operation selected 17 RIGHT key Touch lightly the key for the next menu after selecting the menu touch lightly OK key ...

Страница 20: ...t and traffic information program 3 CLOK touch key Touch lightly the key to switch ON OFF time display 4 SEL touch key Touch lightly the key to select the following systems 5 EQ touch key Touch lightly the key to select sound effect as follows 6 EXIT touch key Touch lightly the key to return to main menu AUTO NTSC PAL FLAT POP ROCK CLAS AUX function AUX function OSD Operation System Setup 18 ...

Страница 21: ...n button or touch screen 4 Brake Key Touch key to select on and off On Need to connect the parking cable to parking gear to watching movie and TV when parking Off watch movie and TV while driving 5 Clock key Click and to set the time 6 RETURN touch key Touch the key to enter previous page 1 Brightness Key Touch key to select Bright 2 SOFT Key Touch key to select SOFT 3 Standard Key Touch key to cu...

Страница 22: ...ng for increasing front speaker sound 8 Rear key Balance setting for increasing rear speaker sound 9 Left key Balance setting for increasing left speaker sound 10 Right key Balance setting for increasing right speaker sound 11 Bass key Click and in the menu to adjust Bass 12 Treble key Click and in the menu to adjust Treble 13 RETURN touch key Touch the key to enter previous page OSD Operation 7 R...

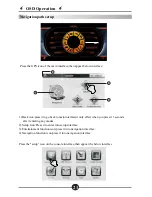
Страница 23: ...ect when you press it 3 seconds afer it entering any modes 2 Setup Icon Press it to enter into setup interface 3 Entertainment function icon press it into navigation interface 4 Navigation function icon press it into navigation interface Press the setup icon on the console interface then appear the below interface Navigation path setup NAVI 21 ...

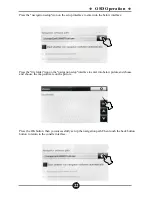
Страница 24: ... interface Press the file folder icon on the navigation setup interface to enter into below picture and choose and choose the map software on the picture Press the OK button then you successfully set up the navigation path Then touch the back button button to return to the conslle interface 22 ...

Страница 25: ... display any kinds of information of GPS Touch the General setup icon to enter into below interface then you can ser up the language and the selection of effect for switch Touch the touchscreen icon to enter into below interface to adjust the screen OSD Operation 23 ...

Страница 26: ...n you can setup the brightness position and magnitude of the screen Touch the volume icon to enter into below interface then you can setup the volume for system system voice and press voice Touch the time icon to enter into below interface then you can set up the time 24 ...

Страница 27: ...tails What s more you can operate the initial setup and file fixing Touch the entertainment icon in the console interface it will appear below picture Return Turn off Touch the Music icon to enter into below picture Return key press return control panel interface File Turn off Delete Turnup Turn down Music menu Return Last Next 25 ...

Страница 28: ...ection Mute Photo menu Play progress display Return key press return control panel interface Turn off Ebook shows area web page play page shows area Turn up Turn down Touch the picture icon to enter into below picture Return key press return conttol panel interface turn off Picture Enlarge Picture Rotation Picture Narrow Picture Enlarge File Full screen button Turn up Turn down 26 ...

Страница 29: ...ct brake connection Park the car in a safe place and remain brake status Without image DVD current system video setup not cooperative Video signal connection incorrect Adjust system video setup Check and connect correctly Image output abnormal Image pulled stretched or compressed Improper image proportion setup Use correct image proportion setup Radio Auto antenna didn t stretch out completely LOC...

Страница 30: ...U s e r Ma n u a l ...

Отзывы: