Dynavent DNV25NB Скачать руководство пользователя страница 67

OPERATOR’S MANUAL

GAC® 2500 Models (UGMA & INTL)

11001-1505E-201305

RESULTS / 63

NOTE:

A status bar indicates progress 
of retrieving filtered data. 
Results can take several 
minutes to load while retrieving 
data.  Do not press any buttons 
during this time.

ALL PRODUCTS

Displays all sample tests stored on instrument.

PRODUCT

Allows entry of part or all of the product name to perform a product search.  

All records that fit criteria entered in the Product Like filter search will 

display. Example: Searching for a product like “Wh” searches for all records 

with “Wh” in the product name. (

Figure 56

) displays results for Wheat and 

Durum Wheat.

NOTE:

User and Sample ID filter 
function works the same as the 
Product filter.  Refer to 
(

Figure 56

)

USER 

Allows entry of part or all of the User name to perform a search for similar 

records within the User field. All records that fit the criteria entered in the 

User filter search will display.  

SAMPLE ID 

Allows entry of part or all of the Sample ID name to perform a search for 

similar records within Sample ID. All records that fit the criteria entered in 

the Sample ID filter search will display. 

LAST

Displays the last number of days specified. All records that fit the criteria 

entered will display.

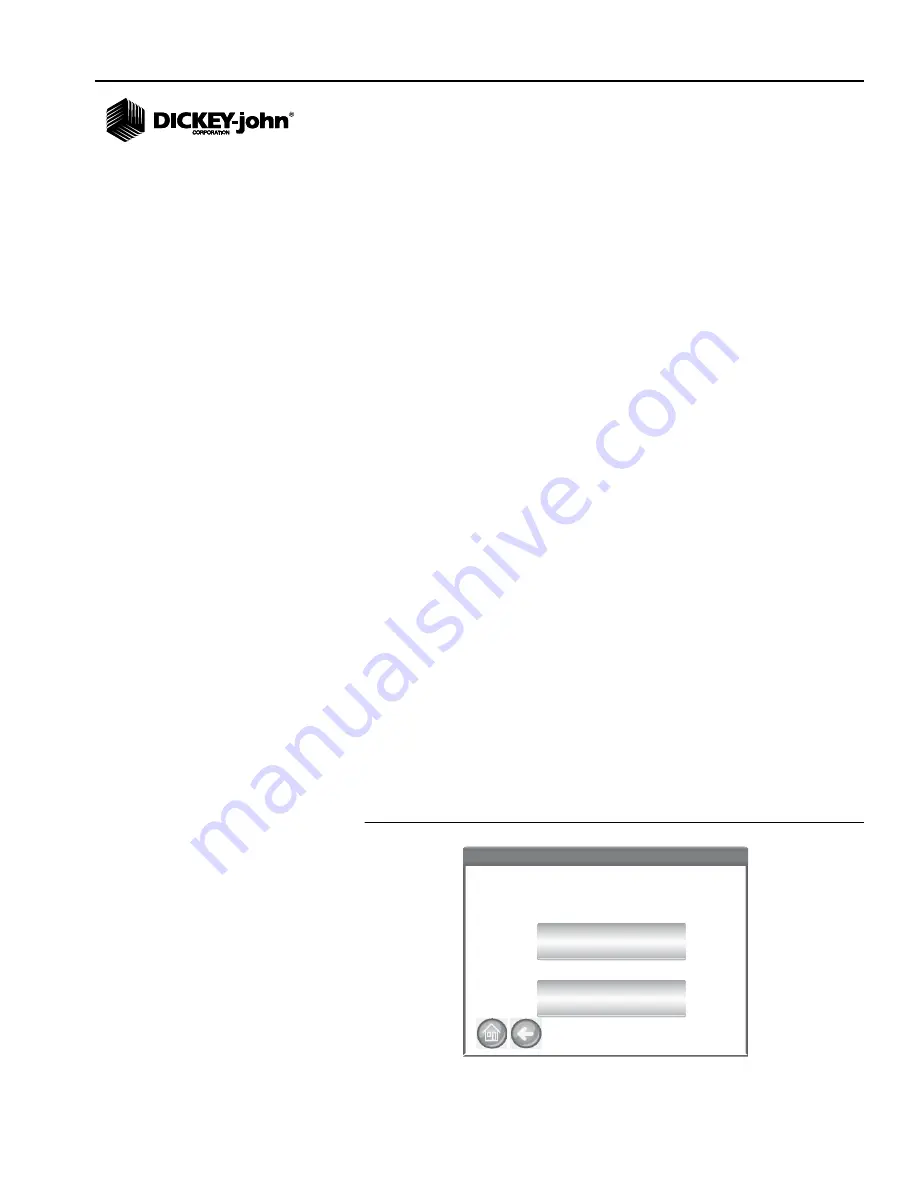
UNABLE TO SHOW QUERY RESULTS

When the system has reached near memory storage capacity, a query 

might not be able to display results per the number of records entered on 

the Query screen. In this instance, a screen confirmation will require the 

query be performed at a reduced number than was entered on the Query 

screen.

– Press 

OK

 to run query at reduced number

– Press 

Abort

 to cancel and return to Home screen.

Figure 57
Unable to Show Results Screen

Unable to Show Results

Unable to Show Results

OK

Abort

Unable to show all results - Out of Memory.
Would you like to automatically reduce the number
of results queried and try again?

GAC2500-UGMA

Содержание DNV25NB

Страница 1: ... Optional Bottomless Grain Drawer 12 Navigation 13 Using External Devices 13 Touch Screen Button Functions 13 Home 13 Power Off 14 Initiate 14 Print 14 Back 14 Abort 14 Enter 14 USB 14 User 14 Instrument Information 15 LCD Display Touch Screen Calibration 15 Keypad 15 Clean 15 Password Restrictions 17 Setup 19 Product 19 Edit Existing Product 19 Edit Product 21 Create Product 22 Delete Product 23 ...

Страница 2: ...nalyzing Grain 51 User Login optional 51 Selecting Product 53 Performing a Grain Analysis 53 Hopper Level Indicator 54 General Cleaning Tip 57 Database Memory Messages 58 Results 61 Refine Query Options 62 Maximum Records to Return 62 Maximum Records to Print 62 All Products 63 Product 63 User 63 Sample ID 63 Last 63 Unable to Show Query Results 63 Audit Trail 64 View Products 66 Grain Calibration...

Страница 3: ...OPERATOR S MANUAL GAC 2500 Models UGMA INTL 11001 1505E 201305 III Troubleshooting 79 Error Messages 80 Warranty 83 ...

Страница 4: ...OPERATOR S MANUAL GAC 2500 Models UGMA INTL 11001 1505E 201305 IV ...

Страница 5: ...see this symbol carefully read the message that follows Be alert to the possibility of personal injury or death Use of the word WARNING indicates a potentially hazardous situation which if not avoided could result in death or serious injury Use of the word CAUTION with the Safety Alert Symbol indicates a potentially hazardous situation which if not avoided may result in minor or moderate injury Us...

Страница 6: ...OPERATOR S MANUAL GAC 2500 Models UGMA INTL 11001 1505E 201305 2 SAFETY NOTICES ...

Страница 7: ...alysis Computer GAC 2500 instrument models UGMA and INTL ACCESSORIES The following list of components are included with the unit and can be ordered as replacement parts 110V power cord p n 203150002 model GAC 2500 UGMA 220V power cord p n 203150005 model GAC 2500 INTL Operator s manual p n 11001 1505E Cleaning brush p n 206410003 Grain drawer p n 468071541 Grain drawer bottomless optional p n 4680...

Страница 8: ...ions SPECIFICATIONS Operating temperature 36 to 113 degrees F 2 to 45 degrees C Power 110 220V 50 60 Hz 30 35 VA Humidity 20 to 90 noncondensing Grain temperature 4 degrees F to 113 degrees F 20 degrees to 45 degrees C depending on grain calibrations Storage transit temperature 4 to 140 degrees F 20 to 60 degrees C Moisture range 5 to 45 grain dependent Approximate Weight 25 lbs Approximate dimens...

Страница 9: ...MUNICATION CONNECTIONS 4 USB connections 2 in front 2 in back to connect a keyboard mouse printer or flash drive Up to 3 devices can be active on USB 1 USB connection to connect the GAC 2500 to a PC for downloading of software to the device installing calibrations or remotely accessing data from the instrument 1 ethernet connection to connect the GAC 2500 to a PC or network for downloading of soft...

Страница 10: ...connect to the GAC 2500 to print test data results to a ticket The ticket can be setup to include the facility name and address product date and time sample ID customer ID grain calibration date percent moisture grain temperature test weight and errors The data can be automatically printed at the end of each measurement cycle or manually initiated by pressing the Printer button Figure 3 Printer ...

Страница 11: ... in the operating location before proceeding to setup and operation To unlock shipping bracket 1 Remove Allen wrench from upper foam packaging insert Figure 4 Remove Allen Wrench 2 Carefully remove unit from packaging and place on a flat sturdy surface 3 Remove grain drawer and set aside 4 Place unit on its backside Shipping brackets are located on the left and right side wall Figure 5 Remove Grai...

Страница 12: ... Models UGMA INTL 11001 1505E 201305 8 UNPACKING THE INSTRUMENT Figure 6 Loosen Hex Bolt from Bracket 6 Remove hex bolt and set aside Figure 7 Remove Hex Bolt 7 Press down on the bracket to release Figure 8 Press Down on Bracket ...

Страница 13: ...curely tighten using the Allen wrench Figure 10 Insert Hex Bolt and Tighten 10 Perform the same procedure to the other bracket 11 Once both brackets are securely tightened to the operating location place unit upright IMPORTANT If for any reason this unit is shipped or transported the hex bolts should be removed from the operating location and securedback to the shipped locked location to protect t...

Страница 14: ...strument should be placed on a flat level surface that does NOT exceed more than 1 degree of tilt left to right and front to back CAUTION A surface that exceeds this requirement can effect measurement results Surface should be vibration free CAUTION Vibration from other machines or devices can effect measurement results LEVELING INSTRUMENT A bubble level located on the top surface of the instrumen...

Страница 15: ...lete If damage is found file a claim with the carrier immediately and notify your DICKEY john sales representative Figure 11 Unit Dimensions CONNECTING AC POWER 1 Securely connect power cord into the AC plug connection Figure 2 located on the back of the unit 2 Plug the male end into an appropriate 3 wire grounded outlet The grounding pin on the line cord connects directly to the GAC 2500 frame Wh...

Страница 16: ...ER Part Number DRAWEROPGAC2500 A bottomless grain drawer is used with a flow through work counter that allows the tested grain samples to fall through to a larger container below The size of the hole must be at least equal to the drawer dimension and located directly beneath the grain sample drawer NOTE Contact DICKEY john Technical Support at 1 800 637 3302 for additional information on grain dra...

Страница 17: ...and interface with the unit 1 Text input boxes 2 Keypad icon enables keyboard 3 Buttons 4 Keyboard Figure 13 LCD Touch Screen Display USING EXTERNAL DEVICES The following external devices can be used to enter data and navigate through the screens by connecting to the USB ports 2 front 2 back keyboard mouse barcode scanner TOUCH SCREEN BUTTON FUNCTIONS HOME Home button is available on most screens ...

Страница 18: ...tem cannot process error has occurred PRINT Print button allows printing test results to a local printer Refer to the Setup section for print requirements BACK Back button returns to the previous screen ABORT Abort button dumps grain from hopper empties the cell and aborts test ENTER Enter button accepts action taken and proceeds to next screen USB USB button is used when connecting the unit direc...

Страница 19: ...he display when screen responsiveness does not occur effectively to a finger touch or stylus KEYPAD The Keypad icon appears on those screens that require text entry Pressing the Keypad icon opens the virtual keyboard for typing text in English on the screen The virtual keyboard is used when an external keyboard mouse or barcode scanner are not available Figure 14 Keyboard CLEAN Clean button appear...

Страница 20: ...OPERATOR S MANUAL GAC 2500 Models UGMA INTL 11001 1505E 201305 16 NAVIGATION ...

Страница 21: ...e the Admin Username and Password as GUEST and press the Enter button 3 At the Setup screen press the Admin Settings button 4 At the Enter New Password screen press the Admin Username keypad icon and enter an administrator user name 5 Press the Enter button to accept 6 Enter a Password and re enter password to confirm 7 Press the Enter button to accept NOTE An external keyboard barcode scanner or ...

Страница 22: ...tem Setup Setup Admin Settings Enter New Password FRED New Password Re Enter Password FRED PASSWORD FRED PASSWORD Enter Admin Username GAC2500 UGMA Enter Admin Username Enter Admin Username Enter Admin Username GUEST GUEST Enter Password Please Log In GAC2500 UGMA Product Diagnostics GAC2500 UGMA Enter Admin Username ...

Страница 23: ...screen press the Setup button 2 Enter User Name and Password if required and press the Enter button to display the Setup screen If defaulted to Name Guest and Password Guest press the Enter button Figure 16 Setup Screen PRODUCT The Product screen is used to Edit existing products Load new products EDIT EXISTING PRODUCT If for any reason non NTEP calibrations need to be adjusted certain product par...

Страница 24: ...eens 3 Press the desired product to highlight and press the Enter button to select Once the product is selected the product s parameters display in a table 4 Select the desired action Edit product does not display on screen for NTEP calibrations Create product Delete product Product Setup Product Setup Edit Existing Product Load New Product Load New Products Only appears if flash drive is inserted...

Страница 25: ...ng 5 The new bias and slope appears in the product table on the View Product Setup screen The product name and Issue ID will remain the same NOTE An external keyboard barcode scanner or mouse can be used to enter data into the unit Figure 18 Edit Product View Product Setup View Product Setup Product Peas2100 Issue 20101231 Calibration GAC2100 Emulation Range 10 30 Moisture Test Weight Range 42 73 ...

Страница 26: ... the default name 3 Press the keypad icon to enter a different product name if desired 4 A new Issue ID is automatically defined for the new product Press the keypad icon to enter a different Issue ID if desired 5 Press the Enter button to save Figure 19 Creating a Product Screen View Product Setup View Product Setup Product Popcorn Issue ID 20101030 Calibration UGMA Range 5 35 Test Weight Range 4...

Страница 27: ...roduct screen press the Enter button to confirm deletion Figure 20 Delete Product Screen Delete Product Delete Product Confirm Deletion Of Peas2100 GAC2500 UGMA View Product Setup View Product Setup Product Peas2100 Issue 20101231 Calibration GAC2100 Emulation Range 10 30 Moisture Test Weight Range 42 73 lbs bu Temperature Range 0 50 C 66 lbs Temperature Range 0 45 C Moisture Bias 1 35 Moisture Sl...

Страница 28: ...y structure 4 If a product calibration already exists on the instrument accept the new calibration by pressing the Replace button or the Skip button to revert to the existing product NOTE Contact DICKEY john Technical Support at 1 800 637 3302 for assistance with obtaining updated calibrations or with transferring data to the unit Figure 21 Load New Product Screen Product Setup Product Setup Edit ...

Страница 29: ...list returns to the previous level in the directory structure 4 Press the Enter button to begin download 5 If product calibrations already exist on the instrument accept new calibrations by pressing the Replace button or the Skip button to revert to the existing product NOTE You must know the directory where the files are saved as names do not display Figure 22 Load Multiple Products Screens Produ...

Страница 30: ...min Settings screen 6 Press the keypad icon and enter a new Admin Username 7 Enter New Password and re enter password for verification 8 Press the Enter button to accept changes The new user name and password is saved when the Enter button is pressed Figure 23 Reset Username and Password Contact DICKEY john Tech Support or a local representative to reset instrument to open access mode Enter Admin ...

Страница 31: ...ket at the end of each test NOTE Reference the printer s specifications for correct settings To Set Printer Settings 1 At the System Setup screen press the Printer button 2 At the Printer Setup screen enable the check box for the type of connection between the unit and printer RS232 connection using a Null modem cable PCL USB when connecting to a PCL USB printer Star USB when connecting to an SP71...

Страница 32: ...st results are sent to a computer NTEP A detailed printout that includes engineering data and test results used by the National Conference on Weights and Measures 10 Select the line termination style CR Carriage return CRLF Carriage return line feed LF Line feed LFCR Line feed carriage return Figure 24 Selecting a Printer Type Printer Setup Printer Setup 9600 Baud Rate 1 Stop Bits 8 Byte Size None...

Страница 33: ...ed text 5 Press the Enter button to accept 6 If desired enter a footer name by pressing the Footer button Enter desired information to appear in footer Figure 25 Header Screen STREAMING DATA SERIALLY Streaming data is available in two methods Print CSV Serially Also When only this feature is enabled CSV data is transmitted out of the serial port when the Print button is pressed along with a print ...

Страница 34: ...SB checkbox When the USB box is checked the unit can output to both the USB and RS232 port The USB port communicates with the printer and can operate with any printer output format step 5 IMPORTANT When the output desired is to a scale and a printer via USB Print CSV Serially Also and a Baud Rate of 9600 must be selected 4 To interface with a scale only check the RS232 box 5 Select the output form...

Страница 35: ...st 8 When enabled Include Line Feeds After Print allows additional line feeds to be added at the end of each ticket after printing 9 Press the Enter button to accept changes LANGUAGE AND KEYBOARD SETTINGS Language availability depends on the model type Language default is English US The GAC 2500 UGMA is equipped with 2 languages that displays the user screens in the language selected English Spani...

Страница 36: ...ss Enter 3 To select a keyboard type press the radio button to enable either QWERTY or Standard style 4 Unit automatically converts to the selected system language and or the selected keyboard Figure 28 Language Screen Enter Sample Name Enter Sample Name V U O P Q S R T N M G H I K J L F E 0 A C B D 9 8 2 3 4 6 5 7 1 Space W X Y Z GAC2500 UGMA GAC2500 UGMA System Setup System Setup Printer Languag...

Страница 37: ... the Sample ID screen before each analyzation Sequence Sample ID Automatic number sequencing to the next higher number will occur with additional tests of the same grain Sequence Sample ID default is enabled Customer ID Required Requires a Customer ID to be associated with each grain test and prints to ticket Customer ID default is disabled User Login Required A User Login requires a tester to log...

Страница 38: ...stem Setup System Setup Language More Printer Sample Setup GAC2500 UGMA Sampling Setup Sampling Setup When Running Samples User Login Required A Sample ID is Required Auto Sequence Sample ID A Customer ID is Required Prompt for Sample ID Automatically Measure When Hopper is Full GAC2500 UGMA GAC2500 UGMA ...

Страница 39: ...of time 4 to 20 seconds without pressing the Initiate button Manual Return Advances to the Sample ID screen to perform another test by pressing the Enter button after each test Empty Drawer Requirement A forced empty of the drawer requires a sample dump before proceeding to the next analysis Bottomless Drawer in Use Must be enabled when the bottomless drawer style is used with a flow through count...

Страница 40: ...ample Return Setup Upon Sample Result 8 Enter number between 4 20 seconds Bottomless Drawer in Use Seconds before automatic return Manual Return Require drawer to be emptied after each sample Display Test Weight GAC2500 UGMA System Setup System Setup Result Setup Export Data Format Time More GAC2500 UGMA Display Temperature ...

Страница 41: ... 1 At the System Setup screen press the the More button until the Export Format button appears 2 Enable the check box of the desired output 3 Press the Enter button to accept Figure 31 Data Format Screen System Setup System Setup Export Data Format More Saved Data Saved Data Save Data Outputs in the Following Format CSV Format Excel Format GAC2500 UGMA GAC2500 UGMA Result Setup Time ...

Страница 42: ...ss the Date drop down arrow to display calendar 3 Use arrows to change the month 4 Enter time using the up down arrows 5 Select PM check box if applicable 6 Press the Enter button when done Figure 32 Time and Date Screen System Setup System Setup Time and Date Settings Time and Date Settings GAC2500 UGMA Monday June 10 2013 Current Time 6 10 13 6 18 06 PM More Export Data Format Result Setup 6 18 ...

Страница 43: ...en Unit defaults Date US MM DD YYYY Test weight lbs bu Temperature degrees F Radix point Period Moisture tenths To Change Units 1 At the System Setup screen press the the More button until the Units button appears 2 Press the Units button to display the Units Setup screen 3 Enable the respective check boxes 4 When selected press the Enter button to accept Figure 33 Units Screen Units Setup Units S...

Страница 44: ...refer to Printer Setup 1 At the System Setup screen press the More button until the Owner Data button appears 2 Press the Owner Data button and enter name address phone number by pressing the keypad icon 3 Press the Enter button when finished NOTE An external keyboard barcode scanner or mouse can be used to enter data Figure 34 Owner Data Screen Owner Data Owner Data Name Address DICKEY john Corp ...

Страница 45: ... the System Setup screen press the More button until the Service button appears 2 Press the Service Data button to display the Service Data screen 3 Enter notes and date by pressing the keypad icon 4 Press Reset button to set counter to 0 if desired NOTE An external keyboard barcode scanner or mouse can be used to enter data Figure 35 Service Screen System Setup System Setup Service Data Service D...

Страница 46: ...arget moves around the screen 4 With a keyboard attached press the Enter button to accept new settings or the Esc button to keep previous settings Without an attached keyboard press anywhere on the screen to accept Figure 36 Display Calibration Carefully press and briefly hold stylus on the center of the target Repeat as the target moves around the screen Press the Esc key to cancel Press Target w...

Страница 47: ...his can be accomplished at the View Results screen found under the Results button To Delete Records 1 At the System Setup screen press the More button until the Clear Database button displays 2 Press the Clear Database button to display the Delete Results screen 3 At the Delete Results screen press the Delete All Results button A Delete Engineering Data button appears if Engineering log files are ...

Страница 48: ...ll the next screen automatically displays Figure 38 Performing a Check Scale 4 Press the Measure button to start the process This is the last screen that allows returning to the previous screen or returning to the Home screen 5 Measurement process automatically begins measuring tare then loading and weighing the sample 6 At the Scale Measurement Results screen dump any excess material that fell in...

Страница 49: ...cale Weighing Checking Scale Checking Scale Weight 263 90 g Temp 22 72 C Please Empty Drawer Scale Measurement Results Scale Measurement Results Scale Measurement Results Scale Measurement Results Weight 263 90 g Temp 22 72 C Please Close Drawer Press Measure to Read Scale Check Scale Check Scale GAC2500 UGMA Measure GAC2500 UGMA GAC2500 UGMA GAC2500 UGMA GAC2500 UGMA GAC2500 UGMA ...

Страница 50: ...d weigh the grain in the drawer on an external scale and compare to reading on the display 10 Press the Retest button to perform another check scale or Exit button to return to the Setup screen Figure 40 Dumping Sample System Setup System Setup Dump Sample GAC2500 UGMA System Setup System Setup Retest Exit Weight 263 90 g Temp 22 72 C GAC2500 UGMA ...

Страница 51: ...bled by an authorized service technician or by contacting DICKEY john Tech Support UPDATE INSTRUMENT Update Instrument allows a software update to the instrument via a USB memory device This feature should be enabled by an authorized service technician or by contacting DICKEY john Tech Support Figure 41 Network Setup System Setup System Setup Update Instrument GAC2500 UGMA ...

Страница 52: ...OPERATOR S MANUAL GAC 2500 Models UGMA INTL 11001 1505E 201305 48 SETUP ...

Страница 53: ... Main Menu screen appears IMPORTANT On initial power up of the unit the system defaults with open access to all screens To ensure that the unit s settings are protected and accessible by qualified users an administrative level with password should be created Refer to the System Setup section for further information Figure 42 Startup Screens Instrument Information S N 1807 00005 Software Versions I...

Страница 54: ...ff switch located on the front panel A virtual Power Down button is also available on some top level screens and powers off the unit in the same manner as the on off switch A Power Down screen must be acknowledged before the unit shuts down Figure 43 Power Down Screen Shut Down Requested Shut Down Requested Yes No Do you want to shutdown GAC2500 UGMA ...

Страница 55: ... feature that requires a user to login before grain can be analyzed The unit default is no user login required If a user login is required a User button appears on the Main Menu screen The User cannot proceed to test grain until a login name is entered The User Login feature records the user name with a grain test in the unit database and prints on each grain ticket Instrument Information User Log...

Страница 56: ... Login Keypad 3 Press the Enter button to accept The user name will appear as the current user on the Main Menu screen The unit will continue to analyze grain with the active user name until the user logs off or the power is turned off USER LOG OFF 1 At the Main Menu screen press the User button 2 At the User Login screen press the Clear User Name button GUEST will default as the new user name 3 P...

Страница 57: ... the More button Press the Up and Down buttons to view grains Select the desired grain in the product table Once selected press the Initiate button to accept 4 Grain is ready for analysis Figure 46 Select Product PERFORMING A GRAIN ANALYSIS Screens that display during analysis will vary based on what configurations are enabled or disabled at the System Setup Sample Setup screens Automatic grain me...

Страница 58: ...3 etc If auto sequence is not selected the previous tests sample ID is cleared 3 A Customer ID can be entered by pressing the keypad located next to the input box 4 Press the Initiate button to proceed If the automatic measure feature is enabled instrument automatically proceeds 5 Pour grain into the hopper heaping grain slightly up to the hopper full sensors Figure 47 Sample ID Screen Do not inse...

Страница 59: ... Setup screen and the hopper is full instrument automatically proceeds to measure a sample skipping the Fill Hopper screen and eliminates pressing the Initiate button 7 The cell fills and the striker arm swings across the top of the test cell to wipe away excess grain 8 During analysis a testing status bar indicates progress Figure 49 Analysis Process Attention Required GAC2500 Attention Required ...

Страница 60: ...ce A requirement that grain be dumped after each test can be enabled at the Result Setup screen Drawer capacity holds approximately 3 tests After 3 tests the drawer must be emptied before proceeding IMPORTANT When using a bottomless grain drawer with flow through counter the bottomless drawer feature should be enabled under System Setup Result Settings to perform unlimited grain tests to eliminate...

Страница 61: ...d could possibly affect measurement results It is recommended the unit be regularly cleaned to ensure continued and consistent results Refer to the Maintenance section for cleaning steps NOTE Refer to the Error Message section for probable causes and corrective actions if errors occur during analysis NOTE Refer to the Save Results section and Printing Options section for output options ...

Страница 62: ...sults button To Clear Database Records 1 At the Memory Low screen press Yes to delete results Select No to return to previous screen and abort deleting records 2 At the Delete Results screen the number of records in the database is indicated Press the Delete All Results button to confirm record deletion 3 Press the Yes button to verify and begin deleting records Select No to return to previous scr...

Страница 63: ...parate from the Results Database Therefore the Results database can be empty but the Data Drive can exceed capacity causing a memory low error Analysis can continue but the data drive should be cleared soon Figure 53 Data Drive Memory Low Warning OUT OF MEMORY FOR RESULTS OUT OF MEMORY FOR RESULTS Yes No The Results Database is Out of Space You must delete results Would you like to delete results ...

Страница 64: ...en the data drive is out of space An analysis cannot be performed until data is cleared Figure 54 Data Drive Out of Memory Warning OUT OF MEMORY FOR RESULTS OUT OF MEMORY FOR RESULTS Yes No The Data Drive is Out of Space Please remove data by clearing the results database and purging the engineering data Would you like to delete data now GAC2500 UGMA ...

Страница 65: ...s all test results with Sample ID Moisture Weight Temperature Product Issue No Customer ID User ID Date and Time 4 Press the Filter button to choose what events display on the test results record Refer to Refine Query Options for criteria options 5 Press the Print button to print results as displayed in the table on the Results screen 6 Insert USB memory device and press the USB button to transfer...

Страница 66: ...he limit of records entered but there could be more older records in the database that meet the same criteria MAXIMUM RECORDS TO PRINT Allows entry of a specified number of records to print starting with the last sample taken such as printing the last 5 samples taken Refine Query Refine Query Maximum records to return All Products Sample ID User Product Last Days Wh View Results View Results Sampl...

Страница 67: ...ld All records that fit the criteria entered in the User filter search will display SAMPLE ID Allows entry of part or all of the Sample ID name to perform a search for similar records within Sample ID All records that fit the criteria entered in the Sample ID filter search will display LAST Displays the last number of days specified All records that fit the criteria entered will display UNABLE TO ...

Страница 68: ...display on the Audit Trail record or to obtain an NTEP audit trail display Show NTEP only when selected all other options are unchecked Show All Events when selected all other options are unchecked Show Calibration Changes Show System Changes Show Errors Print only a certain number of events 4 Press the Print button to print results as displayed on the Audit Trail screen If the printer output form...

Страница 69: ...ED EMPTY C 33 ERROR LOGGED NO COM Results Results View Results Audit Trail View Products GAC2500 UGMA Audit Trail Query Settings Audit Trail Query Settings Show calibration changes Show NTEP Only Show system changes Show errors Print only last events Show all events 10 Descriptio DOWN Product changes and errors and system changes 1 of 38 Current Filter Selected Print Complete Print Complete or Fil...

Страница 70: ...e viewed and printed at this screen To View Products 1 At the Results screen press the View Products button 2 Press the Print button to print all active products and respective Issue ID s Figure 59 View Products Screen Results Results View Results Audit Trail View Products GAC2500 UGMA Installed Products DOWN UP LGR Rice HRW Wheat HRS Wheat CornHM 2100 6 Row Barley Product 111999 23A345 123321 103...

Страница 71: ...ion files are available for download at the DICKEY john website for transfer to the GAC 2500 via a USB memory device www dickey john com Products Analytical Moisture Testing GAC2500 Grain Analysis Computer Get Support Downloads These files are also available through DICKEY john Technical Support Group at 1 800 637 3302 ...

Страница 72: ...OPERATOR S MANUAL GAC 2500 Models UGMA INTL 11001 1505E 201305 68 GRAIN CALIBRATIONS ...

Страница 73: ...m various functions and for troubleshooting purposes It is recommended that the functions on this screen are performed by a DICKEY john representative To View Diagnostics Screen 1 Press the Setup button to display the Setup screen 2 Press the Diagnostics button to view the Diagnostics screen Figure 60 Diagnostics Screen WEIGHT 00 07 LCELL 10367327 Empty 10367238 E 1 4 g ...

Страница 74: ...OPERATOR S MANUAL GAC 2500 Models UGMA INTL 11001 1505E 201305 70 DIAGNOSTICS ...

Страница 75: ...mmended on an as needed basis Quick clean Extensive clean QUICK CLEAN METHOD A quick clean method allows cleaning the cell and door using an automated process During the cleaning sequence the hopper door automatically opens Instruments with version 2 4 grain handler firmware the trap door opens automatically also For a more thorough internal cleaning refer to the Maintenance section of the operato...

Страница 76: ...S N 1807 00005 Software Versions IP Address 169 254 0 37 Last Service 1 1 2013 4 2 0 0 2 4 2 2 NTEP COC 10 038 Model GAC2500 DICKEY john Corporation DICKEY john Corporation Analyze Current User Guest Setup Results Cleaning Cell Cleaning Cell Setting Instrument to Cleaning Mode Please wait GAC2500 UGMA GAC2500 UGMA GAC2500 UGMA Directive No 9180 61 05 01 13 ...

Страница 77: ...ring cell 5 Press the OK button to return instrument to normal operation Hands should be clear from inside the instrument before pressing the OK button Figure 63 Cleaning Sequence 6 Insert grain drawer Clean Cell Clean Cell Ok GAC2500 UGMA Clean Cell and Press Ok when complete Cleaning Cell Cleaning Cell Returning System to Normal Operation Please wait GAC2500 UGMA ...

Страница 78: ...INTL 11001 1505E 201305 74 MAINTENANCE EXTENSIVE CLEANING METHOD 1 Power down the instrument Figure 64 Power Down 2 Unplug power cord Figure 65 Unplug Power Cord 3 Remove other accessory cords USB and printer Figure 66 Remove Accessory Cords ...

Страница 79: ...ls UGMA INTL 11001 1505E 201305 MAINTENANCE 75 4 Remove grain drawer Figure 67 Remove Grain Drawer 5 Place the unit on its back side Figure 68 Place Unit on Back Side 6 Manually pull down on trap door Figure 69 Pull Down on Trap Door ...

Страница 80: ...including hinge trap door and edge of cell Figure 70 Clean Surface Area Around Cell Hinge Trap Door Edge of Cell 8 Close the trap door and clean hinge under trap door Figure 71 Clean Under Trap Door 9 Return instrument to upright position 10 Insert grain drawer 11 Connect all cords power USB and printer 12 Power on unit ...

Страница 81: ...he instrument toward the top and front attached to a circuit board Figure 72 Sensor Probe Location CLEANING METHOD The temperature sensor probe is hermetically sealed so the best cleaning method is using oil less compressed air with an extension tube to clear particles from around the sensor 1 Unplug the power cord and all cables 2 Remove grain drawer 3 Turn the instrument on its backside Figure 7...

Страница 82: ...e LCD display may require periodic cleaning Use a commercial cleaner for glass lenses to remove dust Do not apply water organic solvent or chemicals such as acid and alkali to the LCD display Figure 74 LCD Display Use oil less compressed air with an extension tube Hold can upright about 2 inches from sensor probe to clean LCD Display ...

Страница 83: ...oprocessor to control grain sample measurements and self checks that determine the integrity of the internal electronics If any limit is exceeded or malfunctions occur an error code displays with a recommended resolution Figure 75 Error Screen Example Error Detected Error Detected Error 5 INVALID GRAIN CALIBRATION FILE An invalid calibration file was selected Re install the selected calibration fi...

Страница 84: ...01 1505E 201305 80 TROUBLESHOOTING ERROR MESSAGES Error messages display when an abnormal event occurs An error can be acknowledged by pressing the Initiate button For any failure that persists contact DICKEY john Technical Support at 1 800 637 3302 ...

Страница 85: ...temperature is higher than the allowed limit of 45 degrees C Check unit ventilation or move to a cooler environment 15 Unit to Grain Differential The difference between grain temperature and machine temperature has exceeded the unit specification to analyze grain Allow grain and machine temperature to equalize and then re analyze 16 Internal Power Supply Out of Spec Unit internal voltage is out of...

Страница 86: ...OPERATOR S MANUAL GAC 2500 Models UGMA INTL 11001 1505E 201305 82 TROUBLESHOOTING ...

Страница 87: ...thout DICKEY john s written consent damage to any associated equipment or lost profits or special damages Said part will not be considered defective if it substantially fulfills the performance expectations THE FOREGOING WARRANTY IS EXCLUSIVE AND IN LIEU OF ALL OTHER WARRANTIES OF MERCHANTABILITY FITNESS FOR PURPOSE AND OF ANY OTHER TYPE WHETHER EXPRESS OR IMPLIED DICKEY john neither assumes nor a...

Отзывы: