


DS752LT5 User Manual 21
Navigating the On Screen Display (OSD) Menu
Press the MENU button on the built-in keypad or remote control to show the OSD. Use the
navigation arrows to select and adjust the menu items.
*The change of each setting can only enable when you press “LEFT” (refer to p.19) to back to the last
menu layer.
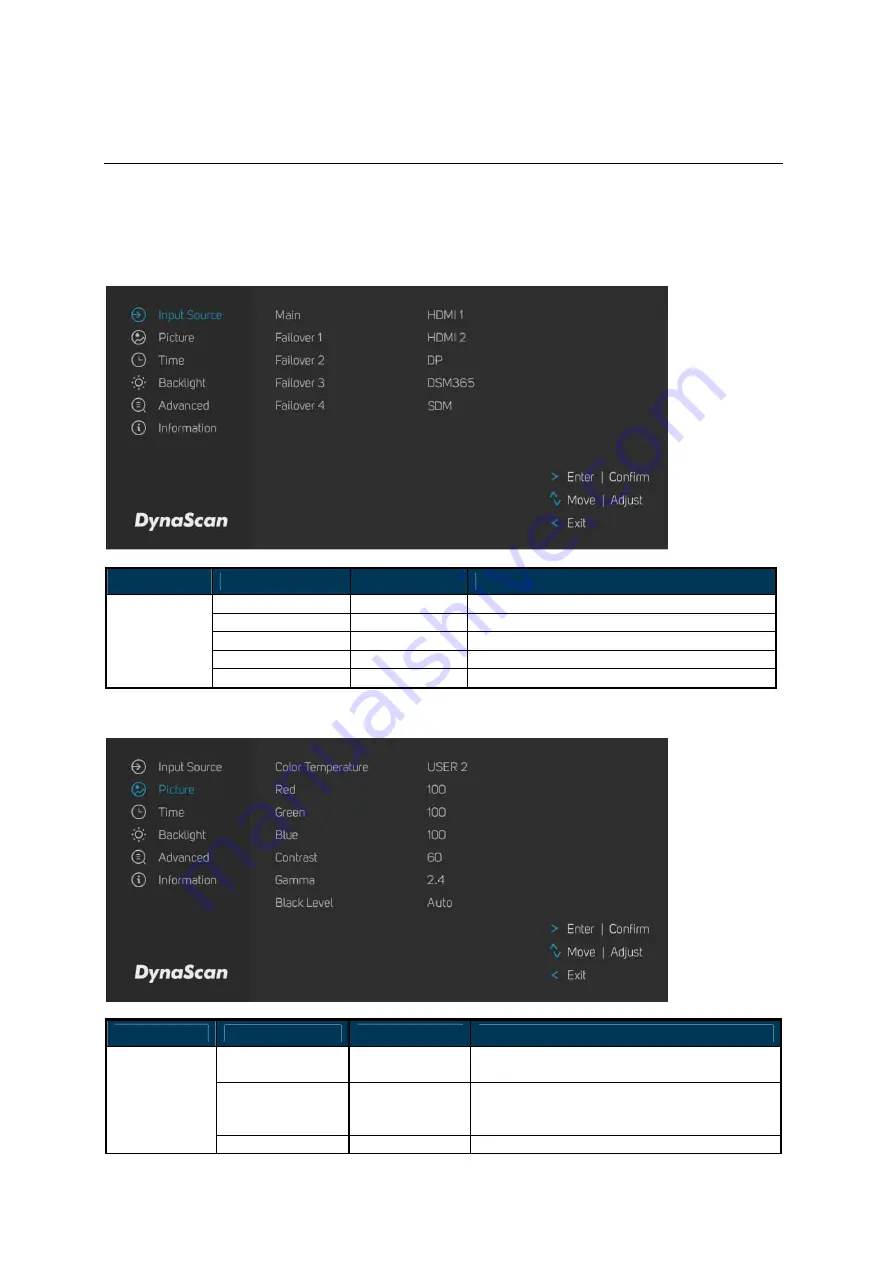
1. Input Source
ITEM 1
ITEM 2
DEFAULT
DESCRIPTION
Main
HDMI 1
Set the Main input to display.
Failover 1
HDMI 2
Set the Failover 1 input to display.
Failover 2
DP
Set the Failover 2 input to display.
Failover 3
DSM365
Set the Failover 3 input to display.
Input Source
Failover 4
SDM
Set the Failover 4 input to display.
2. Picture
ITEM 1
ITEM 2
DEFAULT
DESCRIPTION
Color
Temperature
USER 2
Select the color temperature. (User2, User1,
D93, D65 and D55).
Red
Adjust the red light level. Range 0 – 100.
Note
: The feature is only supported on
User2 mode.
Picture
Green
Adjust the green light level. Range 0 – 100.


