


DS491LT4-M User Manual
20
ITEM 1
ITEM 2
DEFAULT
DESCRIPTION
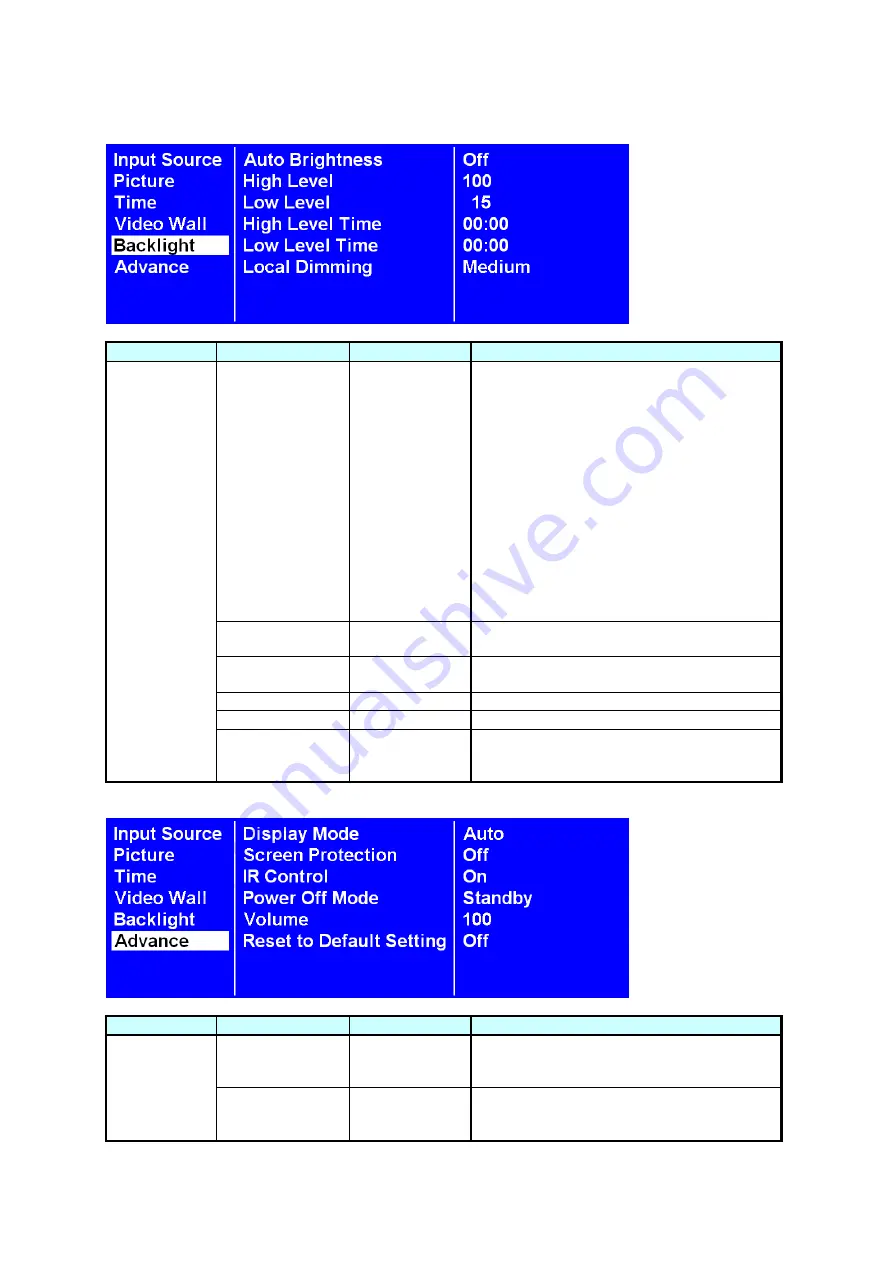
Backlight
Auto Brightness
Off
To turn On / Off the auto brightness
adjustment.
Note
: If the AUTO BRIGHTNESS is off, the
screen brightness will remain at HIGH
LEVEL brightness value. If the AUTO
BRIGHTNESS is on (Auto), the display
brightness adjusts according to the ambient
light. When ambient light is bright, the
screen will adjust to the HIGH LEVEL
brightness value set; when ambient light is
dark, the screen will adjust to the LOW
LEVEL brightness value set. When the
Timer mode is set, the display will
automatically switch the brightness
according to the time set.
High Level
100
Adjusts the highest brightness level.
Range 0
– 100.
Low Level
15
Adjusts the lowest brightness level.
Range 0
– 100.
High Level Time
HH:MM
Set high level time.
Low Level Time
HH:MM
Set low level time.
Local Dimming
Medium
Adjusts the contrast. High is the highest
contrast. Off is the lowest contrast.
(Off, Low, Medium and High)
ITEM 1
ITEM 2
DEFAULT
DESCRIPTION
Advance
Display Mode
Auto
Change the Menu orientation. The Menu
can be displayed in either LANDSCAPE or
PORTRAIT mode.
Screen
Protection
Off
Turn on / off image burn-in protection.
Set image burn-in protection interval.
Range 1
– 100.


