2-2 Access Point Configuration
2-2-1
Login
Typing
http://10.10.10.254
in the address field of web browser. After a moment, a
login window will appear, Enter
admin
for the User Name and Password, both in lower
case letters. Then click the
OK
button or press the
Enter
key.
After your successful login, you can configure and manage the AP.
2-2-2
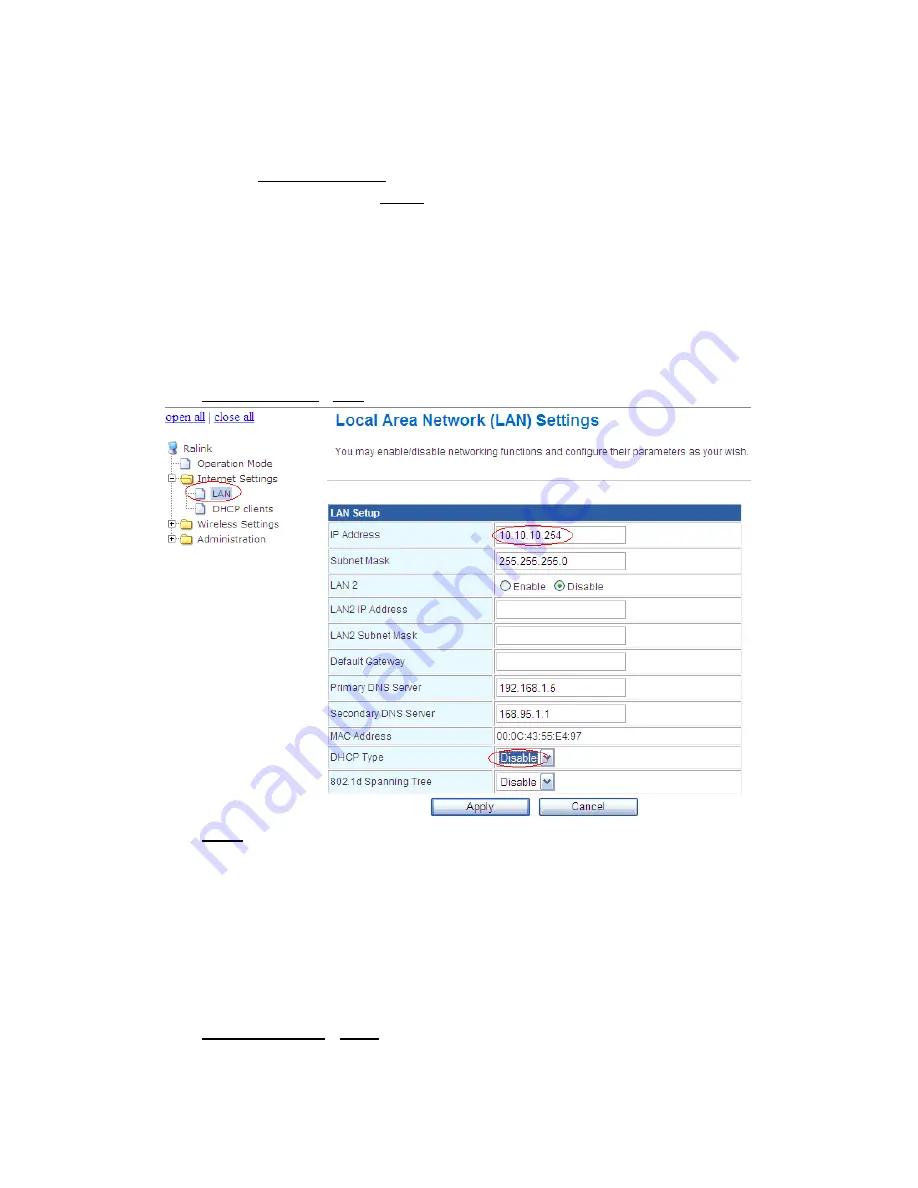
LAN Settings
You may enable/disable networking functions and configure their parameters as
your wish. for example, you can change the IP address and enable/disable the DHCP
server, if there exist another DHCP server within your network, you must disable this AP’s
DHCP server. As below:
Click
Internet Settings
LAN
Click
Apply
save the settings
2-2-3 Wireless Settings
2-2-3-1 Basic Wireless Settings
You could configure the minimum number of Wireless settings for communication,
such as Network Name (SSID) and Channel. The Access Point can be set simply with
only the minimum setting items. As below:
Click
Wireless Settings
Basic


