4
• Press and hold to scan quickly through the text.
• Press
+
or
to move the cursor to the
beginning or end of the line of text.
• When used in conjunction with certain function keys,
use
or
to select options.
• To insert characters into the text, use
or
to
position the cursor under the character to the right of
the insertion point, then type in the characters required.
• Press
or
to move the cursor to the start of
the previous or next line of a multi-line label.
• Press
+
or
to move the cursor to the
beginning or end of the label.
PRINTING
• Press
to print the label.
• Use cutter lever
E
➊
to release and tab-cut the label –
see page 2.
INCREMENTAL PRINTING
+
123.N
Prints the label, then increments a number label by 1,
ready for the next print command. Note that barcode
numbers are not incremented.
SPACE KEY
• Press
to insert a space into the text.
SYMBOLS
SYMBOL
• Press to select a symbol character – see SYMBOLS
AND SPECIAL CHARACTERS and the symbols table
on page 2.
TEXT SIZE
SIZE
• The display shows the current selection of text print
size:
small height
small height, extended
medium height
medium height, extended
large height
large height, extended
• Large height is available on 19mm labels only.
Medium height is available on all except 6mm labels.
Small height is available on all labels.
• Press
SIZE
repeatedly to select the size symbol
required.
JUSTIFY
JUST
Labels are normally printed with the text left-justified.
On multi-line labels, press
JUST
to select left-justified,
right-justified or centred text, as shown in the display.
See also LABEL LENGTH.
VERTICAL TEXT
+
VERT
JUST
• Rotates the text through 90° so that the label is
printed
, as confirmed by the
VERT indicator in the display.
• Press again to cancel and return to horizontal text.
Note: Vertical text is not available on multi-line labels.
MULTI-LINE PRINTING
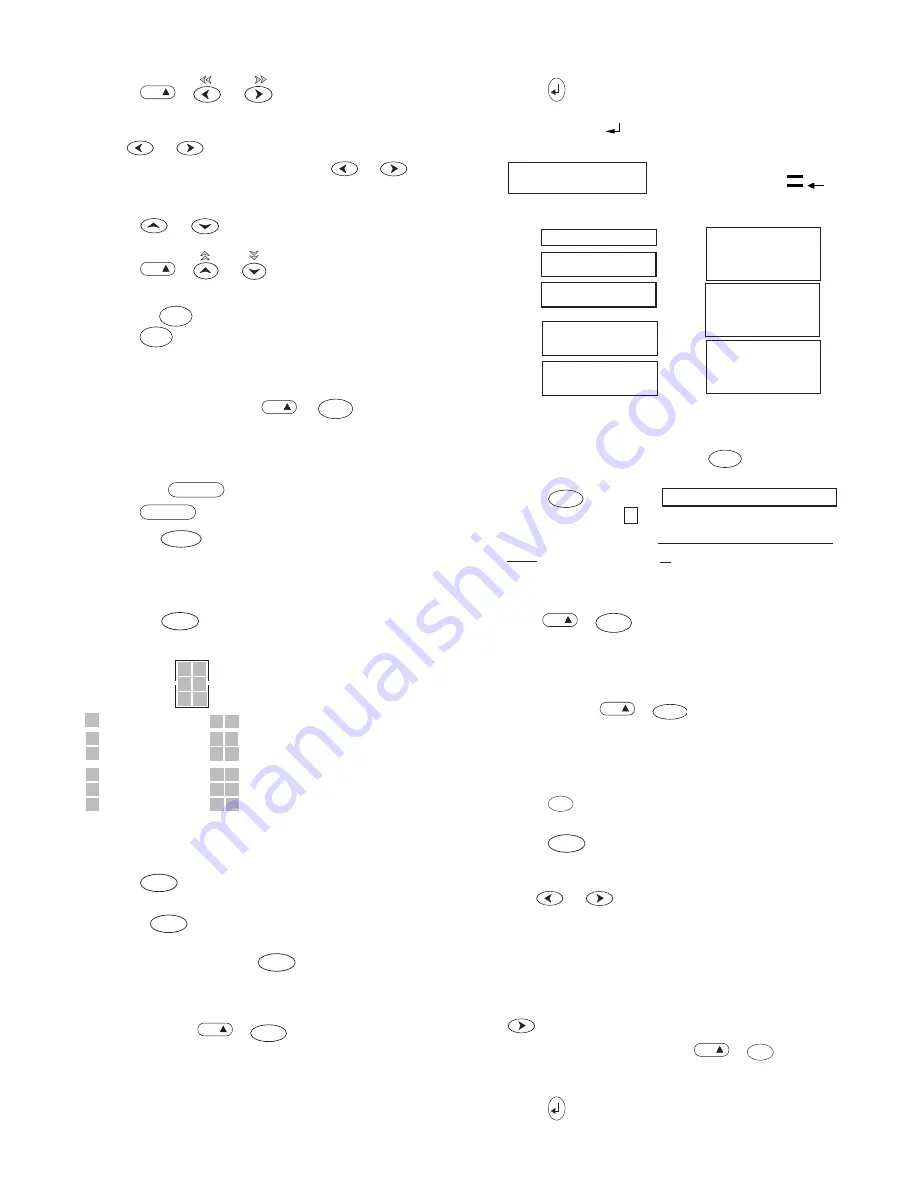
• Press
to start the next line of text on a multi-line
label, e.g.
This is a two
line label
in the display will be
printed as:
This is a two
and the display will
line label
indicate 2 lines:
Labels can be created as follows:
6mm
1 line small text
9mm
Up to 2 lines
small text
9mm 1 line medium text
12mm
Up to 2 lines
small text
12mm 1 line medium text
The line indicator in the display will confirm the
number of lines in the label.
BOXED/UNDERLINED PRINTING
BOX/UL
The display shows the current selection.
• Press
BOX/UL
once to put a line box around the label
(confirmed by the
A
indicator in the display).
• Press a second time to underline all the text on the
label (confirmed by the
A
indicator in the display).
• Press a third time to cancel and return to normal
text.
ITALIC
+
BOX/UL
ITALICS
• Press once to print the label in
italic
text (confirmed
by the
A
indicator in the display).
Press again to cancel and return to normal text.
LABEL LENGTH
+
SIZE
LENGTH
• Press to display the current label length. The length
is normally calculated automatically, according to
the length and size of the text on the label. The
justify symbol will also be displayed.
• Press
DEL
to exit the length function without
changing the length, or:
• Press
JUST
if necessary to select the justification
required, as confirmed by the justify symbol in the
display.
• Use
or
to increase (up to 5000mm max.)
or decrease the length in 2mm steps. The display
will flash if you try to make the label shorter than
the text.
• If the length displayed is preceded by the
>
symbol,
the length has already been fixed; the label is too
short for the text and it will not print. Either press
to increase the length in 2mm steps until the
>
symbol disappears, or press
+
DEL
CLEAR
to cancel
fixed length; the label is now long enough for the
text and can be printed.
• Press
to fix the length for all subsequent labels,
confirmed by the l<->l indicator in the display, or
19mm
Up to
4 lines
small
text
19mm
Up to 2 lines
medium text
19mm
1 line large text
1
2
3
v e r t i c a l l y


