- 9 -
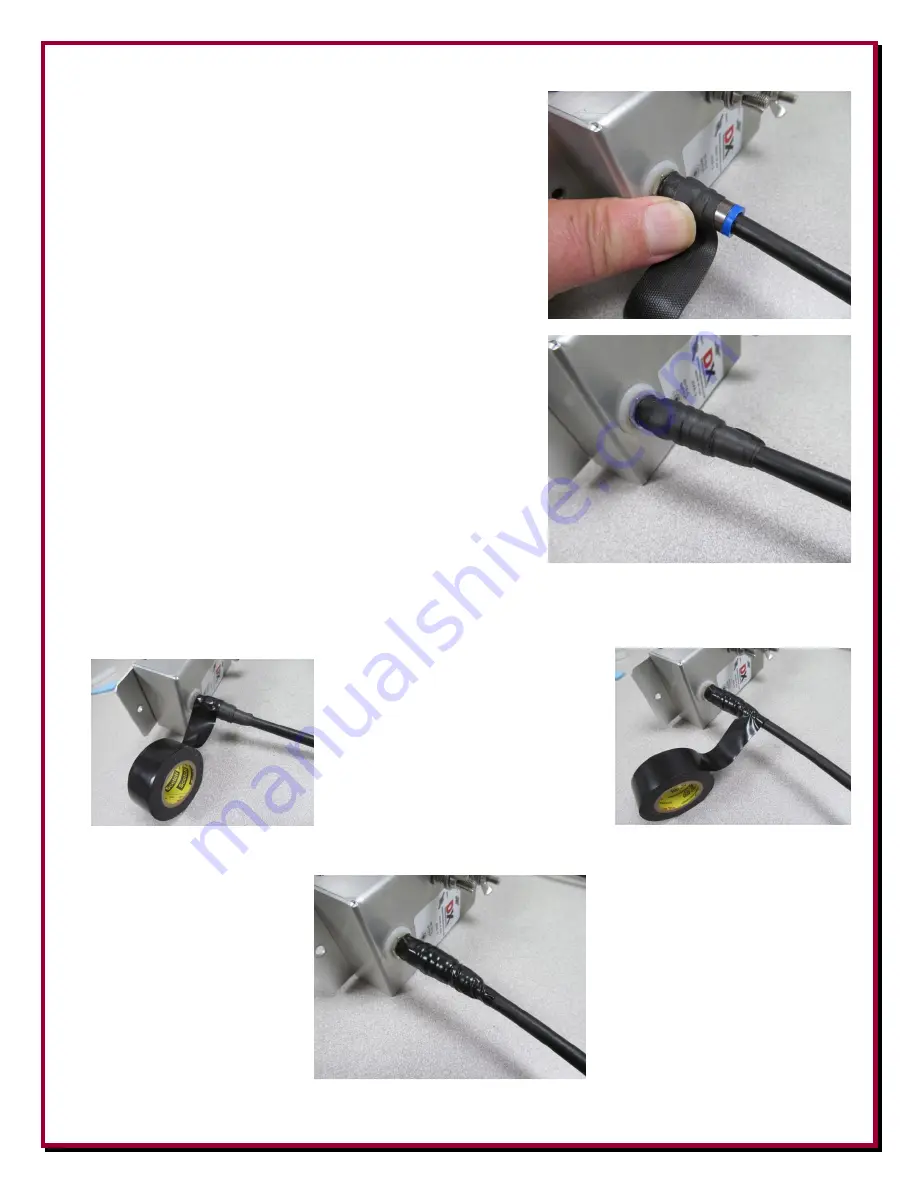
C. Starting at the end nearest the unit, hold the end of the
cut length of
TES-2155
- 3M Temflex™ 2155 Rubber
Splicing Tape in place and stretch it out until the width
of the tape is about 50%.
D. While keeping the
TES-2155
- 3M Temflex™ 2155
Rubber Splicing Tape stretched, wrap the tape around
the assembly and overlap the previous wrap by about
50%. Keep going until the complete assembly is
covered, and go an extra 1/2 to 1 inch beyond.
Stretch
while overlapping wraps.
If the length you cut is too short for the entire assembly,
that's okay. You can add more starting where the one
piece ended (overlap it) and then continue on in the
same manner described above.
This completes the first layer wrap.
TES-2155
- 3M
Temflex™ 2155 Rubber Splicing Tape requires an
added wrap of
TES-06132 -
Scotch
®
Super 33+ tape for
UV protection.
E. Starting about one inch before the previously installed 3M Temflex™ 2155 Rubber Splicing
Tape start a wrap of the
TES-06132 -
Scotch
®
Super 33+ tape. While wrapping, over lap the
previous wrap by about 50%. Use firm pressure while wrapping to ensure the tape is on flat and
there are no wrinkles or open spots.
Keep wrapping the Scotch
®
Super 33+ tape until you are about an
inch past the end of the previously
installed 3M Temflex™ 2155 Rubber
Splicing Tape. Use the scissors to cut
the tape rather than stretching and
breaking the tape.
Using these quality products and this method, the completed weatherproofing will be complete
and reliable.


