INSTRUCTION MANUAL
(Ver. 1.4_HDcctv (20110422)
H.264 Video Compression
HDcctv Digital Video Recorder
About This User’s Guide
Before operating the unit, please read this user’s guide thoroughly and retain it for future reference.
Страница 1: ...MANUAL Ver 1 4_HDcctv 20110422 H 264 Video Compression HDcctv Digital Video Recorder About This User s Guide Before operating the unit please read this user s guide thoroughly and retain it for futur...
Страница 2: ...ire or explosion Replace only with the same or equivalent type battery recommended by the manufacture Discard used batteries according to manufacturer s instructions This symbol indicates the presence...
Страница 3: ...oing so can damage the unit Installation and servicing should be performed only by qualified and experienced personnel Turn off the power of the DVR when connecting Cameras Audio or Sensor Cables The...
Страница 4: ...specified below DVR Unit Client Software CD Remote Control Battery1 5V AAA x 2EA User s Guide HDD SATA Cable HDD Mounting Brackets Screws HDD Mounting Screws Power Cable 110V or 220V Mouse Items Quant...
Страница 5: ...nting bracket as specified below 3 Insert the HDD bracket and mounting screw as specified below 4 Connect the HDD SATA and HDD power cable as specified below NOTE Additonal HDD should be connected in...
Страница 6: ...2 TB 7200 RPM 32 MB HITACHI HDS721010KLA330 1 TB 7200 RPM 32 MB HITACHI HDT721010SLA360 1 TB 7200 RPM 16 MB HITACHI HDS721010CLA332 1 TB 7200 RPM 32 MB HITACHI HDS721050CLA362 500 GB 7200 RPM 16 MB H...
Страница 7: ...2 10 3 5 3 20 4 18 1TB 4 23 5 23 6 14 7 21 9 18 1 5TB 6 0 7 12 10 22 11 21 14 18 2TB 8 1 10 1 13 7 15 22 19 18 4 Channel Continuous 640x360 30fps Audio On HDD Level 5 H Level 4 Level 3 Level 2 Level...
Страница 8: ...initializing is completed select the language and set date and time as specified below Setting Daylight Saving Time If the DVR is to be set Day Light Saving Time and be synchronized NTP Network Time P...
Страница 9: ...elect proper TIME ZONE time Pacific Time Zone Los Angles CA USA GMT 8 00 for Standard time GMT 7 00 for Daylight time Mountain Time Zone Denver CO USA GMT 6 00 for Standard time GMT 5 00 for Daylight...
Страница 10: ...T 4 HI Hawaii GMT 10 NA ID Idaho N GMT 8 GMT 7 ID Idaho S GMT 7 GMT 6 IL Illinois GMT 6 GMT 5 IN Indiana GMT 5 GMT 4 IN Indiana SW NW GMT 6 GMT 5 IA Iowa GMT 6 GMT 5 KS Kansas GMT 6 GMT 5 KS Kansas W...
Страница 11: ...GMT 5 GMT 4 SC South Carolina GMT 5 GMT 4 SD South Dakota E GMT 6 GMT 5 SD South Dakota W GMT 7 GMT 6 TN Tennessee E GMT 5 GMT 4 TN Tennessee W GMT 6 GMT 5 TX Texas GMT 6 GMT 5 TX Texas W GMT 7 GMT 6...
Страница 12: ...Min 1 Minute Before an Event Post Recording Max 1 Hour After an Event Playback Multi Decoding 1 4 Playback Speed Single Channel FF FR X2 4 16 and 32 Multi Channel FF FR X2 4 16 and 32 Search Mode Tim...
Страница 13: ...By Alarm Motion Video Loss HDD Error Multi Language Yes Software Upgrade By USB Flash Drive Network Remote Upgrade TBD NTP Network Time Protocol YES Watermarking YES Digital Zoom YES Remote Setup YES...
Страница 14: ...3 5 Setup Storage Mode 37 3 6 Setup System Mode 38 3 7 Setup SECURITY Mode 42 3 8 Setup Network Mode 44 3 8 1 Network Types 45 3 8 2 DDNS 47 3 8 3 Network Stream 47 3 9 Setup CONFIG Mode 48 3 10 Quic...
Страница 15: ...ive Window 76 8 4 1 Main User Interface 76 8 4 2 Control Buttons 76 8 5 Search and Playback Window 78 8 5 1 Main User Interface 78 8 5 2 Main Control Panel 78 8 6 Setup of UMS Multi Client 80 8 6 1 Ge...
Страница 16: ...16 P a g e 10 2 Live Monitoring 105 APPENDIX How to Connect the Network 107 How to set the IP address of the DVR and open TCP port of the router 107 How to access DVR from a Remote PC 110...
Страница 17: ...eliable File System HDMI Output 4 Channel Audio Recording Individual Channel Operation NOTE Under federal law the Omnibus Crime Control and Safe Streets Act 18 U S C Section 2510 et seq provides that...
Страница 18: ...tion Provides Enhanced Security Built in PTZ Camera Control Motion Detection Easy and Simple Graphic User Interface Simple Scheduler Easy Software Upgrade by USB port and Network SW Instant and Conven...
Страница 19: ...Ways Network Access via Network Client Software Web Viewer CMS and Mobile Viewer Web Viewer Network Client Software CMS Mobile Viewer S M A R T Self Monitoring Analysis and Reporting Technology for H...
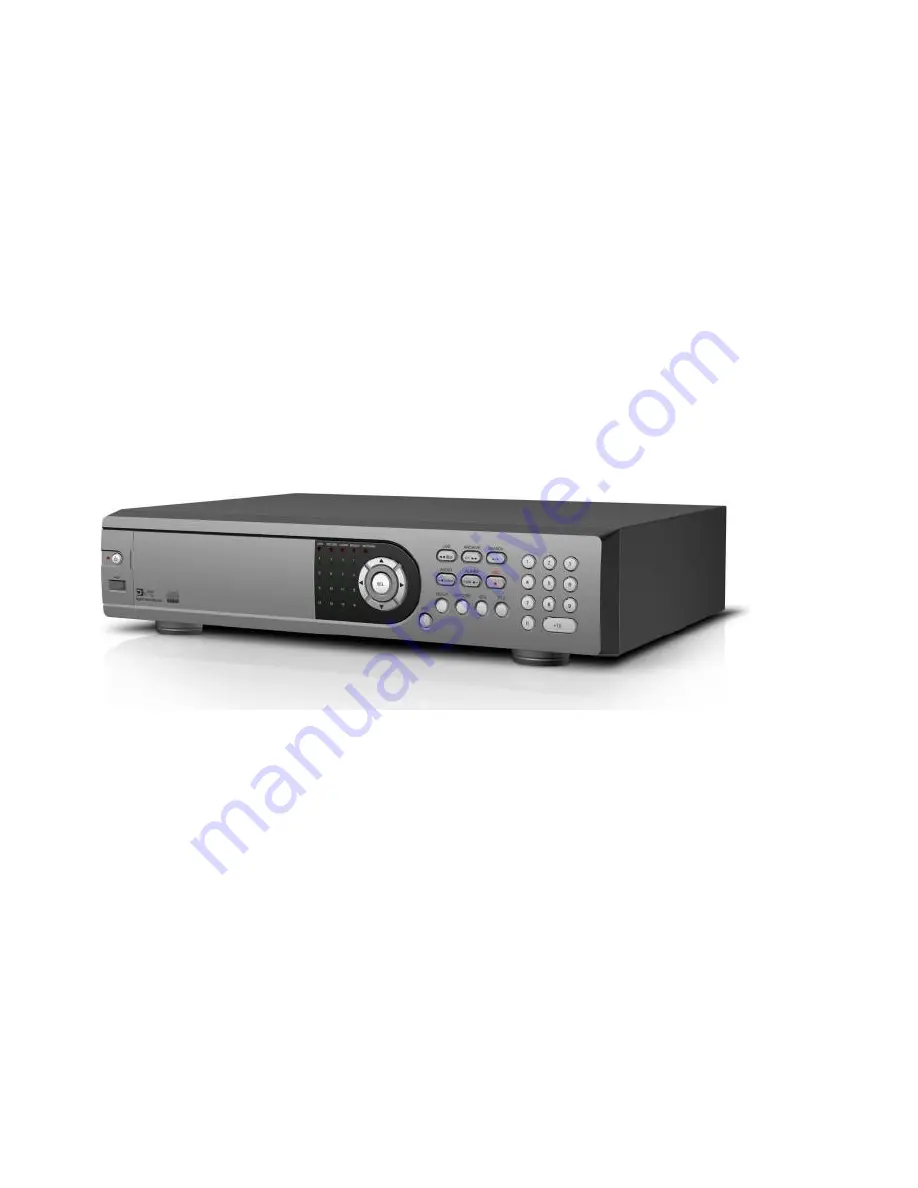
Страница 20: ...d or motion is detected E NETWORK Indicating that when Network client connects through the network F BACKUP Indicating that USB or DVD RW storage device is stored images or video Table 2 1 2 Front pan...
Страница 21: ...to control Pan Tilt Zoom operations 11 Press to enter SETUP menu 12 Press to capture video in jpeg format in live or playback mode 13 LEFT Press to move left or to change the values in Setup mode It...
Страница 22: ...Quad 9 or 16 split screen F REW Jump 60 seconds backward PLAY PAUSE Play Pause F ADV Jump 60 seconds forward REW Rewind BACKUP Backup still or video data FF Fast Forward ALARM Disable alarm operation...
Страница 23: ...nput HD SDI 2 AUDIO IN 4 connectors for audio input 3 AUDIO OUT 1 connector for audio output 4 VIDEO OUT Spot output 5 VGA Connector for VGA monitor 6 RS 232 POS Interface 7 HDMI OUT Main video output...
Страница 24: ...switch for 1st and 2nd UNIT ID Reserve PIN for additional feature 11 ETHERNET RJ 45 connector for network function 12 E SATA To archive still image or video into an external storage HDD Raid nits to b...
Страница 25: ...the submenu or press the setup button on the front panel or the remote control Table 3 1 1 Setup Menu Tree When the DVR prompts the LOG IN window enter the PASSWORD using the virtual keyboard or the...
Страница 26: ...ION FRAME RATE QUALITY RECORDING SENSOR RECORDING PRE RECORD POST EVENT RECORD AUDIO SCHEDULE DEVICE ALARM OUT SENSOR IN MOTION ON VIDEO LOSS ON ALARM DURATION ERROR ALARM PTZ CHANNEL NAME SPEED ID SP...
Страница 27: ...TIME CLIENT ACCESS SEND EMAIL NTP SECURITY USER AUTHENTICATION ADMIN NETWORK USER1 USER2 USER3 USER PASSOWRD NETWORK NETWORK TYPE DHCP STATIC DDNS DDNS SERVER 1 DDNS SERVER 2 NETWORK PORT PORT WEB POR...
Страница 28: ...28 P a g e CUSTOMER SETTINGS RESOLUTION FRAME RATE QUALITY RECORDING DAYS TO RECORD DUAL STREAM DUAL RESOLUTION DUAL FRAME RATE DUAL QUALITY...
Страница 29: ...y OSD CONTRAST Set the visibility level of the On Screen Display OSD 0 100 SEQUENCE Enable disable sequential display of video in full screen mode SEQ DWELL TIME Set the dwell time of each single chan...
Страница 30: ...m Figure 3 3 1 Recording Mode Setup Screen Table 3 3 1 Menu Items in Recording Mode Setup Menu Item Description CHANNEL Select a channel for applying the following settings using the mouse or the cont...
Страница 31: ...evel 1 Low Level 2 Level 3 Level 4 and Level 5 High RECORDING Assign the recording mode for each channel Options are Continuous Motion Sensor Schedule or Disable SENSOR RECORDING Enable setting up to...
Страница 32: ...cursor to ALL and select a recording mode C M or S using the SEL button to set the same setting for every day SUN to SAT Move the cursor to SUN to SAT and select a recording mode C M or S using the SE...
Страница 33: ...OUT Set the sensor motion and video loss for triggering alarm relay HDD Error and Video Loss can trigger beeping PTZ Set the PTZ baud rate protocol and ID CHANNEL Select specified channel for motion...
Страница 34: ...4 2 ALARM OUT Setup Screen Table 3 4 2 Menu Item in ALARM OUT Setup Screen Item Description ALARM OUT Select an Alarm out number Available No 4 CH 1 SENSOR IN Enable Alarm Out by Sensor up to 4 Input...
Страница 35: ...them directly to the RS 485 port If the camera is controlled with RS 232C use a RS 485 to RS 232C signal converter On the PTZ control setup screen you can select or set the protocol type of the camera...
Страница 36: ...MOTION SENSITIVITY FULL ZONE The motion sensor is active on the whole screen PARTIAL ZONE The motion sensor is active in the set detection frame Select the motion detection position using the mouse or...
Страница 37: ...cription OVERWRITE When enabled the DVR will continue recording and overwrite the oldest existing recorded data once the hard drive is full When disabled recording will stop once the hard drive is ful...
Страница 38: ...urs S M A R T Set the alarm and beep by setting the HDD temperature limit 3 6 Setup System Mode In the SETUP menu select the SYSTEM tab Then the SYSTEM menu is displayed as pictured below Navigate thr...
Страница 39: ...lect the display language using the mouse or the control button on the remote control Once a language is selected the display language changes English Korean Japanese SP Chinese TR Chinese Czech Finni...
Страница 40: ...ntrol button 4 OTHERS If the time zone is neither USA nor EU set the start and end date of the daylight saving period Select BEGIN or END using the control button and press the SEL button Select the i...
Страница 41: ...ct NTP time server connection mode INTERVAL Synchronize the clock by hours which is set on the connection period menu TIME Synchronize the clock at the time daily which is set on the connection period...
Страница 42: ...virtual keyboard ex abcd abcdefg com PASSWORD To set the connection password for the mail server using a virtual keyboard MAIL FROM To set the mail address sent to the destination host using a virtua...
Страница 43: ...he function USER PASSWORD Options are ADMIN NETWORK USER1 USER2 and USER3 Select USER PASSWORD using the mouse or the control button on the remote control and press SEL button Select user type and ent...
Страница 44: ...Port number Default 5445 WEB PORT Web Sever Port number Default 80 NETWORK TYPE Select a type of network connection Options are STATIC DHCP DHCP DVR will automatically retrieve an IP address from the...
Страница 45: ...NS Server DDNS INTERVAL Set the connection interval 5 60 minutes NETWORK STREAM Set the value for network streaming Insert Picture for Network Stream 3 8 1 Network Types 3 8 1 1 DHCP An IP address is...
Страница 46: ...g DMZ function Input the IP address set in DMZ into the IP address field and Gateway of ADSL modem on Gateway field Similarly for Subnet Mask DNS addresses input relevant values in IP sharer Figure 3...
Страница 47: ...you select other DDNS server the DVR cannot connect to the DDNS properly Please refer to Appendix How to connect network section for the detail of the registration Figure 3 8 4 Network setup screen DD...
Страница 48: ...nfiguration Setup Screen Table 3 9 1 Configuration Setup Item Description SAVE SETUP TO A USB User can save the current configuration Setting values of the DVR to the USB flash drive Plug in the USB f...
Страница 49: ...settings such as Language DVR ID Security User Authentication Security User P W Date format DLS settings Network settings HDD overwrite Limit recording HDD serial number and HDD ERROR time will not be...
Страница 50: ...lect the Checkbox to use the Quick Setup When user inputs the DESIRED DAYS to record the system displays a recommended resolution frame rate quality and recording type after calculating the capacity o...
Страница 51: ...n be enabled and disabled in the submenu Table 4 1 1 Status Indicator Icons in Live Viewing Screen Icon Description Power On Off button Lock Unlock Setup button Setup button Click this button to go to...
Страница 52: ...ess To set the Manual recording mode press the Record button on the front panel Motion alarm recording in progress Sensor recording in progress Indicates that the lock is set Audio mute To set audio m...
Страница 53: ...ill image The still image will be stored into hard drive It can be transferred to the USB device SETUP Press to launch SETUP menu ESC Press for temporal storage of the changed value or to return to th...
Страница 54: ...button Front Key 5 minute moving 12 00 00 Mouse control button Front Key There are 7 ways of search menu such as TIMELINE EVENT GO TO FIRST TIME GO TO LAST TIME GO TO SPECIFIC TIME ARCHIVE and LOG on...
Страница 55: ...d video Figure 4 2 2 Event Search Screen When the Event menu is selected the user can see a calendar which has recorded data Select a specific date and the event log will be displayed Press the PLAY b...
Страница 56: ...r can search for video data from a specific instance by setting the date and time in the Go To Specific Time menu Use the mouse or the control button on the remote control to change the date and time...
Страница 57: ...selected video then the user can save the selected data 4 2 7 Log Search You can access the LOG list search screen by selecting LOG on the SEARCH window Figure 4 2 5 Log Search Screen When the Log me...
Страница 58: ...ion Return to the previous menu screen search window or exit from the Menu Press to rewind the footage at 1x 2x and 4x speeds Reverse playback speed is shown as 1x normal 2x 2 times normal and 4x 4 ti...
Страница 59: ...Left Right button of the remote control position OSD Select the OSD to enter the menu Control keys are Right Left UP Down Select Far REW KEY and Near FF KEY Press the ESC button to return to the main...
Страница 60: ...60 P a g e Press the ESC button to return to the main menu Table 5 2 Description of RS 485 Port Data Data...
Страница 61: ...ure 6 1 1 Still Image Archiving and Backup Screen NOTICE For a backup using a USB Flash Drive the file format of the USB flash drive must be FAT32 6 2 Video Backup onto USB Flash Drive Video can be ca...
Страница 62: ...the control button on the remote control 2 Once you have selected the date press the NEXT button to open the list of stored data 3 Use the mouse or the control button on the remote control to scroll...
Страница 63: ...the player the HD player that the DVR copies on USB flash drive with video This format is only available when the user selects a huge backup Three files are copied on USB flash drive NSF File NSF form...
Страница 64: ...Requirements Minimum PC Requirements Recommended PC Requirements CPU Intel Core 2 Duo 1 8Ghz Memory 1GB DDR2 VGA 256MB Resolution 1280x720 Disk Space 1GB OS Windows 2000 XP Professional XP Home Vista...
Страница 65: ...e and double click UMS Client XXXX exe 2 Select a destination folder and click Next 3 Select the Program Folder and click Next 4 The installation process will begin After the installation is completed...
Страница 66: ...rom the live screen PLAY PAUSE Play pause live video ALARM The ON OFF button of the alarm output of the DVR If the DVR has an alarm output the button will be indicated red SETUP Display the setup scre...
Страница 67: ...lly zoom in and out QUAD screen display Click the QUAD button to switch to quad screen display Full screen display Click the maximize button to display only screen and hidden the operation panel Image...
Страница 68: ...must have an audio input connected and the PC must have an audio output 7 5 Remote Search Mode and Functions Button Function Description DATE TIME Displays the recording time of the data selected on...
Страница 69: ...ching and playing video in the remote DVR Video recorded in the remote DVR or Video recorded on the PC can be searched and played back 1 Connect to the remote DVR and press the SEARCH button The live...
Страница 70: ...meline scale and press the MARK IN button to mark the video backup starting point 3 Drag the marker on the timeline scale and press the MARK OUT button to mark the video backup ending point Then the s...
Страница 71: ...t the Security Option Save Path and Miscellaneous Security Option Set a password for security options When you access any of the selected functions you will need to enter the password Save Path Specif...
Страница 72: ...Event Set the record path and the size of local disk space for the log files LOG Select to save event log into log file ICON Select to display the event on live video EVENT LIST Select to show the ev...
Страница 73: ...73 P a g e Setting Record Set the recording conditions and select channels to record Select the local disk to use and the amount of disk space you want to allow the program to use for recording...
Страница 74: ...ne and speaker system to devices on site user may make bi directional audio communication over the network 8 2 Minimum PC Requirements Before installing the program check the PC specifications The DVR...
Страница 75: ...75 P a g e 3 Select the program folder and click Next 4 The installation status screen is displayed 5 After the installation is completed UMS Multi Client icon displays on the desktop screen...
Страница 76: ...the local PC REMOTE PLAYBACK Click this icon to run a playback window to search and play videos that are recorded in the remote DVR SITE MANAGEMENT THUMBNAIL REFRESH Click this icon to refresh and re...
Страница 77: ...e video ALARM ON RECORD ON Enable or disable recording of live video to local disk which has set in setup menu AUDIO Use the volume control bar to set the audio level MIC Use the micro phone volume co...
Страница 78: ...upper left of the Live Window 8 5 2 Main Control Panel Button Description LOCAL PLAYBACK Click this icon to run a playback window to search and play videos that are recorded in the local PC REMOTE PLA...
Страница 79: ...his icon to backup the recorded video in AVI format AUDIO Use the volume control bar to set the audio level To select the numbers of DVR DVRs 1 DVR 4 DVRs 9 DVRs 16 DVRs on main display screen To sele...
Страница 80: ...any of selected functions you need to enter the password You can also set the save path for capturing and backup 8 6 1 2 Save Path Specify the location to save captured still image for Capture and Bac...
Страница 81: ...81 P a g e 8 6 2 Event Event log can be archived and searched 8 6 2 1 Archiving Event Log Specify the location to save event logs and select event to archive...
Страница 82: ...time 8 6 3 Record 8 6 3 1 Record Setup You can set the recording conditions as the following Always Event or Auto record And you can also select target DVR DVRs and channel channels When you set the r...
Страница 83: ...sk to record and the amount of disk space you want to allow the program to use for recording You can also select the option to overwrite data or stop recording when the maximum amount of disk space is...
Страница 84: ...84 P a g e 8 6 5 Language You can select a language to be display 8 6 6 About About provides network client version information...
Страница 85: ...ing window is displayed as below Select the REMOTE SETUP Then the setup window is displayed The specified menu screen is displayed on the upper left of the screen Setting is the same as with the DVR m...
Страница 86: ...LY to save the changes of the value 8 7 2 Record Select RECORD tab to set the recording conditions These settings apply to the specified channel only Channel Designation Resolution Sets the resolution...
Страница 87: ...mber on the supplied remote control for its identification Setting a Sensor Input Terminal Specify a sensor input terminal number and set the type SUBMIT Saves the changes of the setting values 8 7 3...
Страница 88: ...e camera ID Apply Click APPLY to save the changes of the value 8 7 4 Storage Select Storage to configure continued recording settings by overwriting the hard disk and the storage period for the record...
Страница 89: ...e connection mode to NTP time server Time Synchronize the time at the time that is set Interval Synchronize the time by hours that is set Connection Period Set the connection period Send EMAIL Enable...
Страница 90: ...tion Apply Click APPLY to save the changes of the value 8 7 7 1 Network Port When connecting multiple DVRs to the network set a unique port number to each DVR Web Port Set a web server port number Net...
Страница 91: ...yed as below o Model User has to select the proper DVR model SDVR series H series DVR N series DVR HD DVR IP Camera o Site Name Input a name that properly describes a site o IP Address Input IP addres...
Страница 92: ...a Site 1 Select the site sites to delete from the directory window 2 Click SITE DELETE button And then the selected site sites is are deleted 8 8 1 3 Modify of Sites 1 Select the site sites to modify...
Страница 93: ...93 P a g e 3 Click MODIFY button And then the modified information is applied...
Страница 94: ...ite sites to connect from the directory window 2 Click CONNECT button and then site sites displays display as connected 8 8 2 2 Disconnect 1 Select site sites to disconnect from the directory window 2...
Страница 95: ...nel to capture from the display screen Otherwise all channels will be captured 2 Click CAPTURE button And then a Capture window will be displayed as below 3 Set Save path File Name and File Format And...
Страница 96: ...window will be displayed as below 2 Select Record and set the values 3 Select Disk and set the values 4 Click RECORD ON button And the color of button is changed 5 Live video data is recorded as set...
Страница 97: ...2 Select site sites to connect from the directory window 3 Click CONNECT button And then Green bar displays on Search calendar and timeline scale window 4 Move the marker on the timeline scale to whe...
Страница 98: ...d over the Live Window 2 Select the site to connect from the directory window 3 Click CONNECT button And then Green bar displays on Search calendar and timeline scale window 4 Move the marker on the t...
Страница 99: ...imeline scale to select the beginning point of the backup 4 Click MARK OUT button on the timeline scale to select the ending point of the backup Then the selected starting point and the ending point o...
Страница 100: ...t video can be played back by Window Media Player or other media player that is compatible with AVI format video Notice When backing up as a NSF format the user can playback using the HD Player which...
Страница 101: ...net Explorer 1 Check the IP address of the DVR from SETUP SYSTEM DESCRIPTION IP ADDRESS 2 Input the IP address or Domain name address that you pre registered on www ddnscenter com 3 Click this bar The...
Страница 102: ...or Domain name address that you pre registered on www ddnscenter com Port number and Password and click Connect Server Address Input IP address of the DVR from SETUP SYSTEM DESCRIPTION IP ADDRESS or D...
Страница 103: ...ETWORK PASSWORD 7 Then the cameras connected to the DVR are displayed on the screen 8 Use mouse scroll to digitally zoom in and out from a single channel display 8 SETUP The menu settings for the DVR...
Страница 104: ...wer 10 1 Installing the 3G App Viewer 1 Enter the Apple App Store For Apple iPhone Users or the Android Market For Android Phone users 2 Search iUMS in the App Store or the Android Market 3 Install th...
Страница 105: ...top right corner for Site Information 3 Input the Site Information and select to save the Site Information Android phone iPhone 4 Select the saved site from My Devices 5 Select the channels to view Ma...
Страница 106: ...Double tap a single channel to switch to single channel display 7 Use the pinch zoom to digitally zoom Only available in single channel display Notice 3G Data Usage applied without Wi Fi connection Pl...
Страница 107: ...remotely NOTE Please check your router s User s Manual for detailed instructions on Port Forwarding Connect network cable between DVR and Router or ADSL modem 1 Default network setting on DVR are Por...
Страница 108: ...et Mask and Default Gateway Open your web browser Enter the router IP address in the address bar and press enter NOTE The routers gateway will vary depending on the brand and model of the router pleas...
Страница 109: ...number of the port you need to port forward Example 5445 iv Protocol Select Both v IP address Enter the IP address of the DVR on SETUP NETWORK LAN IP ADDRESS vi Enable Check the enable box 7 Select th...
Страница 110: ...ng Hub Connect an Ethernet cable 10BASE T 100BASE TX CAT 5 LAN Cable from the system to a router hub 1 Run the pre install the network client software on the supplied CD 2 Check the IP address from SE...
Страница 111: ...ddress Public IP address of a router that DVR is connected or Domain name that is registered at www ddnscenter com o Port No Input port number of DVR Default Port Number is 5445 o ID Input ID of DVR D...
Страница 112: ...er com on DDNS1 If a different DDNS server is selected the DVR will not communicate with the DDNS server 2 Open the TCP port 5445 and the Web Port 80 in the router Refer to A How to set IP address of...
Страница 113: ...r DVR system NOTE Letters A Z numbers 0 9 are only applicable Do not enter symbols or spaces 5 Click the DUPLICATION CHECK button to see if the domain name is available 6 If you see the screen You can...
Страница 114: ...connected or Domain name that is registered at www ddnscenter com o Port No Input port number of DVR Default Port Number is 5445 o ID Input ID of DVR Default Port Number is admin o Password Input net...