8
S
URFACE MOUNT INSTALLATION INSTRUCTIONS*
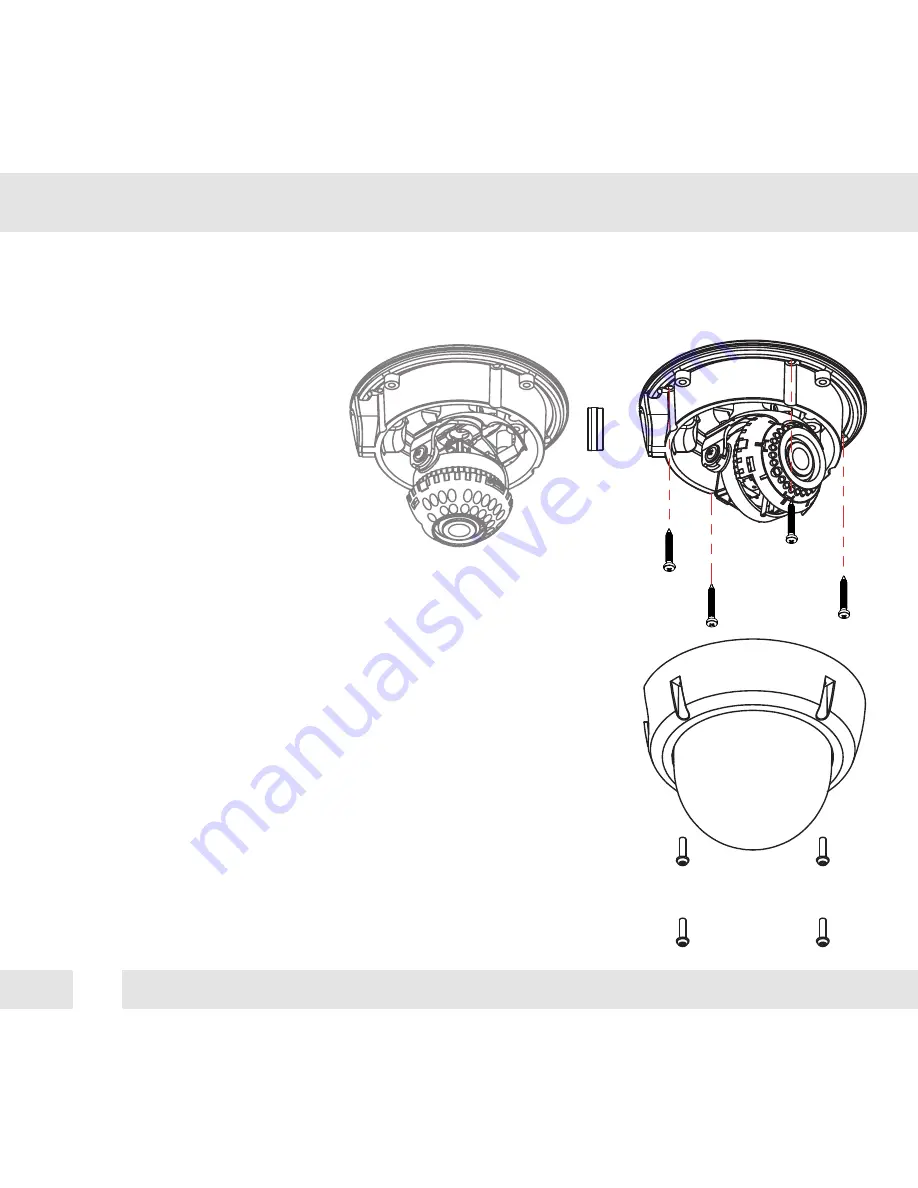
1. Use the camera or mounting template to mark and drill the
necessary holes in the wall or ceiling.
2. Pull wires through and make connections.
3. Using the four (4) included screws, mount and secure the
camera to the wall or ceiling.
4. Adjust the camera’s Pan and Tilt and Lens.
See pages 15-16 for more information.
5. Use the joystick to adjust the OSD menu. See pages 17-28
for more information.
6. Attach the camera housing to the camera base using the
assembly screws.
Содержание DWC-V6563D
Страница 6: ...6 DIMENSIONS IN MILLIMETERS IN 47 0 1 9 144 0 5 7 61 8 2 4 145 0 5 7 117 0 4 6 125 0 4 9...
Страница 34: ...34 MEMO...
Страница 35: ...35 MEMO...


