


INSTALLATION
MANUAL
855-680-9595
NEED HELP?
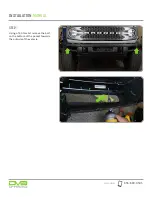
STEP
1
Begin by unpacking all items and
inspecting for missing pieces or
damage. If you have any concerns,
please contact the company the
product was purchased from.
For
this install, it is not necessary to
remove the bumper. We removed the
bumper for better clarity for these
instructions.
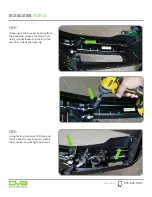
STEP
2
Begin by installing your lights onto
the mounts using the hardware
provided with the lights. Please note
the direction we are facing the lights.
Note: For this install, we are using two 3”
elite pod lights.
(4) M6X25mm Bolts
(4) M6 Locking Nuts
Hardware Included
:
(8) M6 Flat Washers


