2
6.
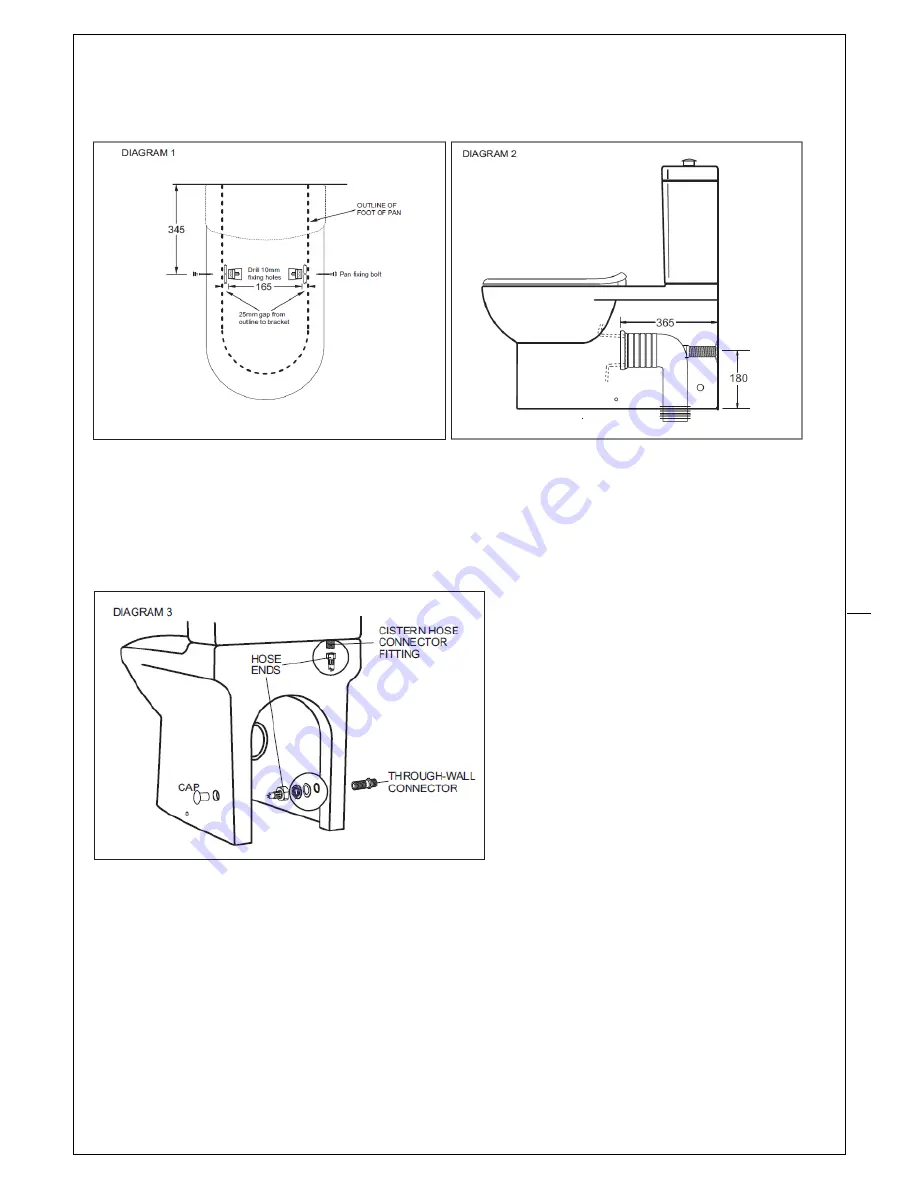
Install the connector and screw the bracing prop to the back wall. Check the outlet connection fit
with the pan fully back against the wall. (
Diagram 2
)
7.
For P trap installation a pan connector and extension will be required.
For Bottom Water Entry Installation
Fit the through –wall fitting through the left or right side access hole in the back of the WC pan and
connect the 600mm flexible hose.
Pass the other end of the flexible hose through the hole in the cistern support platform in
preparation for connection to the inlet valve. (
Diagram 3
)
For Back Water Entry Installation
Remove the hose connector fitting from the base of the cistern and detach it from the flexible hose.
Fit the blanking plug provided to seal the hole in the base of the cistern, (Note: the hose connector
fitting and external flexible hose are not required for back entry installations).
8.
Place the WC into position ensuring it seals firmly to the pan connector.
9.
Insert the floor bracket screws through the fixing holes in the base of the pan and tighten. Attach
the decorative caps.
10.
For mortar bedding use a 4:1 sand and standard cement mix, (do not use rapid hardening cement).
If the floor is tiled, cut out the tiles beneath the pan to create a good bonding surface.
11.
For bottom entry – attach the flexible hose to the inlet valve connection in the base of the cistern.
Содержание Life Style
Страница 4: ...4...


