Durr Dental VistaCam CL.iX Скачать руководство пользователя страница 4

4  /  6

EN Installation and configuration instructions
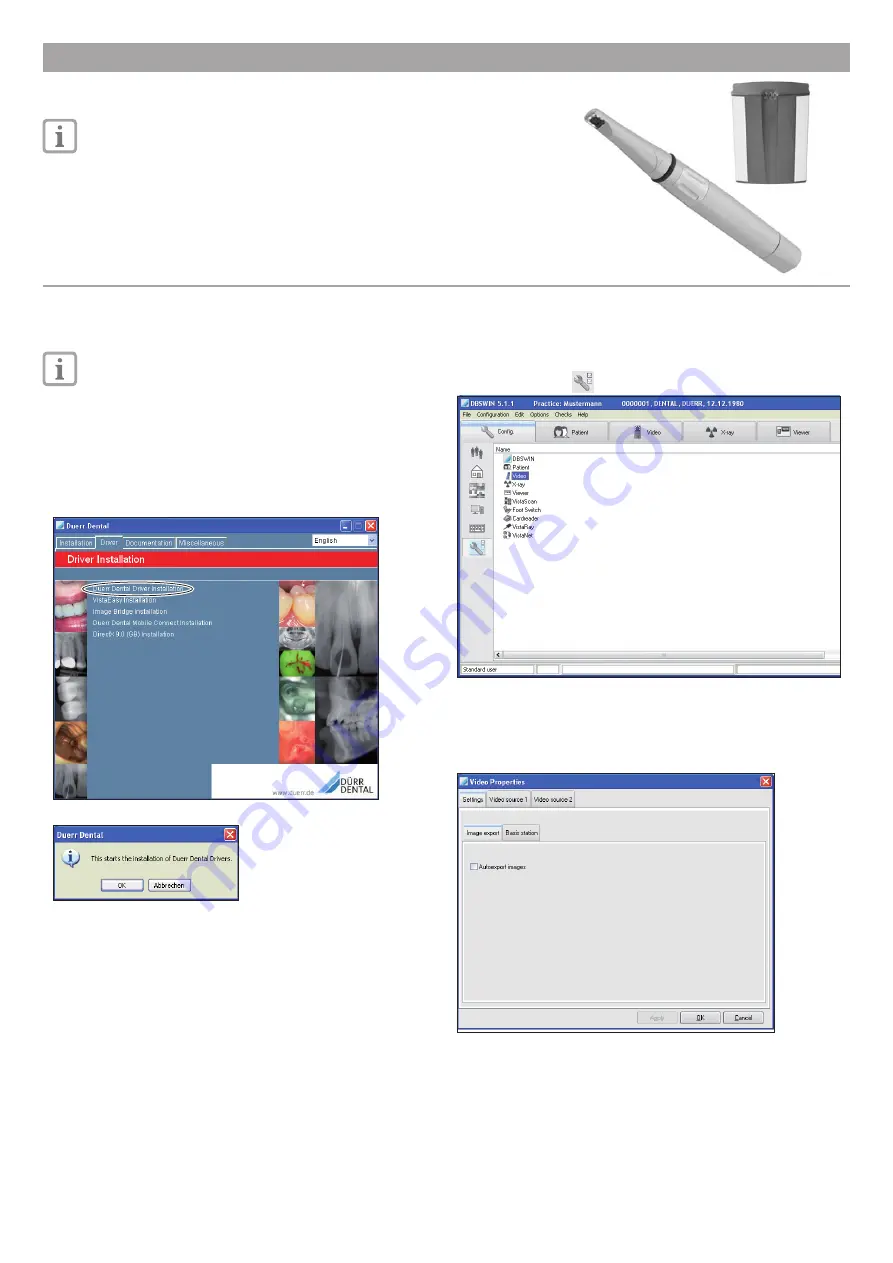
VistaCam CL.iX

Only trained experts may position and install the appliance and start it 
up for the first time.

Minimum system requirements

Imaging program 

DBSWIN or VistaEasy by Dürr Dental
Third-party software on request 

Computer system

See "System requirements for computer systems for 
imaging" (9000-618-148/01)

1  Installation

Only connect the basis station to the computer when the installation 
wizard prompts you to do so. 

• Close all programs. 
• Insert the supplied DBSWIN DVD (from Version 5.1) into the DVD drive.  

The start screen appears. 

• If the DVD does not start to play automatically, execute the file "CD_Start.

exe". 

• Select the required language. 
• Open the "Driver" tab. 

 
• Click "Duerr Dental Driver Installation". 

 
• Confirm the message with "OK".  

The "Dürr Dental Driver Setup" installation wizard opens. 

• Follow the instructions of the installation wizard. When the wizard asks 

you to connect or disconnect the camera to/from the computer, do so.  

2  Configuration

The configuration differs depending on the imaging program used: 
-  DBSWIN: See "2.1 - Setting up the configuration in DBSWIN" (additional 

settings can be made in VistaCamConfig)

-  VistaEasy and third-party software (e.g. Sidexis): See "2.2 - Setting up the 

configuration in VistaCamConfig“

2.1  Setting up the configuration in DBSWIN

• Start DBSWIN.
• Choose 

Options > Show configuration

 from the menu. 

• Click the "Modules" 

 button. 

• Double-click "Video".  

The "Video Properties" window opens. 

Setting up image export

• Go to the "Settings" tab.

• Activate/deactivate "Autoexport images".  

Each image is automatically copied to a defined path. The path, file for-
mat, and other settings can be made in the light table module.

Содержание VistaCam CL.iX

Страница 1: ... mit OK bestätigen Der Installationsassistent Dürr Dental Treiber Setup startet Anweisungen des Installationsassistenten folgen Dabei die Kamera auf Anweisung mit dem Computer verbinden bzw Verbindung trennen 2 Konfiguration Die Konfiguration ist abhängig vom verwendeten Imaging Programm DBSWIN Siehe 2 1 Konfiguration in DBSWIN einstellen weitere Einstel lungen sind in VistaCamConfig möglich Vista...

Страница 2: ...gisterkarte Videoquelle 2 vornehmen Registerkarte Videoquelle 1 oder Videoquelle 2 wählen Die Ansteuerungsart WDM wird automatisch ausgewählt Verwendete Halbbilder Beide Vollbild wählen WDM Treiber einstellen Registerkarte WDM wählen Der WDM Treiber Duerr VistaCam CL Imaging wird automatisch ausge wählt Rauschminderung aktivieren deaktiveren Wenn die Rauschminderung aktiviert ist werden bei jeder ...

Страница 3: ...15 Konfiguration Quellen für Funktionsauslösung der Kamera Hand auslösung Die Handauslösung ist vom Werk aus auf Standard werte eingestellt und kann nicht verändert werden Um die Konfiguration zu ändern auf klicken Einstellungen ändern Um Konfiguration zu speichern auf klicken Um die Änderung der Konfiguration abzubrechen auf klicken Kamera und Konfiguration testen Registerkarte Testen wählen Auf ...

Страница 4: ...al Driver Installation Confirm the message with OK The Dürr Dental Driver Setup installation wizard opens Follow the instructions of the installation wizard When the wizard asks you to connect or disconnect the camera to from the computer do so 2 Configuration The configuration differs depending on the imaging program used DBSWIN See 2 1 Setting up the configuration in DBSWIN additional settings c...

Страница 5: ...ab If you are connecting up two cameras make the settings for the second camera on the Video source 2 tab Open the Video source 1 or Video source 2 tab The WDM driver is selected automatically In Use half frames select Both full frame Setting the WDM driver Go to the WDM tab The WDM driver Duerr VistaCam CL Imaging will automatically be selected Activate deactivate noise reduction If noise reducti...

Страница 6: ...e can be adjusted see also VistaCam CL iX Operating Instructions 9000 618 115 Configuration Source os camera function activation Manual operation The manual release is factory set to standard values and can not be changed To change the configuration click Change the settings To save the configuration click To cancel the changes to the configuration click Testing the camera and configuration Go to ...

Отзывы: