


Page
3
of
4
5. Adjust the suspension so the bed is level. For best results, gradually begin weighting the
center of bed so weight is evenly distributed on the suspension straps. As you gradually
increase your weight on the portaledge, make adjustments in small steps, so the ledge
remains flat and level.
The final adjustment must be done precisely so the portaledge sits
flat.
IMPORTANT TIP
:
If setting up on a slab, do NOT clip the portaledge directly or close to the
anchor. Instead, use one or two full-strength slings between the ledge clip-in point on top of
the rain fly and the anchor. This will help avoid the need to excessively shorten the wall side
straps to get the ledge level.
6. Get settled in.
Always tie into the main rope
and be as maneuverable as possible with a
Prusik or an ascender. You can now put up the portaledge bed divider (center fin) if desired.
RAIN FLY
The D4 Portaledge comes prepared with the rain fly attached to the ledge by a carabiner. The top
1-inch loop connects the ledge to the rain fly clipped in to the main anchor.
To deploy the rain fly, simply pull it out of the haul sack, wrap it around the ledge, fit the corner straps,
and zip up the door.
IMPORTANT NOTE
: Make sure to raise the suspension so that the weight load is entirely on the six
ledge suspension straps, NOT on the rain fly itself! You will rip the rain fly with the corner straps
secured if you lower the suspension too far.
Watch the videos for more details
.
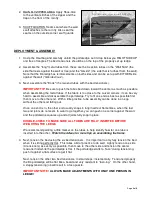
DISASSEMBLY & RE-PACKING
1. To disassemble the portaledge, pull apart the end tubes first using your foot as
leverage if needed. Let the tubes collapse toward the center.
2. Pull apart the remaining side tubes and let them collapse toward the center.


