background image

– 22 –

FR

1L25

LECTURE DE BASE

Pour commencer

¡

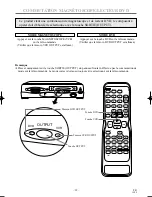
Mettre le téléviseur, l’amplificateur et tout autre
composant connecté au lecteur DVD sous tension.

¡

Vérifier que le téléviseur et le récepteur audio
(disponible dans le commerce) sont réglés  à la
chaîne correcte.

¡

Sélectionner le mode DVD en appuyant sur DVD

sur la télécommande ou OUTPUT sur le panneau
frontal.

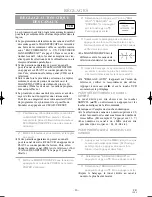
1   

Appuyer sur POWER.

2   

Appuyer sur la touche OPEN/CLOSE pour
ouvrir le plateau de chargement des dis-
ques.

3   

Mettre un disque choisi sur le plateau avec
le côté portant l’étiquette tourné vers le
haut.

CD

DVD-V

Remarques

¡

Une "icône d'interdiction" peut apparaître en haut à
droite sur l'écran du téléviseur pendant le fonction-
nement, avertissant que le DVD ou disque a rencon-
tré une opération interdite. 

¡

Avec les DVD qui utilisent des titres pour la lecture
des signaux de programme, la lecture peut com-
mencer à partir du second titre ou bien ces titres peu-
vent être sautés.

¡

Lors de la lecture de disques à deux couches, les
images peuvent s'arrêter un moment. Cela se produit
au passage de la première  à la seconde couche. Ce
n'est pas une anomalie.

LECTURE D’UN DISQUE

4   

Appuyer sur la touche PLAY.

¡

Le plateau se referme automatiquement et la lecture
commence à partir du premier chapitre ou de la pre-
mière piste du disque. Si la lecture ne démarre pas
automatiquement, appuyer sur la touche PLAY.

¡

Lors de la lecture d’un DVD possédant un menu de
titres enregistrés, il se peut que ce menu apparaisse
à l’écran. Dans ce cas, voir “MENU DE TITRES”,
page 23.

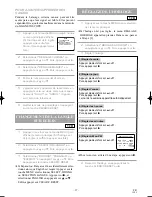
5   

Appuyer sur la touche ARRÊT (STOP) pour
arrêter la lecture.

GÉNÉRALITÉS

Des DVD peuvent contenir des menus pour naviguer
sur le disque et accéder  à des fonctions spéciales.
Appuyer sur la touche numérique correcte ou utiliser
une touche fléchée (

L

/

K

/

s

/

B

) pour mettre en évi-

dence la sélection au menu principal DVD et appuyer
sur ENTRER (ENTER) pour confirmer.
Remarque

¡

Sauf indication contraire, toutes les opérations
décrites se basent sur l'emploi de la télécommande.
Certaines opérations sont possibles avec la barre de
menus sur l'écran du téléviseur.

PAUSE

1   

Pendant la lecture, appuyer sur la touche
PAUSE.

¡

La lecture sera interrompue et le son assourdi.

2   

Pour continuer la lecture, appuyer sur la
touche PLAY.

CD

DVD-V

H9411CD(FR)2î

..qx33  03.4.22 10:51 AM  Page 22

Содержание DCD2203

Страница 1: ...sing this equipment OPEN CLOSE OUTPUT REC REW FF VIDEO AUDIO CH DOWN POWER CH UP STOP EJECT PLAY DVD VCR TIMER REC STOP PLAY DISC IN FWD REV PLAY ReWritable ReWritable Recordable Recordable DVD PLAYER with VIDEO CASSETTE RECORDER DCD2203 ...

Страница 2: ...s equipment may cause harmful interference unless the modifications are expressly approved in the instruction manual The user could lose the authority to operate this equipment if an unauthorized change or modification is made CAUTION TO PREVENT ELECTRIC SHOCK MATCH WIDE BLADE OF PLUG TO WIDE SLOT FULLY INSERT RADIO TV INTERFERENCE This equipment has been tested and found to comply with the limits...

Страница 3: ...3 Outdoor Antenna Grounding If an outside antenna or cable system is connected to the video product be sure the anten na or cable system is grounded so as to provide some pro tection against voltage surges and built up static charges Article 810 of the National Electrical Code ANSI NFPA No 70 provides information with regard to proper ground ing of the mast and supporting structure grounding of th...

Страница 4: ...s product incorporates copyright protection technology that is protected by method claims of certain U S patents and other intellectual property rights owned by Macrovision Corporation and other rights owners Use of this copyright protection technology must be authorized by Macrovision Corporation and is intended for home and other limited viewing uses only unless otherwise authorized by Macrovisi...

Страница 5: ...NORMAL PLAYBACK 18 AUTO REPEAT PLAYBACK 18 SEARCH FUNCTIONS 18 RECORDING FUNCTION 19 NORMAL RECORDING 19 OTR One Touch Recording 19 TIMER RECORDING 19 HINTS FOR TIMER RECORDING 20 SPECIAL FEATURES 21 COPYING A VIDEO TAPE 21 AUTO REWIND 21 REAL TIME TAPE COUNTER 21 PLAYING A DISC 22 BASIC PLAYBACK 22 GENERAL FEATURES 22 PAUSE 22 DISC MENU 23 TITLE MENU 23 STEP BY STEP PLAYBACK 23 RESUME 23 FAST FOR...

Страница 6: ...requency synthesiz er tuner with direct station call A cable converter box may be necessary to view scram bled cable channels Automatic functions Auto power on system Automatically turns the VCR on when you insert the cas sette Digital Auto Tracking DTR Playback Auto Repeat 2 Step Picture Search Operation Index Search Time Search Recording 1Year 8 events including Daily and Weekly Timer Recording ...

Страница 7: ...R COMBINATION UNIT DVD with region codes other than 1 or ALL DVD ROM DVD RAM Never play back otherwise malfunc tion may result CD ROM VSD CDV Only plays back the audio part CD G Only plays back the sound CD I Never play back otherwise malfunction may result SACD Photo CD Never play back otherwise malfunc tion may result Video CD Never play back otherwise malfunc tion may result Any other discs wit...

Страница 8: ...er on and off 7 POWER Light red Light appears when the power is on 8 STOP EJECT Button VCR EJECT Button Press to remove the tape from the VCR STOP Button Press to stop the tape motion 9 PLAY Button VCR page 18 Press to begin playback 10 CH UP DOWN Buttons page 16 In VCR mode press to change TV channels on the VCR press to adjust the tracking during normal or slow motion playback press to remove ve...

Страница 9: ...begin slow motion playback Press this button repeatedly to change the reverse speed of slow motion VCR mode page 18 Press to rewind the tape or to view the picture rapidly in reverse during the playback mode Rewind Search 32 STOP Button DVD mode Press to stop the disc motion VCR mode Press to stop the tape motion 33 RECORD Button page 19 Press once to start a recording 34 MENU Button DVD mode page...

Страница 10: ...e DVD picture step by step or one frame at a time VCR mode page 18 While recording press to temporarily stop the recording pause Press a second time to resume normal recording You can not pause a One Touch Recording Or press during tape playback to freeze the picture Press to advance the picture one frame at a time during still mode 52 SLOW Button page 18 During tape playback press to view the vid...

Страница 11: ...jack of a decoder or audio receiver 62 DVD ANALOG AUDIO OUT Jacks Connect the supplied audio cables here and to the Audio In jacks of a television or other audio equip ment DVD only 63 S VIDEO OUT Jack Connect an optional S Video cable here and to the S Video In jack of a television DVD only 64 VIDEO IN Jack Connect a cable coming from the video out jack of a camcorder another VCR or an audio visu...

Страница 12: ...TITLE T SET DVD VCR OPEN CLOSE OUTPUT REC REW FF VIDEO AUDIO CH DOWN POWER CH UP STOP EJECT PLAY DVD VCR TIMER REC STOP PLAY DISC IN FWD REV PLAY OUTPUT DVD VCR OUTPUT button DVD OUTPUT Light VCR OUTPUT Light DVD button VCR button Press VCR on the remote control Verify that the VCR OUTPUT Light is lit VCR MODE Note Pressing only OUTPUT on the front panel does not switch the mode of the remote cont...

Страница 13: ...m installer s attention to Article 820 40 of the NEC that pro vides guidelines for proper grounding and in particular specifies that the cable ground should be connected to the grounding system of the building as close to the point of cable entry as practical HOOKUPS CAUTION Be sure to turn off the DVD VCR COMBINATION UNIT and equipment to be connected Read through the operation manual for the equ...

Страница 14: ...b Cr L R COMPONENT VIDEO OUT AUDIO IN VIDEO IN DVD VCR VCR DVD R L To COAXIAL DIGITAL AUDIO INPUT jack To COAXIAL DIGITAL AUDIO OUT jack Stereo Receiver Amplifier equipped with digital input jacks MD deck DAT deck etc Notes The audio source on a disc in the 5 1 channel Dolby Digital surround format cannot be recorded as digital sound by an MD or DAT deck Set DOLBY DIGITAL to OFF for audio output i...

Страница 15: ...ver with Dolby Digital Decoder Fig 5 Manufactured under license from Dolby Laboratories Dolby and the double D symbol are trademarks of Dolby Laboratories If the output is Dolby Digital audio connect to a Dolby Digital decoder and set DOLBY DIGITAL to ON for audio output in the setup mode Unless connected to a Dolby Digital receiver set DOLBY DIGITAL to OFF for audio output in the setup mode Playi...

Страница 16: ...d a video tape If you want to play or record a video tape BEFORE programming the tuner you can cancel it by pressing CLEAR C RESET 1 You need to connect the antenna or cable to the VCR first Then connect the DVD VCR power plug to a standard AC outlet 2 Turn on the TV and set the TV to channel 3 If noise appears change the RF output channel of the VCR to channel 4 by pressing PLAY for 3 sec onds du...

Страница 17: ... 2 Select LANGUAGE SELECT by pressing K or L Then press B 3 Select ENGLISH FRANCAIS or ESPAÑOL by pressing K or L Then press CLEAR C RESET If you accidentally select Spanish or French and need English Press MENU and choose SELEC IDIOMA or SELECTION LANGUE Press B and select ENGLISH by pressing Kor L Finally press CLEAR C RESET VCR TO ADD DELETE CHANNELS When scanning some channels may be skipped d...

Страница 18: ...PLAY Tracking adjustment will be done automatically Digital Tracking function when you start playback To adjust the tracking manually press SKIP CH o p on the remote or CH UP DOWN on the VCR When a tape has reached the end the VCR will rewind the tape to the beginning and eject the tape 4 To stop playback press STOP If no corresponding symbols appear on the display when you press buttons such as P...

Страница 19: ...ead from damage 2 Press STOP when the recording is completed Notes When you wish to watch another program while recording select desired channel on your TV If noise appears press VCR TV This is not possible when using a cable box or satellite box VCR OTR One Touch Recording This feature allows you to set the recording length sim ply by pressing REC on the VCR 1 Press REC to begin OTR The TIMER lig...

Страница 20: ...d channel number Then press B 2 Set the frequency of the recording For once Press K or L to point to ONCE For daily Monday Friday Press K or L to point to DAILY For weekly Press K or L to point to WEEKLY Then press B 3 Set the date PROGRAM NUMBER 4 DATE 05 12 MON START TIME 07 30 PM END TIME 08 30 PM CHANNEL 16 REC SPEED SP SP SLP ONE TIME PROGRAM 4 Set the start time First press K or L for the ho...

Страница 21: ... DVD VCR select L2 position by pressing 0 0 2 on the remote control or the CH UP DOWN 5 Press REC on the recording VCR 6 Begin playback of the tape in the playing VCR For best results during dubbing use the VCR s front panel controls whenever possible The remote con trol might affect the playing VCR s operation Always use video quality shielded cables with RCA type connectors Standard audio cables...

Страница 22: ...isc pictures may stop for a moment This happens when the 1st layer switches to the 2nd layer This is not a mal function PLAYING A DISC 4 Press PLAY The tray will close automatically and playback will then start from the first chapter or track of the disc If the playback does not start automatically press PLAY When you playback the DVD which a title menu is recorded it may appear on the screen In t...

Страница 23: ...reen 3 If disc menu is available on the disc audio language subtitle options chapters for the title and other options will appear for selec tion 4 Press Arrow L K s B to select an item and ENTER to confirm selection DVD V CALLING UP A MENU SCREEN DURING PLAYBACK Press MENU to call up the DVD menu Press TITLE to call up the title menu Note Contents of menus and corresponding menu opera tions may va...

Страница 24: ...es Zooming function does not work while disc menu is shown x4 zoom is not available on some discs DVD V Using SKIP H G During playback press SKIP G to move the next track Press it repeatedly to skip subsequent tracks Press SKIP H to go back to beginning of the current track Press it repeatedly to go to the previous tracks If SKIP is pressed while the playback is paused the playback will be paused ...

Страница 25: ...A B CD DVD V Notes The A B REPEAT section can only be set within the current title for DVDs or current track for audio CDs A B REPEAT is not available with some scenes in DVD To cancel the A point which was set press CLEAR C RESET A B REPEAT playback does not function during title chapter track or all repeat playback PROGRAM You may determine the order in which tracks will play 1 In stop mode pres...

Страница 26: ... Press TITLE to return to the first item 2 Press STOP to stop playback MP3 MP3 PLAYBACK Notes Folders are known as Groups files are known as Tracks MP3 files are accompanied by icon Maximum of 255 folders can be recognized Maximum of 256 files can be recognized Up to 8 hierarchies can be created This player recommends the use of files recorded at the below specifications Sampling frequency 44 1kHz...

Страница 27: ...le playback 1 Press SUBTITLE during playback 2 Press SUBTITLE repeatedly to select your desired subtitle language The subtitle language will be displayed on the dis play bar at the top of the screen 3 To turn off subtitles press SUBTITLE repeatedly until OFF appears Notes Pressing AUDIO may not work on some DVDs with multiple audio languages e g DVDs which allow audio language setting on the disc ...

Страница 28: ...xceed your settings with a password or playback will stop This feature allows you to prevent discs with alterna tive scenes from being played by your children DVD V PARENTAL LEVEL Parental Level allows you to set the rating level of your DVD discs Playback will stop if the disc s rat ings exceed the level you set 1 Press SETUP in STOP mode 2 Press B to select CUSTOM then press ENTER 3 Press Arrow ...

Страница 29: ... or select AC at step 2 and press ENTER will erase all Markers To clear a marker using Arrow s B position the cursor on to the marker number to be cleared and press CLEAR C RESET You can mark up to 10 points 5 Press SEARCH MODE or RETURN to exit DVD SETUP AUDIO SETTING Choose the appropriate Audio settings for your equip ment as it only affect during the playback of DVD discs 1 Press SETUP in STOP...

Страница 30: ...UP in STOP mode 2 Press B to select CUSTOM then press ENTER CUSTOM mode will appear 3 Press Arrow s B to select DISPLAY then press ENTER to confirm 4 Press Arrow K L to select the below items then press ENTER TV ASPECT Press Arrow K L for an item selection then press ENTER Select 4 3 LETTER BOX for a black bars appears on top and bottom of the screen Select 4 3 PAN SCAN for a full height picture w...

Страница 31: ...vian 5961 Mongolian 5960 Nauru 6047 Nepali 6051 Norwegian NOR 6061 O R Occitan 6149 Oriya 6164 Oromo Afan 6159 Panjabi 6247 Pashto Pushto 6265 Persian 5247 Polish 6258 Portuguese POR 6266 Quechua 6367 Rhaeto Romance 6459 Romanian RUM 6461 Russian RUS 6467 S Samoan 6559 Sangho 6553 Sanskrit 6547 Scots Gaelic 5350 Serbian 6564 Serbo Croatian 6554 Sesotho 6566 Setswana 6660 Shona 6560 Sindhi 6550 Sin...

Страница 32: ...PUT light is lit Then set it to the TV position by pressing VCR TV Video or color fades in and out You cannot copy a copyrighted video tape You are experiencing copy guard protection when making a copy of a video tape Cannot remove the tape Check if the player is in the VCR mode If not press VCR on the remote control to switch the mode No picture Connect the video cables firmly Insert a correct vi...

Страница 33: ... HANDLING Use discs which have the following logos on them Optical audio digital discs Handle the discs so that fingerprints and dust do not adhere to the surfaces of the discs Always store the disc in its protective case when it is not used AUTO HEAD CLEANING Automatically cleans video heads as you insert or remove a cassette so you can see a clear picture Playback picture may become blurred or i...

Страница 34: ...el 3 or 4 Power source 120 V AC 10 60 Hz 0 5 Power consumption 24 W standby 7 0 W Operating temperature 41 F 5 C to 104 F 40 C Dimensions W 435 mm 17 1 8 H 99 mm 3 15 16 D 218 mm 8 9 16 Weight 3 7 kg 8 16 lbs Designs and specifications are subject to change without notice If there is a discrepancy between languages the default language will be English ...

Страница 35: ... 35 EN 1L25 ...

Страница 36: ...age to the tape or tape cartridge if applicable b Cleaning of video heads if applicable c Damage occurred or costs incurred in the shipping of the product to Wal Mart Canada d Ordinary adjustments to the product which can be performed by customer as out lined in the owner s manual e Signal reception problems caused by external antenna cable systems or interference f Incompatibility due to the chan...

Страница 37: ...l utilisation de l appareil LECTEUR DVD avec MAGNÉTOSCOPE DCD2203 OPEN CLOSE OUTPUT REC REW FF VIDEO AUDIO CH DOWN POWER CH UP STOP EJECT PLAY DVD VCR TIMER REC STOP PLAY DISC IN FWD REV PLAY ReWritable ReWritable Recordable Recordable ...

Страница 38: ...u un changement non autorisé est effectué ATTENTION POUR ÉVITER TOUTE ÉLECTROCUTION INTRODUIRE LA LAME LA PLUS LARGE DE LA FICHE DANS LA FENTE CORRESPONDANTE DE LA PRISE ET LA POUSSER JUSQU AU FOND ATTENTION RISQUE D ÉLECTROCUTION NE PAS OUVRIR INTERFÉRENCES AVEC LA RADIO TÉLÉVISION Cet appareil a été testé et jugé conforme aux limites des produits numériques de la Classe B conformément à la Parti...

Страница 39: ...on aux prises murales et aux endroits où les câbles sortent des appareils 13 MISE À LA MASSE D UNE ANTENNE EXTÉRIEURE Si une antenne extérieure ou un réseau de câblodistribution est rac cordé à cet appareil veiller à ce que l antenne ou le câble du réseau de câblodistribution soit relié à la terre pour éviter une surtension du raccordement et des surcharges statiques L article 810 du Code national...

Страница 40: ...ght intégrée à ce produit est protégée par une méthode de réclamation de cer taines patentes américaines et autres droits à la propriété intellectuelle dont Marcrovision Corporation et d autres sont propriétaires L utilisation de cette technologie de protection du copyright doit faire l objet d une autorisation de la part de Macrovision Corporation et est conçue pour le foyer et autres utilisation...

Страница 41: ...IQUE 18 FONCTIONS DE RECHERCHE 18 FONCTION D ENREGISTREMENT 19 ENREGISTREMENT NORMAL 19 OTR enregistrement instantané 19 ENREGISTREMENT AVEC MINUTERIE 19 CONSEILS POUR L ENREGISTREMENT AVEC MINUTERIE 20 FONCTIONS SPÉCIALES 21 COPIE D UNE VIDEOCASSETTE 21 REMBOBINAGE AUTOMATIQUE 21 COMPTEUR DE BANDE EN TEMPS RÉEL 21 LECTURE D UN DISQUE 22 LECTURE DE BASE 22 GÉNÉRALITÉS 22 PAUSE 22 MENUS DE DISQUES ...

Страница 42: ... Recherche de chapitre Recherche de titre Recherche de piste Recherche horaire Répéter Chapitre Titre Piste Groupe Disque A B Zoom Marqueur La partie désignée par l utilisateur peut être rappelée DVD Reprise de lecture Son ambiophonique virtuel Prises de sortie vidéo à composants Les prises situés à l arrière du LECTEUR DE DVD MAGNÉTOSCOPE sont utilisés pour envoyer de la vidéo de haute qualité à ...

Страница 43: ...ES DVD avec des codes de région autres que 1 ou TOUS DVD ROM DVD RAM Ne jamais en lire sinon un mauvais fonctionnement pourrait se produire CD ROM VSD CDV N effectue que la lecture de la partie audio CD G N effectue de la lecture du son CD I Ne jamais en lire sinon un mauvais fonc tionnement pourrait se produire SACD CD Photo Ne jamais en lire sinon un mauvais fonctionnement pourrait se produire V...

Страница 44: ...pareil sous ou hors tension 7 Témoin POWER ALIMENTATION rouge Apparaît à la mise sous tension 8 Touche STOP EJECT ARRÊT ÉJECTION MAGNÉTOSCOPE Touche EJECT ÉJECTION Appuyer pour retirer la vidéocassette du magnétoscope Touche STOP ARRÊT Appuyer pour arrêter le défilement de la bande 9 Touche PLAY LECTURE MAGGNÉTOSCOPE page 18 Appuyer pour démarrer la lecture 10 Touches CH UP DOWN CHAÎNE HAUT BAS pa...

Страница 45: ...AY AFFICHAGE Mode DVD page 28 Appuyer pour accéder à l écran d affichage ou le retir er pendant la lecture d un DVD ou DC audio Mode VCR Appuyer pour accéder à l affichage d état sur écran du magnétoscope ou le retirer 30 Touche DVD page 12 Appuyer pour sélectionner le mode DVD pour la télé commande Il est possible de commuter le mode OUTPUT en appuyant sur la touche OUTPUT du panneau frontal ou e...

Страница 46: ...ettre le compteur à zéro Appuyer pour quitter l écran MENU 45 Touche RETURN RETOUR page 30 Mode DVD Retourne à l opération précédente 46 Touches des flèches Sert à effectuer les réglages en regardant l affichage sur l écran d un téléviseur Mode DVD pages 22 31 Déplacer le curseur et déterminer sa position Mode VCR page 16 Touches p o Appuyer pour entrer des chiffres au réglage d un pro gramme par ...

Страница 47: ...câble vidéo S en option entre ce prise et le prise d entrée vidéo S d un téléviseur DVD seule ment 64 PRISE D ENTRÉE VIDÉO VIDEO IN Raccorder un câble en provenance d une prise de sortie vidéo d un camescope d un autre magnétoscope ou d une source audiovisuelle lecteur de disque laser lecteur de disque vidéo etc 65 PRISE DE SORTIE VIDÉO DVD VCR Raccorder le câble vidéo jaune fourni entre cette pri...

Страница 48: ...REW FF VIDEO AUDIO CH DOWN POWER CH UP STOP EJECT PLAY DVD VCR TIMER REC STOP PLAY DISC IN FWD REV PLAY OUTPUT DVD VCR Touche OUTPUT Témoin DVD OUTPUT Témoin VCR OUTPUT Touche DVD Touche VCR Appuyer sur la touche MAGNÉTOSCOPE VCR sur la télécommande Vérifier que le témoin VCR OUTPUT est allumé MODE MAGNÉTOSCOPE Remarque Presser uniquement sur la touche SORTIE OUTPUT du panneau frontal n effectue p...

Страница 49: ...DVD MAGNÉTOSCOPE car cela pourrait créer une interférence électrique lors de la visualisation de programmes de télévision RACCORDEMENT À UN TÉLÉVISEUR SANS BORNES A V 1 Déconnecter le cordon d alimentation du téléviseur de la prise murale 2 Déconnecter l antenne ou le câble du téléviseur 3 Raccorder l antenne ou le câble au jack ANT IN du LECTEUR DVD MAGNÉTOSCOPE 4 Raccorder le LECTEUR DVD MAGNÉTO...

Страница 50: ...EO OUT AUDIO IN VIDEO IN DVD VCR VCR DVD R L À la prise ENTRÉE AUDIO NUMÉRIQUE COAXIALE COAXIAL DIGITAL AUDIO INPUT À la prise SORTIE AUDIO NUMÉRIQUE COAXIALE COAXIAL DIGITAL AUDIO OUT récepteur stéréo Amplificateur avec prises d entrée numérique platine MD platine DAT etc Remarques La source audio sur un disque en format Dolby Digital 5 1 canaux ne peut pas être enregistrée sous forme de son numé...

Страница 51: ... d extrême grave Récepteur avec décodeur Dolby Digital Figure 5 Fabriqué sous licence de Dolby Laboratories Dolby et le symbole double D sont des marques de commerce de Dolby Laboratories Si la sortie est audio Dolby Digital raccorder au décodeur Dolby Digital et régler Dolby Digital à EF OUI pour la sortie audio en mode de configuration Sauf en cas de raccordement à un récepteur Dolby Digital rég...

Страница 52: ...x cas les canaux program més seront effacés La procédure ci dessous doit être suivie avant d es sayer de lire ou d enregistrer une vidéocassette Pour lire ou enregistrer une vidéocassette AVANT de programmer le syntoniseur il est possible de l annuler en appuyant sur CLEAR C RESET 1 L antenne ou câble doivent être raccordés au MAGNÉTOSCOPE en premier Ensuite raccorder la prise d alimentation du le...

Страница 53: ...fois 2 Sélectionner SELECTION LANGUE en appuyant sur K ou L Puis appuyer sur B 3 Sélectionner ENGLISH FRANCAIS ou ESPAÑOL en appuyant sur K ou L Puis appuyer sur la touche CLEAR C RESET Si Espanol ou Français a été accidentellement sélec tionné alors que English est requis Appuyer sur la touche MENU et sélectionner SELECT IDIOMA ou SELECTION LANGUE Appuyer sur B et sélectionner ENGLISH en appuyant...

Страница 54: ...sur le MAGNÉTOSCOPE Une fois que le VCR est resté en mode Image fixe ralenti pendant 5 minutes il s arrêtera automa tiquement pour protéger la bande et la tête vidéo contre les dommages Pour revenir en lecture appuyer sur la touche PLAY LECTURE RÉPÉTÉE AUTOMATIQUE Cette fonction permet de lire une cassette encore et encore 1 Sélectionner le menu principal en appuyant sur la touche MENU 2 Sélection...

Страница 55: ...llite VCR OTR enregistrement instantané Cette fonction permet de régler simplement la longueur d enreg istrement en appuyant sur la touche REC du MAGNÉTOSCOPE 1 Appuyer sur la touche REC pour activer OTR Le témoin MINUTERIE TIMER s allume Modifier la longueur d enregistrement en appuyant plusieurs fois sur la touche REC VCR Si la bande arrive à sa fin en OTR le MAGNÉTOSCOPE s arrêtera éjectera la ...

Страница 56: ...t connecté le câblosélection ou le récepteur d antenne parabolique comme en RACCORDEMENT DU LECTEUR DVD VCR À UN TÉLÉVISEUR à la page 14 régler le DVD VCR au canal 3 ou 4 c à d le même canal que le canal de sortie RF du lecteur DVD MAGNÉTOSCOPE Puis sélectionner le canal à enregistrer avecle câblosélection ou le récepteur d antenne parabolique Laisser le câblosélection ou le récepteur d antenne pa...

Страница 57: ...tionner la position L2 en appuyant sur 0 0 et 2 sur la télécommande ou sur les touches CH UP DOWN 5 Appuyer sur REC sur le magnétoscope d enregistrement 6 Commencer la lecture de la cassette sur le magnétoscope lecteur Pour obtenir les meilleurs résultats pendant la copie utilis er les commandes du panneau frontal du lecteur de VCR quand c est possible La télécommande peut affecter le fonctionneme...

Страница 58: ...nt Cela se produit au passage de la première à la seconde couche Ce n est pas une anomalie LECTURE D UN DISQUE 4 Appuyer sur la touche PLAY Le plateau se referme automatiquement et la lecture commence à partir du premier chapitre ou de la pre mière piste du disque Si la lecture ne démarre pas automatiquement appuyer sur la touche PLAY Lors de la lecture d un DVD possédant un menu de titres enregis...

Страница 59: ...nfirmer la sélection DVD V APPEL D UN ÉCRAN DE MENU PENDANT LA LECTURE Appuyer sur la touche MENU pour appeler le menu du DVD Appuyer sur la touche TITLE pour appeler le menu de titres Remarque Le contenu des menus et les opérations de menu corre spondantes peuvent varier selon les disques Pour plus de détails se référer au manuel accompagnant le disque 1 Pendant la lecture appuyer plusieurs fois ...

Страница 60: ... quand le menu du disque est affiché Le zoom x4 n est pas disponible pour certains dis ques DVD V Emploi des touches SKIP H H G G Pendant la lecture appuyer sur la touche SKIP G pour passer à la piste suivante Appuyer plusieurs fois pour sauter les plages subséquentes Appuyer sur la touche SKIP H pour passer au début de la piste actuelle Appuyer plusieurs fois pour passer aux pistes précédentes Si...

Страница 61: ...touche CLEAR C RESET pour effacer le dernier pro gramme entré 3 Appuyer sur la touche PLAY pour lire les pistes programmées Remarques Pendant la lecture d un programme la touche STOP fonctionne comme suit Appuyer une fois sur la touche STOP puis à nouveau sur la touche PLAY la lecture reprendra du point où la touche STOP a été pressée suite du programme Appuyer deux fois sur la touche STOP puis à ...

Страница 62: ...puyer sur la touche STOP pour arrêter la lecture MP3 LECTURE MP3 LISTE DES FICHIERS NOM DE DISQUE PREMIER TITRE PREMIER TITRE DOSS MP3 nom de doss nom de doss nom de doss nom de doss nom de doss nom de doss Remarques Les dossiers sont appelés groupes et les fichiers pistes Les fichiers MP3 sont accompagnés de l icône 255 dossiers maximum peuvent être reconnus 256 fichiers maximum peuvent être reco...

Страница 63: ...i disponible pendant la lecture d un disque DVD 1 Appuyer sur la touche SUBTITLE pendant la lecture 2 Appuyer plusieurs fois sur la touche SUBTI TLE pour sélectionner la langue de sous titres souhaitée La langue des sous titres sera affichée sur la barre d affichage dans le haut de l écran 3 Pour supprimer les sous titres appuyer plusieurs fois sur la touche SUBTITLE jusqu à l apparition de HF Rem...

Страница 64: ...t de passe et la lecture s arrêtera Cette fonction permet d empêcher les enfants de visionner des scènes indésirables DVD V CONTRÔLE PARENTAL Le niveau de contrôle permet de régler le niveau des disques DVD La lecture s arrêtera si le disque dépasse le niveau réglé 1 Appuyer sur SETUP en mode Arrêt 2 Appuyer sur B pour sélectionner PERSON NALISER CUSTOM puis sur la touche ENTER 3 Appuyer sur les t...

Страница 65: ...toutes les marques Pour supprimer une marque utiliser les touches fléchées s B pour positionner le curseur sur le numéro de marque à supprimer et appuyer sur la touche CLEAR C RESET Il est possible de marquer un maximum de 10 points 5 Appuyer sur SEARCH MODE ou RETURN pour quitter RÉGLAGES DU LECTEUR DVD RÉGLAGES SON Choisir les réglages audio les mieux adaptés pour l équipement parce qu ils sont ...

Страница 66: ...R Le mode PERSONNALISER CUSTOM apparaîtra 3 Appuyer sur les touches fléchées s B pour sélectionner DISPLAY puis sur la touche ENTER 4 Appuyer sur les touches fléchées K L pour sélectionner les articles ci dessous puis sur la touche ENTER ASPECT TV Appuyer sur les touches fléchées K L pour sélection ner un article puis sur la touche ENTER Sélectionner 4 3 BOÎTE AUX LETTRES pour que des barres noire...

Страница 67: ... GER 5051 Amhar 4759 Anglais ENG 5160 Arabe 4764 Arménien 5471 Assamien 4765 Aymara 4771 Azerbaïdjanais 4772 Bashkir 4847 Basque 5167 Bengalais 4860 Biharis 4854 Birman 5971 Bislamien 4855 Biélorusse 4851 Bouthanais 5072 Breton 4864 Bulgare 4853 C E Cambodgien 5759 Cashmiri 5765 Catalan 4947 Chinois CHI 7254 Corse 4961 Coréen KOR 5761 Croatien 5464 Danois DAN 5047 Espagnol SPA 5165 Espéranto 5161 ...

Страница 68: ...asser en mode VCR Vérifier si le témoin VCR OUTPUT vert est allumé Puis régler à la position TÉLÉVISEUR TV en appuyant sur la touche VCR TV La vidéo ou la couleur apparaît ou Une cassette sous copyright ne peut pas être copiée C est la protection contre la copie disparaît graduellement pendant qui opère la copie d une cassette vidéo Retrait de la cassette Vérifier si le lecteur de DVD MAGNÉTOSCOPE...

Страница 69: ...r des disques portant les logos suivants Disques audio numériques optiques Manipuler les disques de façon à ne pas laisser de marques de doigts ou de poussière sur la surface des disques Toujours ranger les disques dans leur coffret pro tecteur lorsqu ils ne sont pas utilisés NETTOYAGE AUTOMATIQUE DES TÊTES Nettoie automatiquement les têtes vidéo à l insertion ou au retrait d une cassette pour per...

Страница 70: ...entation 120 V CA 10 60 Hz 0 5 Consommation 24 W veille 7 0 W Température de fonctionnement 41 F 5 C à 104 F 40 C Dimensions L 435 mm 17 1 8 H 99 mm 3 15 16 P 218 mm 8 9 16 Poids 3 7 kg 8 16 livres La conception et les données techniques peuvent être sujettes à des modifications sans préavis En cas de différence entre les langues la langue implicite sera l anglais ...

Страница 71: ... 35 FR 1L25 MEMO ...

Страница 72: ...es de réception de signal causés par une antenne extérieure des systèmes câblés ou des interférences Une incompatibilité due au changement du système de diffusion TV CATV après la vente du produit CET APPAREIL PEUT ETRE REPARE ET OU REMPLACE PAR LE SERVICE WAL MART Canada NOTE Cette garantie est nulle si le produit est CETTE GARANTIE N EST PAS TRANSFERABLE ET S APPLIQUE UNIQUEMENT A L ACHETEUR D O...

Отзывы: