


16
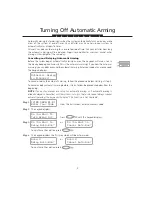
6.2 Erase Code ______________________________________________________________________
Erase Code?
: If you select this function, the keypad displays:
Press (YES) to
Erase code...
To confirm, press
.
The system erases the 4- or 6-digit code. The system keeps the rest of the user's
programming in memory.
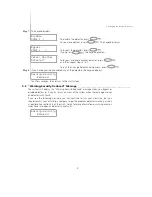
6.3 Edit User Name __________________________________________________________________
Edit User Name?
: If you select this function, you can change the label for the user
(e.g. you can change "User 2" to "Jane Smith". The user name label is displayed on the
keypad when you are editing access codes, or when you are reviewing the event log. You
will also be able to search for a user with the user name label. The keypad displays:
Program Name *
User 2
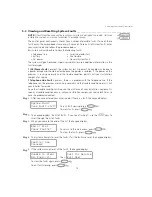
Enter the new user name using the number keys in the following manner:
Pressing number keys 1 - 9 will enter the letters of the alphabet (in upper-case letters).
Each key can enter 3 different letters and a number, depending on the number of times
you press it. The diagram on the right shows the number keys that will enter each letter.
Example:
To enter “A”, press [1] one time
To enter “B”, press [1] two times
To enter “C”, press [1] three times
To enter "1", press [1] four times
When you have entered the letter you want, press
to move the cursor to the next
space.
To enter a blank space, press [0].
To move the cursor back a space, press
.
To erase a character, use the
keys to move the cursor under the character, then
press the [0] key.
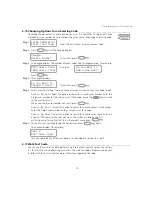
If you press the
key, the system provides additional label-entry options. Use the yes
and no keys to select the option you want.
The available options are:
•
Clear Display?
:
To erase the entire label, press
.
•
Clear to End?
:
To erase the label from the character where the cursor was
located to the end of the display, press
.
•
Change Case?
: To change the case of the letters you enter, press
.
•
Enter ASCII?
:
To enter uncommon characters, press
.
Use the
keys to scroll through the available characters. Each character will
be displayed along with the corresponding 3-digit ASCII number. If you know the
character’s 3-digit number, you can enter it. To enter the character into the label,
press
. See Appendix A at the back of this manual for a list of the
available ASCII characters.