background image

8

7

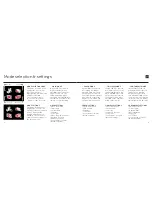
Mode selection & settings

  VIDEO MODE

(Green LED) The camera 
will record video when 
ACTION is pressed on the 
camera or remote. The 
LED will flash red while 
recording. Press ACTION on 
the camera, or STOP on the 
remote, to end recording.

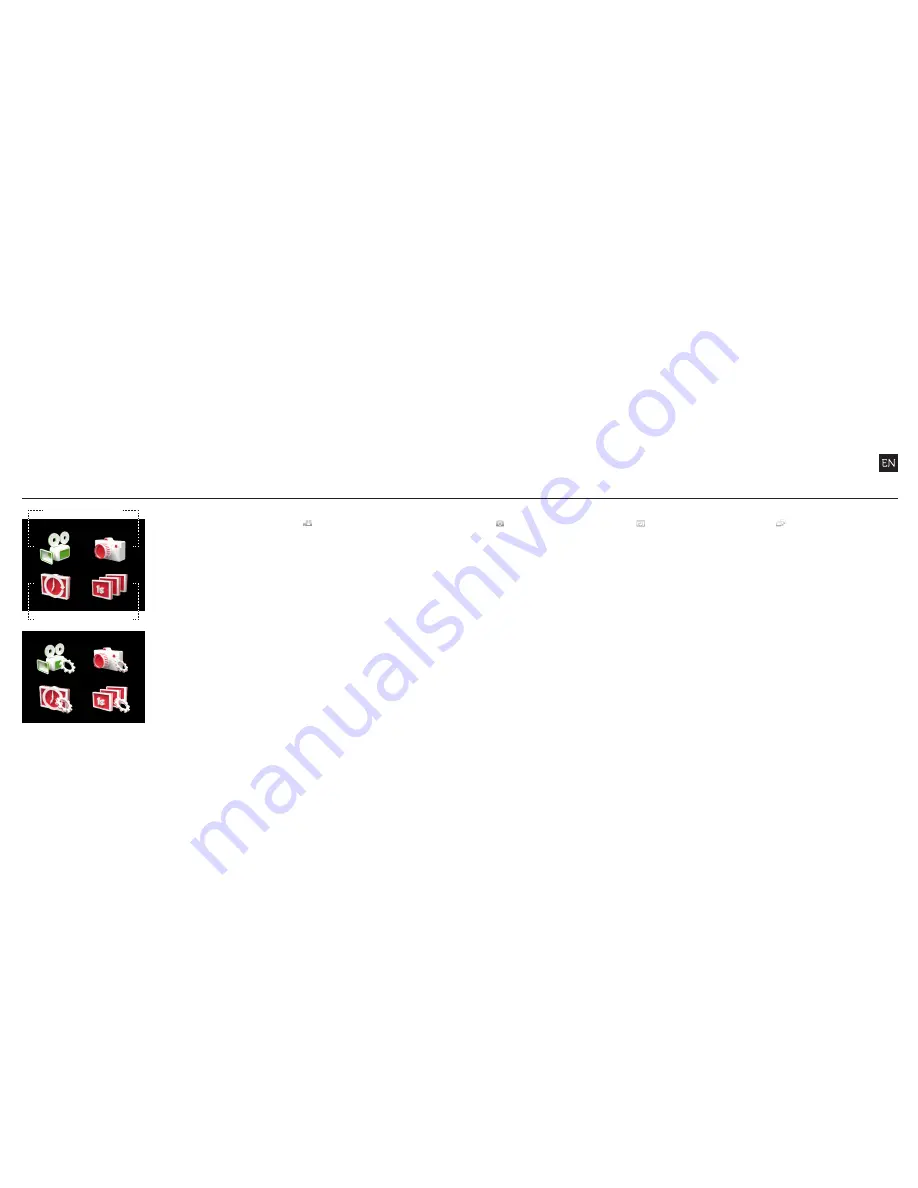
MODE SELECTION MENU

The Mode Selection menu 
displays the icons for the 
four camera modes. 
Highlight the desired mode 
and press ACTION. 
The screen will return 
to Live Preview and the 
camera is ready to record.

  TIMELAPSE MODE

(Purple LED) The camera 
will capture a series of still 
images at a specified rate 
when ACTION is pressed 
on the camera or remote. 
To stop recording, press 
ACTION on the camera or 
STOP on the remote.

  PHOTO MODE

(Yellow LED) The camera 
will capture still images 
when ACTION is pressed 
on the camera or remote. 
The LED will blink red every 
time a photo is taken (this 
applies for Timelapse and 
Photoburst modes also).

  PHOTOBURST MODE

(Cyan LED) The camera 
will capture a burst of still 
images for an allotted 
duration, at a specified 
rate, when ACTION on the 
camera or remote is pressed 
(for best results, use a Class 
10 or higher micro SD card).

MODE SETTINGS

The Mode Settings menu 
displays the icons for the 
settings of the four camera 
modes. Highlight the 
desired mode and press 
ACTION. The screen will 
show the list of settings for 
the chosen mode.

VIDEO SETTINGS

• Video Resolution
• Frame Rate
• Field of View
• Exposure
• Self-Timer
• Video Tagging (

see p12

)

• Car DVR (

see p11

)

• Bit Rate

 (see p11)

• Scene Mode (

see p12

• Default Settings

PHOTO SETTINGS

• Photo Resolution
• Field of View


• Exposure
• Self-Timer
• Scene Mode (

see p12

)

• Default Settings

TIMELAPSE SETTINGS

• Photo Resolution
• Field of View
• Exposure
• Sequence Interval
• Self-Timer
• Scene Mode (

see p12

)

• Default Settings

PHOTOBURST SETTINGS

• Photo Resolution
• Field of View
• Capture Rate
• Burst Duration
• Exposure
• Self-Timer
• Scene Mode (

see p12

)

• Default Settings

Video

Timelapse

Photo

Photoburst

Содержание GHOST-S

Страница 1: ...quick guide follow us facebook com driftinnovation vimeo com driftinnovation instagram com drift_innovation twitter com driftinnovation driftinnovation com ...

Страница 2: ...ecting the camera 15 16 specifications 17 18 disclosures 19 20 Thank you for purchasing the Drift Ghost S CUSTOMER SUPPORT Check our official website for firmware updates customer support news about our products and videos from our users If you have any suggestions comments or concerns please contact our customer support team at support driftinnovation com WARRANTY To obtain our warranty service r...

Страница 3: ... Card Slot Battery Slot Cover A D C B E F G H I J K L 1 Unscrew and remove the rear hatch 2 Insert a Class 10 or higher Micro SD HC XC card up to 64GB Format before first usage 3 Lift the hinged battery slot cover and insert the battery as shown below 4 Connect the camera via mini USB cable to a powered USB port and charge the battery for 4 hours before first use 5 Charge the remote via mini USB c...

Страница 4: ...otos 4 The current camera mode is indicated by the icon in the top left of the display and by the LED indicator for details see p7 8 5 To power off press and hold the ACTION button for 3s MAIN MENU Press the MENU button to enter the Main Menu The screen will display the icons of the four menu options Use the LEFT RIGHT buttons to highlight menu options press the ACTION button to select an option M...

Страница 5: ...imelapse and Photoburst modes also PHOTOBURST MODE Cyan LED The camera will capture a burst of still images for an allotted duration at a specified rate when ACTION on the camera or remote is pressed for best results use a Class 10 or higher micro SD card MODE SETTINGS The Mode Settings menu displays the icons for the settings of the four camera modes Highlight the desired mode and press ACTION Th...

Страница 6: ... Remote Pairing ONE ONE ONE ALL Remote LED ON OFF Camera LED ON OFF Digital Zoom ON OFF Camera Off OFF 1MIN 2MIN 5MIN HDMI Out Resolution AUTO 1080p 1080i 720p HDMI frame Rate 60 50 30 25 Date YEAR MONTH DAY Date Timestamp ON OFF Language list of languages Save Settings A B C Load Settings A B C Reset Settings YES NO Format Memory Card YES NO Firmware Version CURRENT VERSION Mounting the camera 1 ...

Страница 7: ...en cameras if one camera starts recording all synced cameras will record this feature is perfect for capturing multiple angles See Full Manual online for how to use found at www driftinnovation com MODE INDICATOR The Drift Ghost S features our multi coloured active statusTM indicator light system There are LED indicators positioned on both the two way remote control and the front face of the camer...

Страница 8: ...see p12 Pressing STOP will end recording The LED will blink blue to confirm a signal between camera and remote Pressing STOP while the camera is in Live Preview will toggle between camera modes indicated by LED Using the two way remote A B The Remote is NOT waterproof C C HD GHOST WATERPROOF CASE DRIFT TIME LAPSE The Drift HD Ghost waterproof case is perfectly suited for all aquatic activities The...

Страница 9: ...ce Update coming soon for full Ghost S compatibility check website for up to date details CONNECTING TO A PC 1 Connect the camera using the USB cable provided the camera screen will show a USB icon 2 The camera s folder may open automatically if not open using My Computer 3 The camera should be recognised as a removable disk double click to open 4 Open the DCIM folder to access your files CONNECTI...

Страница 10: ...our TFT LCD Screen Cover Corning Gorilla Glass Waterproof 3m 9 84ft Microphone Built in noise reducing microphone Memory capacity Micro SD SDHC SDXC memory cards up to 64GB Inputs 3 5mm external microphone extension included Outputs HDMI connector type C cable not included Connectivity USB Plug and Play mini B USB connector Compatibility Windows Vista or Windows 7 and up Mac OS X 10 5 and up Remot...

Страница 11: ... and the receiver Connect the equipment into an outlet on a circuit different from that which the receiver is connected Consult the dealer or an experienced radio TV technician for help This device complies with Industry Canada license exempt RSS standard s Operation is subject to the following two conditions 1 this device may not cause interference and 2 this device must accept any interference i...

Отзывы: