


Vigor2132 Series Quick Start Guide
25
S
S
t
t
a
a
t
t
i
i
c
c
I
I
P
P
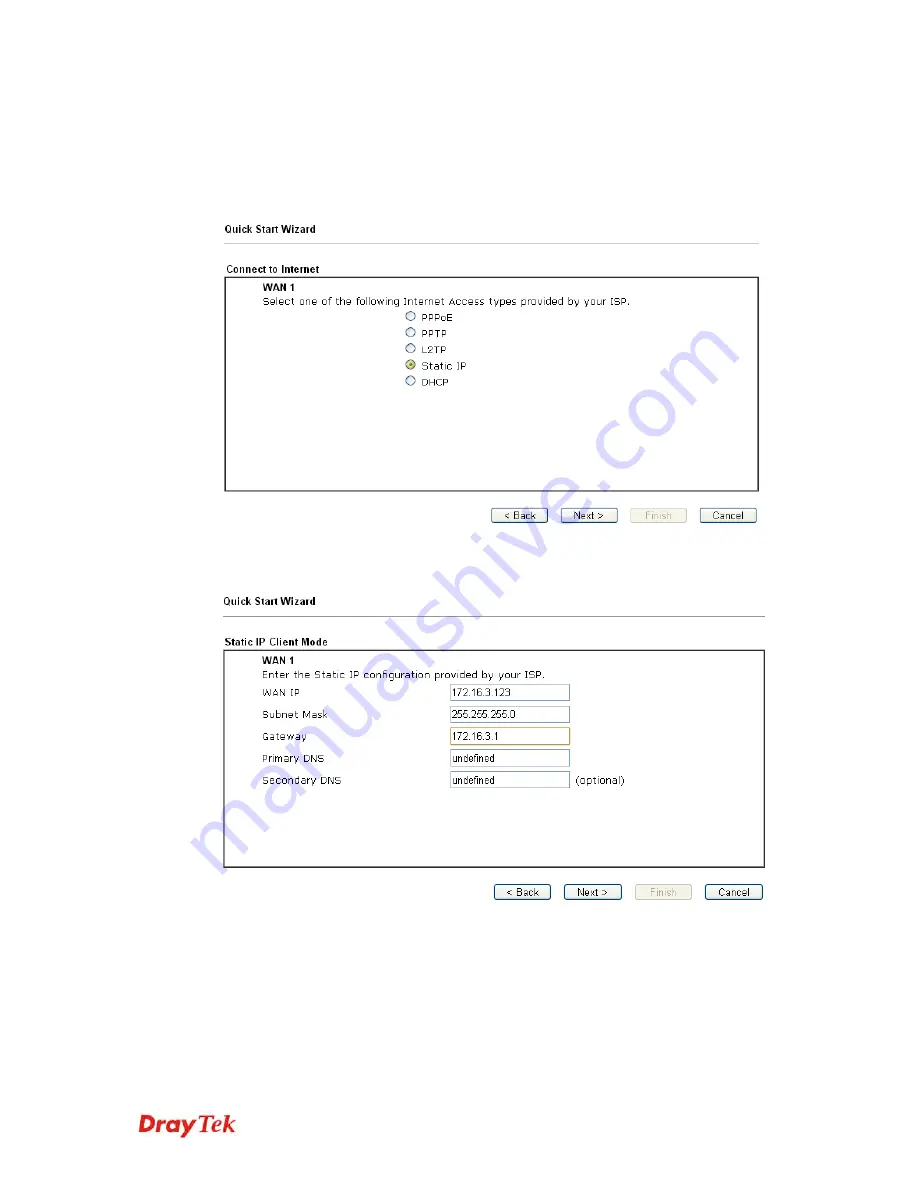
1.
After finished the password settings, click the
Next
button. The
following page will be open for you to specify Internet Access Type.
Click
Static IP
as the Internet Access Type and click
Next
.
2.
Please type in the IP address information originally provided by your
ISP. Then click
Next
for next step.
Содержание Vigor 2132 Series
Страница 1: ...Vigor2132 Series Quick Start Guide i...
Страница 2: ...Vigor2132 Series Quick Start Guide ii...
Страница 6: ...Vigor2132 Series Quick Start Guide iv...
Страница 8: ...Vigor2132 Series Quick Start Guide vi...
Страница 26: ...Vigor2132 Series Quick Start Guide 18 This page is left blank...


