


Section 1 -
Site Preparation
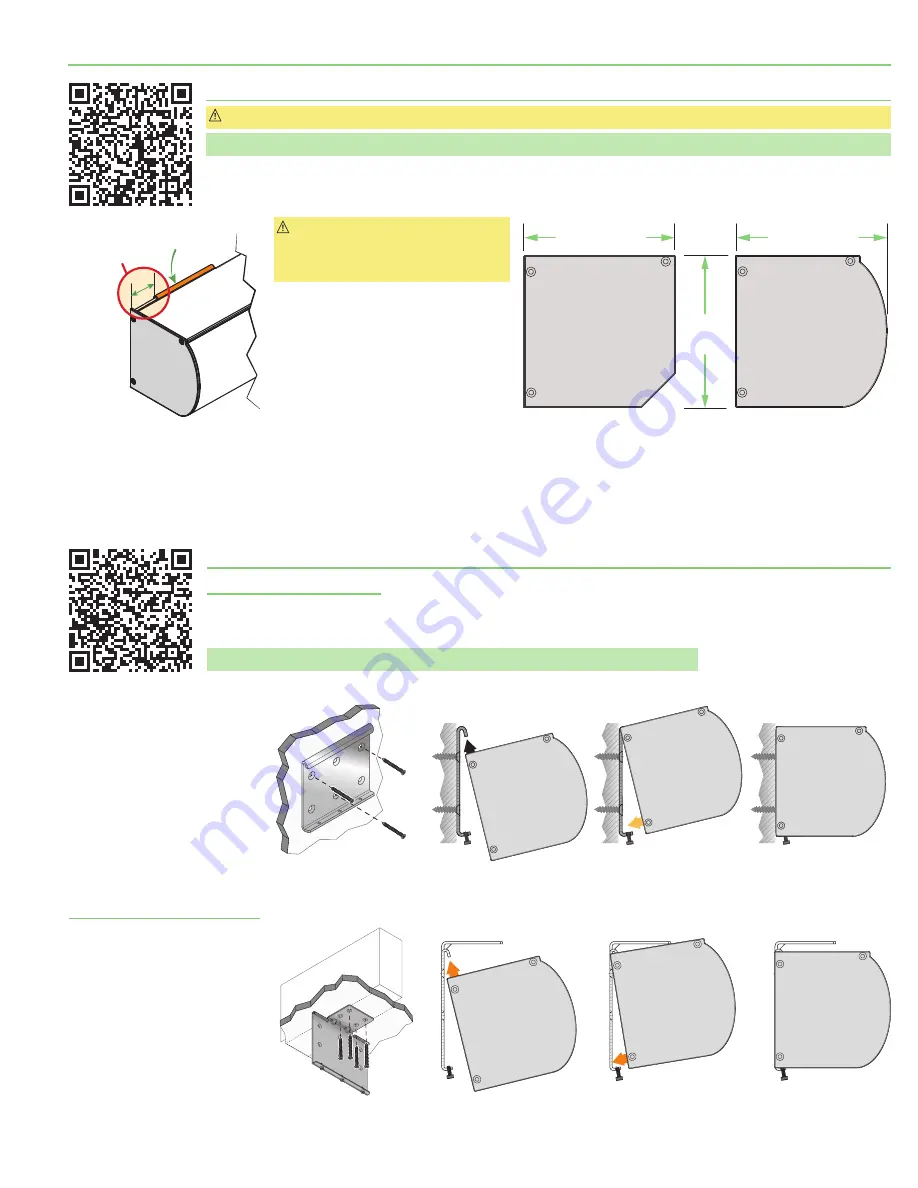
Caution:
Before mounting shades, verify measurements on label provided with shade, and ensure unit is installed at correct width.
Please Note:
Installer is responsible for selecting mounting hardware appropriate for site conditions.
1.
Ensure mounting surface is strong enough to hold unit.
2.
Verify unit measurements, ensuring it will fit
in the desired location.
Section 2 -
Mounting Headbox with Brackets
Section 2.1 - Wall Installation
1.
Drill small starter holes
(if necessary)
in mounting surface.
2.
Attach Mounting Brackets to the wall using #10 flat head screws installed flush with bracket.
Please Note:
Be sure to use AT LEAST 2 of the top mounting holes
(Fig. 3-A)
.
Section 2.2 - Ceiling Installation
3.
Ensure brackets are level and
aligned.
4.
Attach Headbox to brackets and
tighten Set Screws
(Fig. 3-A)
.
5.
Mount the Side Channels
(Section 3)
.
1.
Attach Mounting Brackets
to ceiling using #10 flat head
screws installed flush with
bracket. USE ALL FOUR
(4)
mounting holes
(Fig. 3-B)
.
2.
Attach Headbox to brackets
and tighten Set Screws
(Fig. 3-B)
.
3.
Mount the Side Channels
(Section 3)
.
Caution:
Hem Bar does
not
retract into
the Headbox. Provide at least 2
1/4
"
(57mm)
clearance if mounting over a swinging
window or door.
3.
Mounting Brackets MUST be installed with
a gap of 1
3/4
"
(44mm)
between the Endcap
and the Mounting Bracket edge
(Fig. 1)
.
Mark wall, jamb, or ceiling.
4.
Determine which Headbox style is being
used
(Fig. 2)
.
ENDC
AP
MOUNTING
BRACKET
1
"
(44 mm)
Figure 1
5"
(127mm)
5"
(127mm)
5"
(127mm)
Curved
Headbox
Angled
Headbox
Figure 2
HEADBOX STYLES
OVE
RHE
AD
STR
UCT
URE
1
2
4
3
Tighten Set Screws
Figure 3-B
Figure 3-A
1
2
4
3
Tighten Set Screws
page 3 of 11
FlexShade
®
ZIP XL


