background image

www.drtrustusa.com

www.drtrustusa.com

10

11

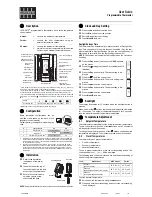
10. REPLACEMENT OF BATTERIES

      constant use.

·

     The battery life is approx. 3000 readings one year and 90 minutes when in

·

     Open the battery cover and remove the old battery.

·

     Put in new battery and take care of the direction of the electrodes.

Cau on

1. When not used for 1 month, please take out the battery to prevent

2. According to local regulations, properly handle the waste batteries to
    avoid pollution.

    leakage. It is forbidden to put waste battery in the  re.

 
11. CLEANING AND MAINTENANCE

Please keep the inner cavity of the sensors and probes clean, otherwise it 
may affect the measurement accuracy. 

Cleaning Methods

     with a little medical alcohol or water to wipe the dirt. 

·

    The device only needs routine cleaning, and period or times can be

     decided according to user’s need.

·

    For surface cleaning, use a clean soft cloth or cotton swab stick moistened

·

    For probe and sensor inner cavity cleaning, use clean soft cloth dipped

     with a little medical alcohol to gently wipe the probe at the top of the
     inner cavity or sensors, and do not use until the alcohol completely

     our customer support for further queries. 

     evaporates. 

·

    No Special maintenance in needed to the use process. Please contact to

Monitor Disinfection

·

    Switch off the monitor and disconnect it from the power line.

     disinfectant solution.

·

    Wipe the display screen using a soft, clean cloth dampened with the

·

    Wipe the exterior surface of the equipment using a soft cloth dampened

     with the disinfectant solution.

·

    Wipe off the disinfectant solution with a dry cloth after disinfection if

     necessary

·

    Dry the monitor for at least 30 minutes in a ventilated and cool place.

Warning

·

    Please keep the inner cavity of the sensors and probes clean, otherwise it

     will affect the measuring accuracy.

·

    If you spill liquid on the probe sensor or LCD, or they are accidentally

     immersed in liquid, contact your service personnel or service engineer.

·

   Use a soft, dry cloth to clean the thermometer body and LCD display.

    and disconnected from the power line.

·

   Before cleaning or disinfection make sure that the device is switched off

    or any other liquid.

·

   After cleaning with isopropyl alcohol, allow the thermometer to air dry. 

·

   Do not use abrasive cleaners. Never submerge this thermometer in water

12. TROUBLESHOOTING

Table 4

Содержание 606

Страница 1: ...customers with the latest medical inventions with an objective to promote good health and wellness all around the world All the medical devices and health monitors provided by Dr Trust are supported by accurate latest and ground breaking technologies innovated at our headquarters in NY USA All our products adhere to the most stringent CE and FDA guidelines and are strongly recommended by doctors a...

Страница 2: ... is intended for the measurement of human body temperature by using the infrared energy emitted from the forehead and eardrum It ensures the safety of users with high level of speed and accuracy The thermometer can also be used to measure the temperature of objects by detecting and measuring the emitted radiations The device is designed to be usedforhomehealthcare medicalinstitutesandmanyotherocca...

Страница 3: ...n per wavelength are closely associated with its surface temperature This thermometer measures the Infrared radiations emitted by the body or object and facilitate the temperature measurement 3 PRODUCT KEY FEATURES Forehead ear temperature dual modes of measurement Dual temperature units C and F optional Capacity of storing 32 sets measurements Contact type infrared thermometer Clear and softy LCD...

Страница 4: ...ture unit setting When power off press the memory key for 5s until the C or F display Press thememorykeyonemoretimetochangeintoanotherunit Note The default temperature unit is C The setting will come back to the default when uninstall the battery B Memory Mode When power off press the Memory key to check the latest 32 sets of measured values in the selected mode in order 1 2 3 and so on Note The rec...

Страница 5: ...e screen screen show all symbols with the object temperature mode on the left Point the thermometer to the object keep the probe 3 5mm to the object Press the measuring key to measure directly when the buzzer beeps the temperature will display on the screen Note Make sure that the cover of mode conversion is taken off and converted to the Ear and the object mode Cau on All operation should do when ...

Страница 6: ...vity or sensors and do not use until the alcohol completely our customer support for further queries evaporates No Special maintenance in needed to the use process Please contact to Monitor Disinfection Switch off the monitor and disconnect it from the power line disinfectant solution Wipe the display screen using a soft clean cloth dampened with the Wipe the exterior surface of the equipment using...

Страница 7: ...work that supplies buildingsusedfordomesticpurposes Table 6 The Dr Trust Instascan Forehead Ear Thermometer 606 is intended for use in the electromagnetic environment speci ed below The customer or the user of the Dr Trust Instascan Forehead Ear Thermometer 606 should assure that it is used in such an environment Mains power quality should be that of a typical commercial or hospital environment If...

Страница 8: ...uld be considered If the measured eld strength in the location in which the Dr Trust Instascan Forehead Ear Thermometer 606 is used exceeds the applicable RF compliance level above the Dr Trust Instascan Forehead Ear Thermometer 606 should be observed to verify normal operation If abnormal performance is observed additional measures may be necessary such as reorienting or relocating the Dr Trust I...

Страница 9: ...er direct sunlight Where there are high salt concentrations in the air 15 MEASUREMENT NOTES Always hold the thermometer by its handle temperature is to be measured going from ambient temperatures to a much higher or lower temperature Keep in mind that it will take up to 30 minutes for the sensor to stabilize if Point the thermometer toward the targeted area or object whose This is not recommended ...

Отзывы: