background image

T

RITON

 S

YSTEMS

3

E

LECTRONIC

 L

OCK

 I

NSTALLATION

M

ODEL

 9100 C

ASH

 D

ISPENSER

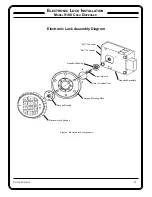
Electronic Lock Assembly Diagram

Electronic Lock Keypad

Keypad Bushing

Brass Spindle

Keypad Mounting Plate

Deadbolt Bushing

Deadbolt Assembly

“ENT” Connector

“BAT” Connector

Hole in Cabinet Door.

Figure 3. Electronic lock components.

Содержание Triton 9100

Страница 1: ...rieval system or translated into any human or computer language in any form by any means whatsoever without the express written permission of Triton Systems DOVER and the DOVER logo are registered trademarks of Delaware Capital Formation Inc a wholly owned subsidiary of Dover Corporation CORPORATE HEADQUARTERS RMA RETURN MATERIAL AUTHORIZATION RETURN ADDRESS 522 E Railroad Street 21405 B Street Lo...

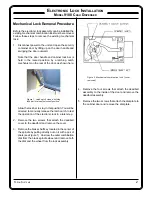
Страница 2: ...will be directed to manually release the latch catch to test the operation of the electronic lock in a later step 2 Remove the two screws that attach the deadbolt cover to the deadbolt and remove the cover 3 Remove the brass shaft key located in the center of the spindle by pulling directly out on it with a pair of pliers see Figure 1 Unscrew the outer combination dial from the black spindle wheel...

Страница 3: ...DEL 9100 CASH DISPENSER Electronic Lock Assembly Diagram Electronic Lock Keypad Keypad Bushing Brass Spindle Keypad Mounting Plate Deadbolt Bushing Deadbolt Assembly ENT Connector BAT Connector Hole in Cabinet Door Figure 3 Electronic lock components ...

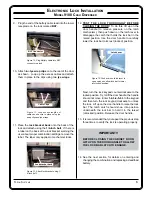
Страница 4: ...th the mounting slots in the back of the keypad 4 Align the large holes in the keypad mounting slots with the heads of the shoulder screws Place the keypad on the shoulder screws and turn it about 10 degrees clockwise to lock it onto the mounting plate The keypad should turn freely IMPORTANT If the keypad DOES NOT turn freeIy remove the keypad back the shoulder screws out 1 4 turn replace the keyp...

Страница 5: ...he brass spindle so that it falls into the square cutout located on the back of the lock Once aligned the lock should sit flush with the mounting plate Install the three mounting screws to hold the lock in place Plug the keypad cable into the top connector labeled ENT located on the lock 8 Peel off the adhesive backing on the battery box and attach it to the inside of the door NOTE For better adhe...

Страница 6: ...tion Next turn the lock keypad counterclockwise to the locked position Try to lift the door handle the handle should not move Enter 1 2 3 4 5 6 into the keypad and then turn the lock keypad clockwise to unlock the lock Lift up on the door handle to raise the lock bar The latch catch should snap into position underneath the lock bar to hold it in the raised unlocked position Release the door handle...

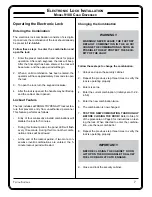
Страница 7: ...es During this lockout period the panel LED will flash every 10 seconds During this time no other combi nation entries will be allowed At the end of the lockout period if two more con secutive invalid combinations are entered the 5 minute lockout period will restart Changing the Combination Follow these steps to change the combination 1 Unlock and open the security cabinet 2 Repeat the previous st...

Страница 8: ...nnect a 9 volt battery across the external terminals with the negative terminal of the battery facing up Continue to hold the battery against the terminals as you enter the combination and open the lock Follow these steps to replace a battery 1 Unlock and open the ATM vault door 2 Pull gently on the front cover of the battery box and slide the cover off 3 Remove the old battery Install a new batte...

Отзывы: