B
C
14
Step 9
R
R
R
Z
Z
N
N
Q
Q
N
Q
Z
R
S
X 4
9.1
9.2
S
S
9.1
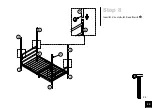
Insert
N
X 2 into
Q
X 2 and secure with
;
9.2
Place subassembly
N/Q
X 2 and part
Z
X 2 sequentially at each corner. Align holes
of all parts and secure them by screwing
S
X 4 into
R
as illustrated.
Two People needed for this step!
R
S
Q
6
6
Содержание 4120219WE
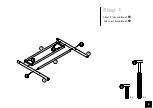
Страница 6: ...6 Step 1 Attach T to A and B with Attach J to A and B with X 2 A B T J 1 1 X 4 1 3 3 3 ...
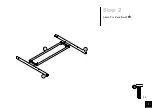
Страница 7: ...7 Step 2 Attach T to C and D with X 4 C D T 3 ...
Страница 8: ...8 Step 3 Insert F X 2 into E X 2 with X 4 F E F E Holes on the top side E F 5 ...
Страница 9: ...9 Step 4 Attach G to E X 2 with X 4 F F E E G F E G 3 ...
Страница 10: ...10 Step 5 Attach M X 2 to G with X 4 G M M G M 3 ...
Страница 11: ...11 Step 6 Attach sub assembly E F from previous step to A B C and D with X 8 E E F F A B C D F A 4 ...
Страница 13: ...13 Step 8 A B C D R R B R X 4 2 2 R R Insert R X 4 onto A B C and D with ...


